In multi -storey and private construction, it is impossible to do without floor slabs, ...
|
|
In each room, the floor is more subjected to mechanical influences ... |
Among the familiar heater so far, so conveniently so convenient in ... |
Water floor screed device
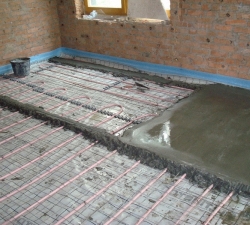
The choice of water flooring is one of the economical options for heating the room, which has a lot of advantages. But for the installation of a water warm floor, except for calculations and the choice of materials, a very important process is followed - this is a screed device and the correct choice of the composition. In this article, we will consider the main types of screeds and instructions for the installation of screed on a water warm floor.
Table of contents:
- The purpose of the water floor screed
- Water warm floor screeds
- The device of the screed of a warm water floor made of concrete
- Water warm floors under the screed. Additional installation tips
- Dry screed for a warm water floor
- Warm water floors without screed
- Wooden warm water floor screed
The purpose of the water floor screed
Water floor screed functions:
- surface alignment;
- preparatory element before installing the flooring;
- temperature distribution on the floor surface;
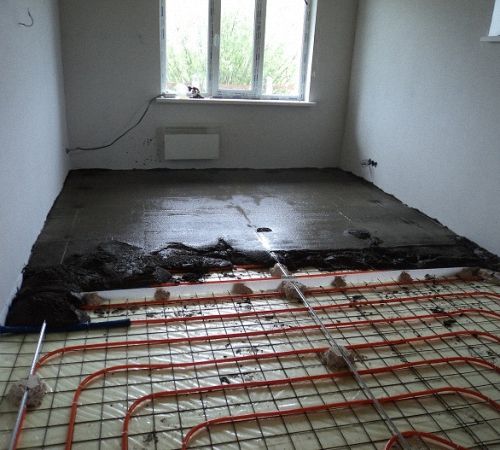
- heating of the room;
- pipe fixation;
- adoption of all loads in the room;
- Elimination of cracks, swellings and other surface deformations.
Water warm floor screeds
Consider the varieties of screeds for a water warm floor:
1. The classic version is a concrete screed that has a number of advantages:
- excellent thermal insulation properties;
- Smooth surface;
- uniform heat distribution;
- Exposure of large loads.

2. Landing screed - suitable for rooms with low ceilings, which do not allow you to pick up an additional height of the walls during the installation of a concrete screed.
3. The device of water warm floor using polystyrene plates is an excellent option for an even floor.
4. Wooden screed - installed in wooden houses. It has good thermal conductive properties.
The device of the screed of a warm water floor made of concrete
Work tools:
- water level,
- drill,
- Mixer nozzle for a drill,
- regulations,
- buckets for the solution,
- spatula,
- Lench roller,
- Lighthouses.
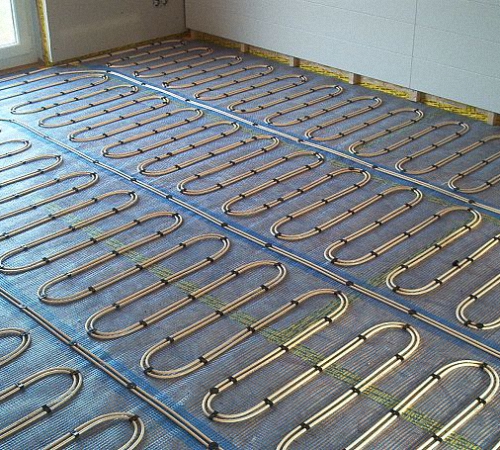
Materials for the device of concrete screed:
- Cement brand 300 or 350,
- sand or crushed stone,
- Styrofoam,
- primer,
- Reinforcement with a section of 4 mm,
- Dampfer tape.
Instructions for the manufacture of water warm floor and screed under a water warm floor:
1. Before laying the pipes, it is necessary to lay the thermal insulation material, for example, polystyrene or foamlex, to avoid additional heat loss.
2. Along the wall, glue the damper tape for thermal insulation.
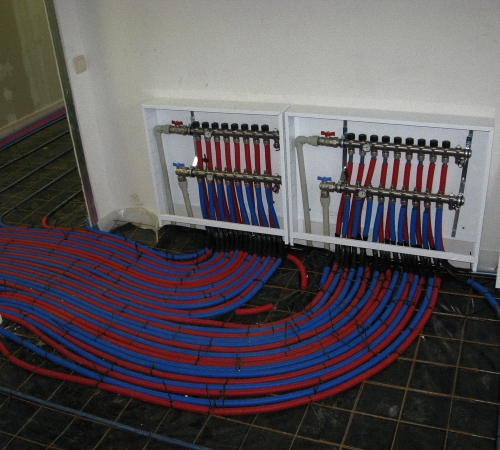
3. We lay a reinforcing mesh that reliably fixes the pipes.
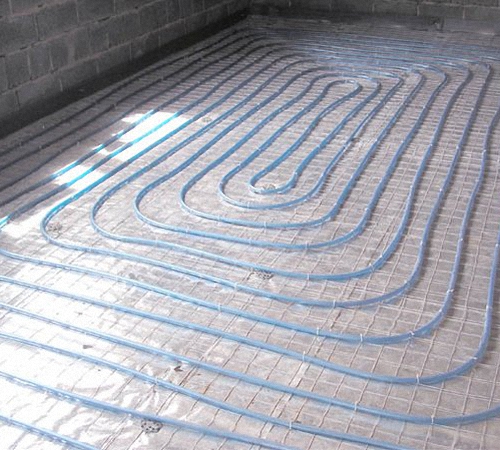
4. Pipes are laid out evenly, in the form of a spiral or snakes. The distance between the pipes is 12-36 cm. The distance between the wall and the pipes is not more than 5 cm.
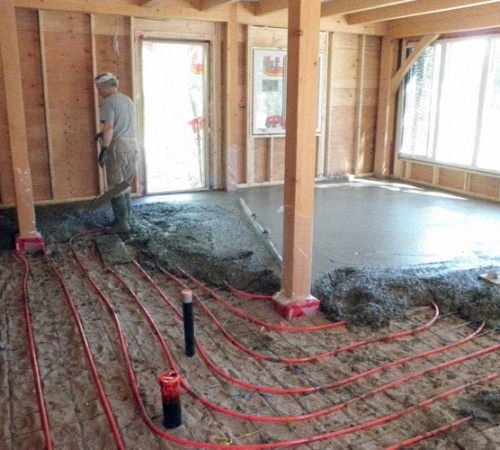
5. With the help of clamps, pipes are attached. The distance between the fasteners is 90-100 cm.
Tip: Do not tighten the clamps very much, since when heated the pipe expand.
6. After laying pipes and checking the floor, laying the screed should be laid.
7. For the preparation of the solution, cement and sand are used. Proportions 1: 3. It is possible to use crushed stone fraction of 5-20 cement brand should be at least 300.
8. Also, ready -made mixtures for a warm floor are used as a solution. Such a solution is more convenient, does not require additional calculation of the number of ingredients.
9. When drying, the solution expands, thereby forming cracks. To avoid this problem, it is recommended to use plasticizers that are applied to hard -to -reach areas.
10. For better alignment of screed, self -leveling mixtures are used, which simplify the final alignment process.
11. The thickness of the screed above the pipe is at least 30-45 mm. On the warm water floor, the thickness of the screed is 60-70 mm. If self-leveling mixtures are used in the screed device, then the thickness of the warm floor is 45-50 mm. You should not save on the thickness of the screed, since the main function of the screed is the adoption of all loads in the room.
12. Before pouring the screed, the floor surface should be well cleaned of small particles of dust and dirt.
13. Next, the surface is primed, it is better to do it twice.
Tip: To calculate the volume of the concrete screed, it is necessary to multiply the thickness of the screed by the area of \u200b\u200bthe room. For example, for a room with an area of \u200b\u200b80 m with a thickness of a screed of 50 cm, the volume of concrete screed is 400 m.
14. After determining the thickness of the concrete screed, lighthouses are installed and reinforced. Reinforcement is suitable for reinforcement with a section of 3, 4, 5 mm.
15. As an amplifier for screed, they use fiber or polypropylene chips. As a result, we get a fiber concrete screed.
16. Deformation seams are distinguished by a concrete screed for a water warm floor from the usual one. If the area of \u200b\u200bthe room does not exceed 10 m, then the seams are left around the perimeter of the room. A special depreciation strip is laid on the lower section of the wall.
17. If the area of \u200b\u200bthe room is more than 10 m, it is necessary to leave additional seams. This process occurs by laying the T-shaped tape, in places, are provided for seams.
18. For the complete drying of the screed, it takes from two to four weeks. Then the finishing of the finished coating is laid.
Water warm floors under the screed. Additional installation tips
1. Before installing a concrete screed, a mandatory action is a check of the water heat system to exclude water leaks and other defects.
2. Be sure to lay the protective layer of insulation before the device of water pipes. This will help to avoid additional heat loss.
3. When choosing materials for the installation of a concrete screed, it is not recommended to save on a brand of concrete, if all technologies are not observed, it is possible to appear cracks and interruptions in the normal functioning of the entire heating system.
4. The beacons should be exposed smoothly and firmly, because the minimum shift of the lighthouses will provoke violations and irregularities of the concrete screed.
5. To prevent cracks, it is necessary to moisturize the screed for the entire time until completely dry.
Dry screed for a warm water floor
A warm water floor of a dry screed is used if the coating must be made in a short time.
Such a screed has a lot of disadvantages:
- non -adegeful use of heat;
- large heat loss;
- Reduced fire safety.
For a dry screed device, perform a number of actions:
1. Remove the old coating and prepare the surface. Flapping small cracks with concrete. Bend the joints between the floor and the wall.
2. Put a special hem on the floor, which will perform a soundproofing function.
3. Lay a layer of waterproofing film. With insufficient width, the film is laid with overwhelming so that moisture does not fall on the insulation.
Tip: Do not use a dry screed for a warm water floor if the room is on the ground floor. Heat loss in this case will be 5%.
4. Pour sand, pumice, small crushed stone, expanded clay screening on top of waterproofing. The higher the layer, the heat heating.
5. It is possible to use polysteronal insulation, which is more expensive, but more effectively holds heat and does not lend itself to the influence of mice, mold or fungus.
6. Place the polysteronal insulation in several layers to ensure reliable thermal insulation.
7. Using the rule, align the coating. Warm floors water thickness of the screed is 60-80 mm.
8. Install special aluminum plates for pipes. The main function of the plates is the distribution of heat by floor area.
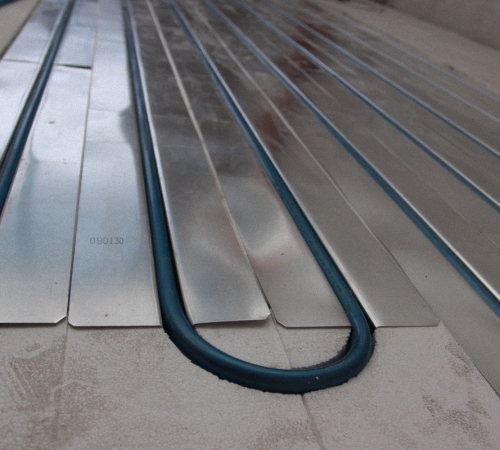
9. In the plates, make the recesses for pipes.
10. Once again, check with the rule the evenness of the coating.
11. Install the pipes.
12. Put the porous tape on top of the pipes, the main function of which is a decrease in sound from the shock load.
13. Cross the floor with drywall or plywood. When covering the floor, the seams are placed by overwhelming.
14. To fasten the joints, use screws with a step of 50 mm for drywall and 150 mm for plywood.
15. Next, try warming the floor, then lay the substrate and laminate.
Tip: laminating coating does not take out a large temperature difference. It is necessary to warm the warm floor every day. The maximum heating temperature is 25-27c.
Warm water floors without screed
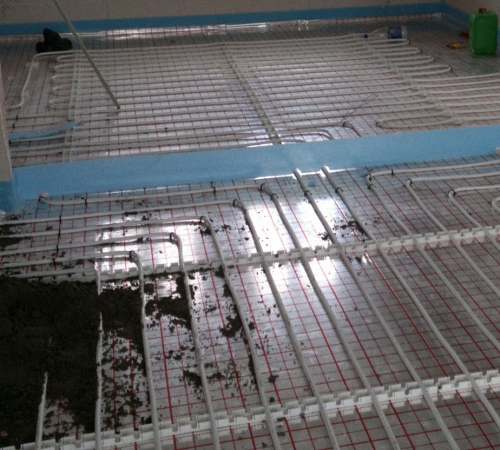
For a water floor, a polystyrene system is used without a screed. Such a system is effective only if the flooring is perfectly flat. Legs of not more than 3 mm per 1 m are allowed. Pipes in such a system are laid on the plates. The thickness of the plate is 3 cm, width 30 cm, length 100 cm. The plates have special grooves in which the pipes are placed.
Advantages of installing a polystyrene system of a warm floor:
- The ideal option for rooms with low ceilings, the thickness of the screed does not exceed 12 cm;
- No need to wait until the screed dries;
- The polystyrene system is very light compared to concrete.
Polystyrene system device:
1. Previously calculate the size of a step of laying polystyrene plates.
2. The plates are laid on a flat coating. The permissible differences are 2 mm per 1 m.
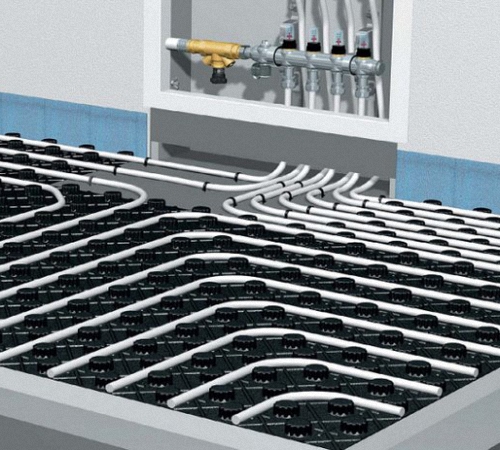
Tip: If the differences exceed the permissible norm, it is better to make a concrete screed or a finish coating.
3. After leveling, the floor must be cleaned of debris and dust.
4. A waterproofing film or other vapor barrier is laid on the floor.
5. The damping tape is laid between the floor and the wall.
6. The plates are laid on the floor with a mosaic way, in accordance with the laying plan.
7. The styling step depends on many factors, such as the number of floors, the type of building, the presence of windows. The average step width is 20, 30 cm, near the windows - 15 cm.
8. Pipes are laid in the grooves of the plates.
Tip: checking the thermal properties of the thermal water floor is carried out within one day, not less.
9. After checking, the surface is covered with foamed polystyrene.
10. The next stage is the installation of gypsum moisture -resistant plates, the minimum thickness of which is 10 mm. Such plates are joined by each other during laying. If a further coating is ceramic tiles, the joints between the plates do not require putty, but putting the joints for laying linoleum - a mandatory process.
Wooden warm water floor screed
In wooden houses, a wooden system of laying a warm water floor is most often used. There are two options for the flooring of such a system:
- river,
- modular.
The river flooring is made from individual planks made of chipboard. A pipeline and reflecting plates are inserted between the strips.
The modular flooring has great efficiency, since it is assembled from ready -made parts in which the placement of the pipeline is in advance.
For a wooden warm floor, perform a number of actions:
1. Lay the lags with a distance of 60 cm. Attach the lags using galvanized supports.
2. Lay the boards under the lags to create a black floor. Put the waterproofing film on the floor, and then thermal insulation. As a heat insulator, it is recommended to use a mineral plate with a basalt base.
3. The next layer is chipboard or a regular board 4 cm thick, which are laid in stripes. The distance between the stripes is 5-7 cm.
4. To reflect heat, galvanized iron or aluminum plates are used, which are laid in the gaps between the stripes.
5. Metal -plastic pipes are laid in grooves.
6. Check the correctness of laying the pipes and the flatness of the floor.
7. The plywood is laid on this system, and then the finished coating.
Tip: choose a moisture -resistant plywood, the thickness of which is at least 1 cm. Leave the gap between the sheets of plywood, since when heated the tree expands.
8. Before installing the finish coating, the system should be checked.
9. As a finish coating, choose laminate, parquet, tiles or linoleum.

pol Kak DELAT
pol Kak DELAT
s Verxu Prof Nastila Kak
s Verxu Prof Nastila Kak DELAT POL
And what is the aggregate for
And which aggregate for concrete mixture is better to use in this case? As I understand it, the fraction should be small, about 5 mm? Will granite gravel are suitable for this, such as in Lenstroycompleting offer?
Calculation a p. 13 ... guys
Calculation A p. 13 ... guys check yourself !! at 80 sq.m ... Why is the thickness of the screed 50 cm !! ?? And at the same time 400 cubic meters of solution .. funny. When they wrote, is it really not strange yourself ???