Когда планируется капитальный ремонт жилого помещения, без выравнивания пола не...
|
|
An important element of the design of a living or office space is a noble coating ... |
House heating is one of the most important issues to which very ... |
Installing wooden skirting boards with your own hands

It would seem that the baseboard is a very insignificant detail in the interior. Does it need it at all? It is this question that consumers ask themselves who do not know about its true purpose. However, the baseboard performs several useful functions at the same time. It is able to significantly embellish the general type of flooring, protect the space between the wall and the floor from water and the accumulation of garbage and dirt there, hide passing cables and wiring. Let's find out today how to fix a wooden skirting board.
Content:
- The choice of wooden skirting boards
- Sloth installation requirements
- Preparation of a wooden skirting board for installation
- Slowing and conjunction of the plinth
- Fastening of a massive baseboard
- Fastening of an venerable skirting board
- Putty wooden skirting board
- Lacing the surface of the skirting board
1. Choosing wooden skirting boards
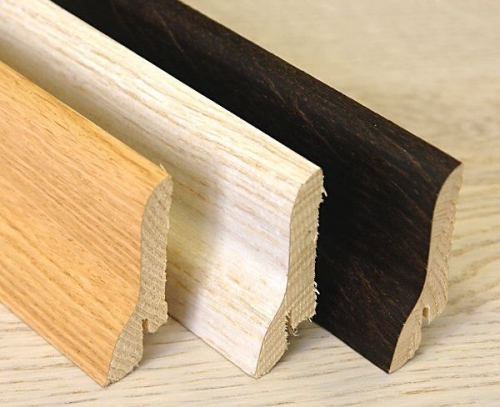
So, you have already chosen the flooring, giving preference to wood. It doesn’t matter whether you will lay parquet or massive board, you still need to install wooden skirting boards. On the market, two varieties of wooden skirting boards are represented by an veneered and massive skirting board. A massive baseboard is most often made from ash, cherries or oak. Its main feature is that it is completely made of wood.
The second option, the skirting board is veneered, is usually made of spruce or pine massif, and then covered with veneer of more valuable and expensive wood with veneer. Therefore, it looks no less noble than massive products. The differences between these two types of skirting boards are exclusively in price: a massive wooden skirting board from an oak will cost you more than a widespread. As for the color scheme, here you are given a huge variety of shades. And you can choose exactly the one that harmonizes with the flooring itself.
The main thing is to choose quality material. If the skirting board is made of poor -quality wet wood, then it will look poorly polished, with numerous sticking fibers, because raw wood cannot be grinded. It is better not to buy such products, because over time they will dry out and deform, which will not add attractiveness to him.
When choosing a wooden skirting board, remember that conifers are resistant to humidity, such as pine, spruce, yew, fir and larch. They are not able to deform when the humidity is changed, and with drying to crack. In addition, wooden skirting boards from pine and other coniferous wood are easily processed and convenient for installation. Soft deciduous rocks (walnuts, linden or cherries) are subjected to the deformation process, and solid deciduous (oak, maple, grab) can crack.
The calculation of the number of wooden skirting boards is made according to the general scheme. To begin with, measure the perimeter of the room in which you will install the skirting board, subtract the length of the doorway from the resulting number, divide the result by the length of one skirting board (as a rule, the standard length of the baseboard is 2.5 meters) and round.
This is the number of products that are needed for installation. Do not forget to take the material in reserve! After you have chosen a wooden skirting board, it must be kept in the room for a day, and only after that it is installed. During this time, the baseboard will get used to the humidity and internal temperature in the room.
2. Requirements for the installation of skirting boards
When installing a wooden floor, for example, a parquet board, gaps must be left around the perimeter of the room. The normative values \u200b\u200bof such gaps are from 10 to 15 millimeters. However, we recommend leaving gaps up to 12 millimeters, since most manufacturers of wooden skirting boards make a thickness of 14 to 18 millimeters with a thickness of 14 to 18 millimeters, and gaps of 15 millimeters often provoke difficulties when installing skirting boards, up to the purchase of thicker plastic products and rejection of wooden.
You should keep in mind that small wooden products have a height of about 55 millimeters, and high wooden skirting boards - 80 millimeters. Accordingly, it is not necessary to make the finish on the lower part of the wall. And before installing the skirting boards, all the wires should be carried out, because wooden skirting boards, unlike their brothers from plastic, are more difficult to remove and fix it again.
3. Preparation of a wooden skirting board for installation
Since natural wood has natural defects - sink and knots, as well as a small scatter of shades, it is recommended to determine in advance which planks and where you will be attached. So it will be possible to choose strips close to each other in color scheme, as well as hide in places where furniture, knots will be located. Or vice versa, you can take out all the natural accents of wood for display, if you plan to achieve this.
Before installing a wooden skirting board, it is necessary to cut out small recesses under the name of the huts, which is necessary to swing hats from self -tapping screws or metal dowel nails. If you do not make the huts, then the hats will go beyond the plane of the baseboard and stick out, interfering with putting their putty. You can make a drill with diameter, which is slightly larger than the diameter of the hat and the same depth.
For noise and thermal insulation of floors to a wooden skirting board, it is recommended to glue pieces of thermal insulation material from below. You can find a similar material in any construction store. For savings, you can use linoleum. According to the standard, not long strips should be glued, but small pieces of 5 centimeters long. Glue the material to the wooden skirting board is not a junction in the joint or overlap, leave air gaps.
Before installing a wooden skirting board, you should stock up on tools such as a hacksaw on wood, a knock, a hacksaw on wood with a thin blade, roulette, a building corner, an electric drill, a screwdriver, a pencil, self -tapping screws, long nails, dowels.
4. Cutting and conjunction of the plinth
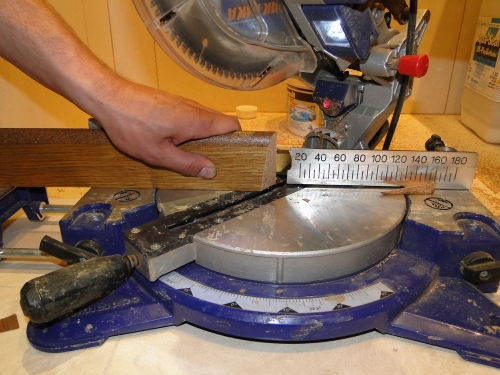
It is more difficult to install a wooden skirting board than a plastic one. The corners are not used with wooden skirting boards, so the process of adjusting skirting boards in the corners becomes much harder. For cutting a wooden skirting board, a knock is required. Before starting work, it should be fixed using installation holes that are available on the bed. You can attach a knock to the construction goat, stool or old table.
Then, with special clamps, a wooden skirting board from the beech is pressed to the cupboard. It should be very firmly pressed to the body so that during cutting it does not move, because in this case the cut will turn out to be wrong, and when connecting the skirting boards, the gap will occur from below or from above. When fastening the skirting board, it is also necessary to ensure that the back plane of the product is tightly adjacent to the bed, and there are no angles between the body and the posterior plane.
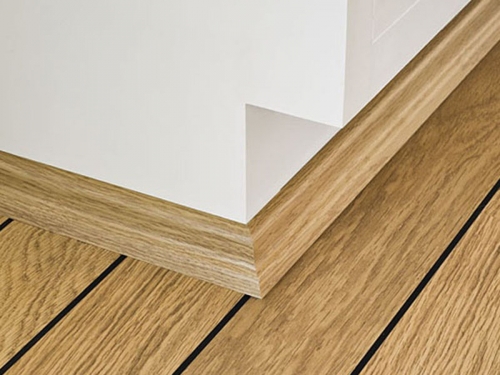
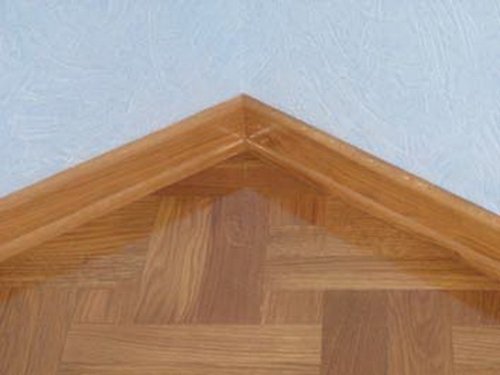
After you clamped the baseboard in Stusl, put the canvas in the right position and make a junction of the joint. Attach the resulting segment to the wall, and then do the same manipulations with a baseboard on the second wall. Combine two skirting boards in the corner and see which one still needs to be finalized.
Since in our apartments the corners are rarely ideal and have 90 degrees, after pruning the product on stuplet, it is recommended to manually adjust a wide wooden skirting board to the features of a particular room. The refinement is performed using the cushed and hacksaw, or by using a bar and large sandpaper. Ideal inconsistency will not be possible to achieve anyway, so it is worth using colored putty and sealants in the tone of wood.
You can’t always block the distance between the two walls with one plinth. In such cases, you will have to use two, and maybe three pieces, performing an intermediate docking of a wooden baseboard. The quality of intermediate docking will largely depend on the quality of the product itself. The skirting boards should be the same thickness and without knots in the joints.
5. fastening of a massive skirting board
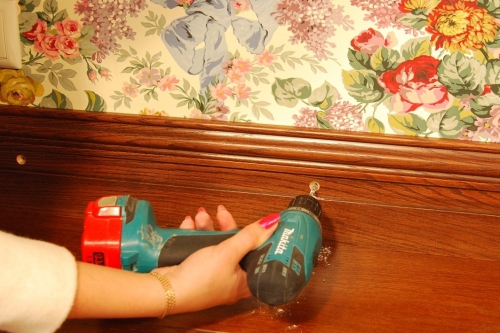
The fastening of a wooden skirting board from array to self -tapping screws is a complex, but most reliable way. After all the necessary cutting, it is necessary to make markings for screws on the skirting board. At the same time, observe the strictly set distances, because the fasteners of the fasteners with any disguise will be visible, let them at least be even. According to the standard, the distance between the holes for self -tapping screws in a wooden baseboard should be 800 - 1200 millimeters, the distance from the floor is close to 15-20 millimeters.
In specialized stores, you can find more inconspicuous fasteners - long and thin self -tapping screws. The hats in this case will be very small, and the fasteners of the great. At the same time, it is not necessary to preliminarily carry out the zenching - to drill the recesses under the self -tapping hat, since the hat in the veneer is naturally drowned.
After marking the fasteners on a wooden skirting board, you can screw the screws until they appear on the other side. Next, the baseboard should be attached to the wall, press it as the floor covering as much as possible and tighten each self -tapping screw to the wall. After that, remove the plinth, find the remaining recesses from the screws on the wall, place them, drill holes and insert the dowels. Next, a wooden baseboard can be placed back to finally screw to the wall with self -tapping screws.
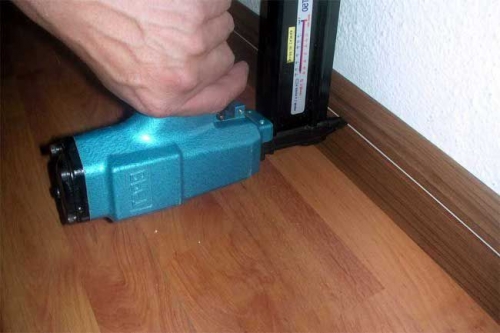
The procedure for installing wooden skirting boards to the finish nails is similar to the previous one, however, instead of self -tapping screws, finish nails are used, and instead of wooden plastic dowels. The advantages of this mount include an almost invisible place for fasteners. However, you should take into account that in some cases, wooden dowels are not held on the surface: with strong irregularities of the walls, if the walls are plasterboard or very loose.
Today, there are models of wooden skirting boards on sale, which in the middle have a decorative insert, which perfectly hides fasteners, as in the photo of wooden skirting boards. In this case, the installation of a wooden baseboard is first made, and then a wooden insert is glued on top.
6. Fixing of the veneered skirting board
Sponge skirting boards have a structure that wood allows you to remain stable not to narrow and not expand. This feature allows you to use two different methods for installing veneered skirting boards. The first of them is the installation of skirting boards using screws, which is a completely identical method described above for products.
The second method consists in gluing skirting boards, the third in mounting on special clips. Glueing the venerable skirting boards allows you to completely refuse to drill mounting holes, but the walls should be perfectly even. If even small irregularities are present on them, after gluing the wooden skirting board Wenge, the gaps will remain noticeable, and in this case it is better to install the baseboard on self-tapping screws.
If you have determined that the walls around the entire perimeter of the room are even, then you can start gluing an extended skirting board. Prior to gluing, thoroughly polish the wall to an ideal state. The skirting boards can be glued with different means, in most cases, the installation of an extended skirting board on liquid nails is practiced.
In addition to gluing, skirting boards from veneer can also be installed on special clips. Although most manufacturers of an venerable skirting board do not provide for the design of the clip, since this method of fastening is even more capricious to the irregularities of the walls than the gluing process, whether it be laminated or wooden skirting boards. On the other hand, the indisputable advantage of installing veneered skirting boards on clips lies in the ability to easily remove the skirting boards for laying cables.
7. putty wooden skirting boards
Well, here you have installed a wooden skirting board. Now is the time to start putting and varnishing the surface. Before putting putty, a wooden skirting board must be completely cleaned of dust, oil and fat spots, if any. To remove all dust, the product must be wiped with a damp cloth or sponge. Oil and fat spots are removed using a solvent.
A wood putty is selected under the tone of the baseboard. This is very important, since otherwise it will stand out against the general background. Typically, the color of the raw putty of the dried surface does not correspond to the slightly, it can be slightly darker or lighter, so check the putty before starting work. After installing wooden skirting boards with your own hands, there are always many scraps on which you can check the tone of putty.
Usually, two or three layers of wood putty are applied. The first layer is quickly absorbed and settles, sometimes cracking if you used a lot of substance. After drying the main layer, the following are applied and the surface is polished after completely dry. If, after grinding, you saw that it is necessary to get a skirting boat, then bend the dust from a grinded putty in front of the undergrack with a damp sponge, because the next layer will stick poorly.
8. Lacing the surface of the skirting board
After the wooden skirting board has been attached and put it, you can start applying varnish. A wooden skirting board before varnishing is wiped with a damp sponge or rag and glued molar tape over the wallpaper and floor. The adhesive tape, which you will stick on the wallpaper, select with weak stickiness and do not leave it for a long time, since it will stick a lot and tear off the wallpaper.
Apply the first layer of varnish in advance before installing wooden skirting boards, so you will speed up the varnishing process. But apply the following layers of varnish only after putty. Do at least two layers. When varnishing wooden skirting boards, temperature changes should not be allowed, because the varnish will grasp unevenly. But the draft can apply various particles and sorcerers on fresh varnish, which will spoil the entire appearance of the finish.
Before each subsequent application of the varnish, the previous layer should completely dry, otherwise it will undermine the non -seized coating. After the spectacular composition is completely dried, it is necessary to ventilate the room. Care for a lacquered wooden skirting board is extremely simple. It is enough to wipe it with a sponge and protect it from excessive moisture so that the structure of the tree does not collapse.
Thus, you found out how to fix a wooden skirting board. There is nothing complicated in this if you cut it and dock it correctly. And even if small cracks occur, you can correct this state of things with the help of a suitable putty color. After that, it is necessary to lacquer the surface to give it a beautiful shine.


How about the repair of this
How about the repair of this skirting board? What if it comes to the head of the wallpaper, or to overload the TV cable? Draw all the walls, again invest thousands of rubles? Thank you.