Bitumen cheap waterproofing and adhesive material, which is often used in ...
|
|
Concluding the repair, where wallpaper is well -prepared on a well -prepared surface ... |
A holistic perception of the apartment is impossible without the front door. How the theater begins with ... |
Laying vinyl tiles - step by step
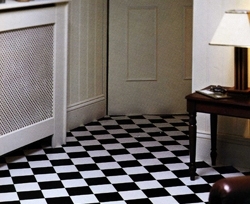
Vinyl tile is incredible today. It is bought to equip the floor in rooms of different orientations. Thanks to the high level of wear resistance, this floor covering fits perfectly into the interior of such public places as airports, stations, schools and hospitals. Vinyl tiles are also suitable for updating the style of a residential building. The most visited rooms, in particular, the kitchen, the living room and the bathroom will look brighter due to the vinyl coating. Well, do you already know where to buy vinyl tiles? Then our step -by -step instructions for laying it will become an indispensable assistant!
Table of contents:
Laying vinyl tiles
It is no secret that the flooring looks beautiful only if the installation is correct from the technological position. This article provides recommendations for the correct laying of vinyl tiles. The arrangement of vinyl coating is a simple process that requires a minimum of tools. It is necessary to correctly mark and properly prepare the surface.

Materials and tools
Most types of vinyl tiles are squares, the side of which is 30 centimeters. Strips of material for flooring are of different widths from 0.6 to 15 centimeters. To buy the required amount of coating, you should measure the area on which the tile will be laid, and add another 10% to the waste.
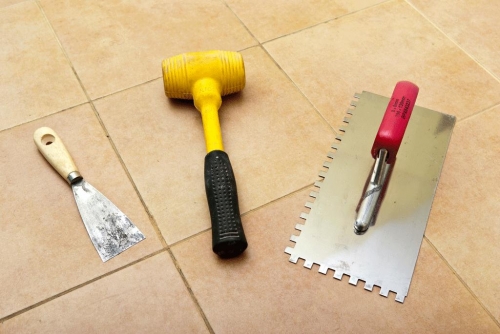
You need to use the adhesive composition, which is recommended for laying the floor vinyl coating. Glue for vinyl tiles must meet the established standards and conditions of laying this material. When arranging a vinyl floor, you must have the following tools at hand. For marking, you need a pencil, a marking cord and roulette. For cutting the material, prepare a metal square and a blade knife. To lay vinyl tiles, you need to take a spatula for glue, a sponge and a smooth rubber roller.
Preparation of the base
If we are talking about self -adhesive vinyl tiles, then the laying process should begin with the fact that the building material should be laid out throughout the day in the room where its installation will be carried out. In this case, you do not need to remove the packaging. The adhesive base of tiles is recommended to be protected from dust and dirt from getting on it, because it will make it difficult to glue later.
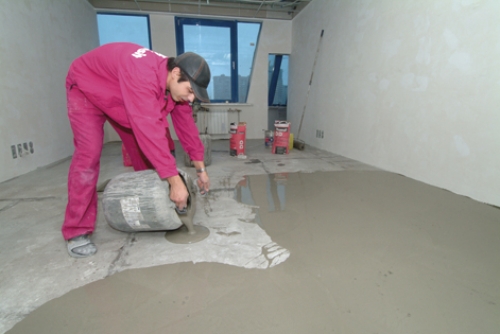
The surface for vinyl tiles in any case should be even, holistic and inflexible without traces of fat, paint and oils. As the preparation of the draft floor, it is necessary to close the cracks, seams and joints, as well as eliminate irregularities. If we are talking about arranging a vinyl floor with an adhesive base on warm floors, then heating is recommended to turn off at least three days before laying and leave the system in the off state for another six days after completion of work.
There are restrictions related to the temperature regime in the room. The optimal temperature range is plus 18 - 24 degrees Celsius. Along with this, it is necessary to ensure that the base for the decoria vinyl tile is not wet, since non -compliance with this requirement provoke the occurrence of mold and fungus on the old floor. The relative humidity of the draft floor is usually measured by a hygrometer: it should not be more than 0.05%. In wet rooms and on the concrete base of the first floors, waterproofing must be arranged. In addition, do not lay vinyl tiles simultaneously with dusty building processes.
Marking space
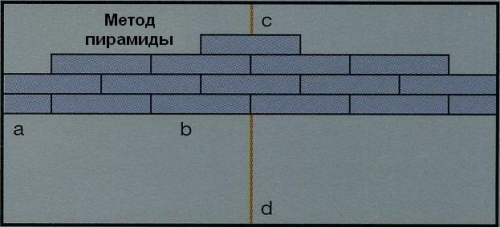
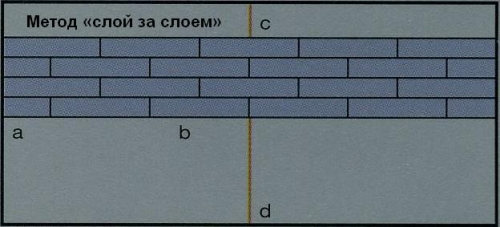
In order to correctly determine the start of the start of work, it is recommended to carry out thorough marking of the space of the room. Find the center of the room because all measurements are customary to produce from this point. Move from the center to the wall, so you can find the best place to start the process of laying ART Tile vinyl tiles with joints in a line.
The laying of tiles is needed to be a slightly different way to find the starting position. Often, the most effective way to determine the starting point is to lay the tiles dry in the direction of the wall from the central line.
When the required arrangement of the tiles is achieved, you just need to draw a line with a pencil along the last row of tiles closest to the wall. On this line, it is necessary to lay full tiles. To cut the coating around curved surfaces and pipes, it is advisable to use a cardboard template. After that, remove all the tiles that were stacked by dry, and proceed to the next stage.
Glue for vinyl tiles
To glue vinyl tiles, you need to take acrylic dispersion glue. It should be noted that the adhesives intended for the vinyl floor have mainly waiting for 5-10 minutes close. Thus, the vinyl tile of Finefloor can be glued only after the adhesive maturation on the base.
On the packaging of glue for the vinyl coating, all the necessary information is given. Carefully study the instructions for using this glue. Listen to the recommendations of manufacturers and reduce the operating conditions of the future coating. The optimal consumption of the glue used reaches 0.3-0.5 kilograms per square meter.
Bleing vinyl tiles
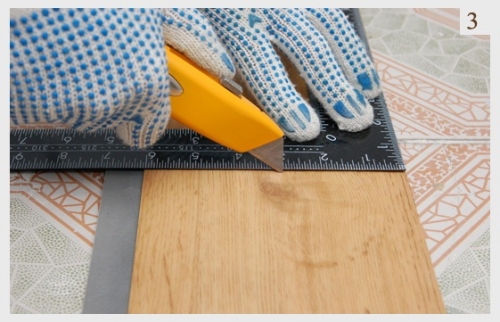
The tile can be cut using a stationery knife, but since the blades will quickly stupor, it is recommended to have spare ones at hand. This is done like this: the upper layer of the tile is cut through, then the material breaks down along the line line and cuts off from the back side. It is possible to cut vinyl tiles according to the pre -made patterns.
When gluing vinyl tiles, it is necessary to avoid entering air. You can not lay the tile close to the walls, you should leave a small gap. Glue should be applied evenly by sections, without leaving clots of glue and not processed areas.
In order for the glue to be applied evenly and in the quantity that is required for the coating sticker, it is recommended to use a gear spatula with interchangeable blades. Due to the different shapes and different steps of the spatula teeth, the desired glue consumption will be provided. When laying on a non -flat base, you can use a household hair dryer to give the tiles greater plasticity.
Having glued vinyl tiles, it should be rolled with a heavy special roller or wiped with a cork board. This is done for better gain and for removal of bubbles. Excess glue, which performed at the seams, must be removed with a damp sponge or sponge, which is moistened in an alcohol -containing composition, before that, the glue will begin to dry. After half an hour, a hundred ride a laid area with a roller again.
After gluing the flooring, the vinyl tile does not need special joints. The exception is especially wet rooms, for this it is customary to use cold welding. The seams are seized after grasping the glue, that is, when working with dispersion adhesives no earlier than two days after laying. If it is too early to close the seams, then this will poorly affect gluing and provoke defects in the edge of the seam.
Vinyl care
Despite the fact that vinyl tiles are quite unpretentious material, there are some rules related to cleaning and caring for vinyl floors. To prevent a lot of sand and dirt from getting into the room, experts recommend that special rugs that are able to take part of the garbage and avoid premature abrasion in the entrance.
Washing vinyl tiles is recommended for detergents that have a neutral composition. There should not be a bleach and ammonia in detergents. The best choice will be special chemistry for vinyl coatings. After wet cleaning, wipe the floor without fail with a dry rag. In extreme cases, if the surface is very contaminated, you can use a special polished machine.
All sharp and rude tools that can damage and scratch vinyl, take away. Put the protection on the legs of the furniture so that they do not scratch the floor when you plan to move the headset. Many manufacturers during the operation of vinyl self-adhesive tiles strongly do not recommend using some mastics, turpentine and acetone, because they can damage the surface of the tile.
All! Your floor is ready! In the end, I would like to note that vinyl tiles can be used not only for flooring, but also for wall decoration.

