Over the past 10 years, the number of roofing materials has increased significantly, however ...
|
|
The arrangement of water supply and sewage systems on the site is one of the most ... |
In modern construction of private houses, you can not do without insulation of the attic ... |
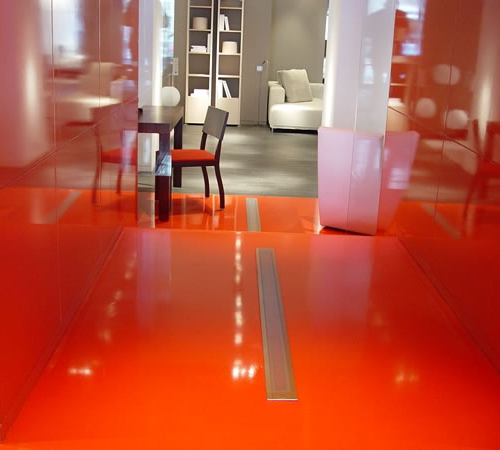
The self -leveling floor of Hercules

Hercules self -leveling flooring is used to create a flat, leveling surface from concrete, preparing it for laying flooring. The composition of the mixture does not include organics, it contains natural minerals for filling, a certain brand of cement, a complex of specific chemical additives.
Table of contents:
- Advantages of the bulk floor of Hercules
- Self -leveling mixtures for the floor of Hercules: Technical characteristics
- Pour the self -leveling floor Hercules with our own hands
- The technology for applying a self -leveling mixture of Hercules
- How to install beacons correctly
- Difficulties in working with floor leveling
- Paul self -leveling Hercules. Reviews about work on a wooden uneven coating
Advantages of the bulk floor of Hercules
- The frozen layer is characterized by increased wear resistance.
- An additional seal of fresh solution is not required. The mixture gives a low shrinkage.
- The ease of installation follow the instructions for use.

- Hygienic material. The dried surface does not dust. Dry mixture during breeding is well mixed and does not give dust to fly into the air.
- It has a long expiration date in packaged form.
- At the end of the work, grueling cleaning of the room is not required.
- Low cost for high -quality building materials. Hercules gender self -leveling - the price of a bag weighing 25 kg $ 8.
Depending on the temperature in the room or in the open space, the bulk gender grabs and gains strength in a day. It can be put into operation, move without caution on the surface of concrete. At high thickness and low temperature, a longer drying period of up to 72 hours is recommended.
Self -leveling mixtures for the floor of Hercules: Technical characteristics
The trademark of Hercules was founded by the Novosibirsk plant in 1997. The quality of the products allowed the company to gain leadership in the building materials market. Constant monitoring of innovations and achievements in the development and production of mixtures for gender, the use of high -tech production lines ensures the increase in pace without a rise in the cost of products.
The assortment line of mixtures of Hercules is extensive and allows you to produce a full cycle of finishing and repair work of internal and external surfaces.

The main product of the enterprise was the production of complex dry mixtures on a mineral basis with the addition of polymers for bulk self -leveling floors.
Depending on the purpose of the floor, mixtures are offered on the following bases:
- Methyl methacryl.
- Epoxy.
- Acryl-smoke.
- Polyurethane.
Due to the presence of polymer modifiers, finished solutions create surfaces with unique properties. Hind, cement surface has high properties of water resistance, moisture resistance, adhesion (adhesion), elasticity, resistance to mechanical abrasion.
The most famous and popular in the construction sector are:
- self -leveling floor,
- bulk floor,
- the mixture is the standard.
The mixture diluted according to the instructions retains living qualities for up to 3 hours. Application of the solution to the concrete surface gives a flat horizontal due to the presence in the compositions of the binding polymers. The mixtures are recommended to apply flooring for subsequent coating with decorative material, for example, linoleum, parquet, laminate, floor tiles, etc.
- For uneven surfaces, wave -shaped, tuberous, with defects and recesses, a starting mixture of the Hercules of the floor is recommended. This mixture is used for the initial creation of the floor level, for example, before the installation of the heated floor. Unique qualities allow the use of a solution for application to a painted surface. The polymer included in the composition forms a strong frost -resistant layer, which determines the scope of application for non -heated rooms and open areas.
- The mixture of the Hercules screed for floors is used to arrange classic concrete floors and layers of lining with traditional methods. The advantages of this material over conventional ready -made cement mixtures in the rapid adherence of a layer of up to 100 mm.
When using mixtures for aligning the floors, a layer of 30 mm is enough, the maximum layer thickness is allowed to 100 mm. The high height of the layer leads to cracking of the surface, detachment from the base and uneven drying in volume. The finishing material begins to lay the finishing material after 28 hours of drying, when the material gains a strength of 20 MPa/ m2.
The use of mixtures is not limited to strict measures according to TB. Traditional safety requirements are observed: the skin and eyes are protected from the solution of the solution. If the eyes are clogged, it is washed with a large amount of water and a tetracycline ointment under the eyelid is laid.

Pour the self -leveling floor Hercules with our own hands
According to professional builders, the alignment of the floor with a mixture of Hercules is not complicated, but it requires initial knowledge of the arrangement of the concrete surface. Prior to the start of work, the basis is qualitatively prepared. A thorough and accurate approach to the initial stage is decisive for the manufacture of reliable and durable sex:
- The cover of the base is freed from construction and household garbage. The solvent is removed spots of paint and oils.
- The surface after wet processing is dried with a draft or a heat -controller.
- All fragile areas are removed.

- 24 hours before the start of filling the screed, all seams, cracks and joints based on.
- The primer is performed after the anchor material is completely dried. For surfaces with high absorption, 2-3 coatings with a primer solution are performed. It is already worthwhile to soil in order to prevent rapid adsorption of water from a fresh self -leveling solution and reduce the formation of air spheres on the surface of the base.
- For thin layers from 0.5 to 15 mm, layers are installed. They create a single design of a layer of solution and base. For the layer, material with high characteristics of adhesion, bending and rupture is selected.
- Materials and tools for work:
- Set for lighthouses or screws.
- Laser or construction level.
- Pencil or chalk.
- Cord for determining the zero level.
- The container for breeding the solution.
- The self -leveling floor of Hercules. The consumption of the material is calculated by the volume of filling. On the package there is a table for the average consumption of the mixture per 1 m2. The consumption of the mixture for the preparation of 1 m3 is indicated. By simple arithmetic calculations, determine the right number of packages and purchase 1 larger.
- Drill with a special nozzle for concrete.
- Lench roller.
- A primer for concrete surfaces.
- Air, needle roller for air removal.
The technology for applying a self -leveling mixture of Hercules
- On the clean coating, the highest point of the plane is determined. This is done using a laser level or ordinary construction. At the site of the maximum peak, a beacon is installed. The lighthouse is made of vertical rails, with a bright rag or bright woolen thread around.
- The level at 6-7 points along the perimeter of the room are determined. It is marked with beacons or screws. This part of the preparation must be performed in order to control the filling with the mixture.
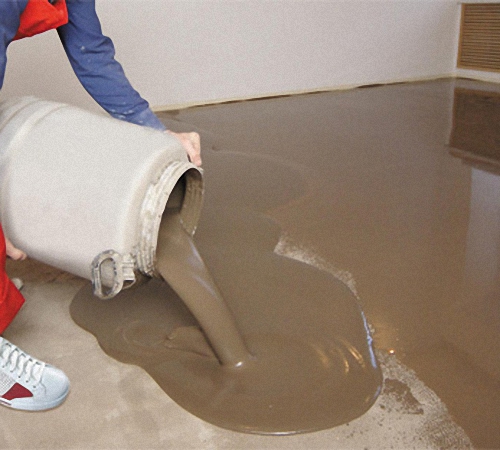
- A small part of the finished solution is poured to the floor. They go along the path with an aircraft roller, removing air bubbles from the surface. The calculation of the mixture is made for 1 m2.
- The next portion of the mixture is poured after 10 minutes, since the first layer will already begin to grasp and harden.
- It is recommended to walk on fresh coating only after 18-20 hours. Lay the finishing coating no earlier than 2-3 days.
How to install beacons correctly
Method number 1:
- Along the perimeter of the room, the level is made on the walls of the mark. The more marks, the easier it will be to work.
- Connect the marks with a continuous line AB.
- Determine the zero level line relative to the horizontal. It depends on the height of the future screed. Using a rope, the same distance down to the surface is measured around the entire perimeter. Make tags.
- Connect them with a line of diabetes. It shows the maximum floor level. This line is needed as a guideline when setting beacons.
- Setting a level using a laser tool. The level is directed to the wall, marks are placed at the required height. Connect the marks with a continuous line.
- The profile lighthouse with different types of screed is installed at a distance of 200-300 mm from the wall. Lines are drawn on the floor, lighthouses are installed along them.

Method number 2:
- I twist long screws on the floor.
- Install them in level.
- Pathash or rope are pulled between them.
- A solution is applied along the thread with a slide for fastening the beacons. Lighthouses are made from the profile
- Put the profile on the slides and pressed it into the solution to the level. The profile should touch the stretched rope.
General rules for both options:
- The distance between the beacons is withstanding 100-150 mm less than the length of the rule. Correctly exhibited beacons allow the rule to rest slightly and slide over the surface.
- Lighthouses are located parallel to each other throughout the room.
- To set the beacons at the required level, lining of bars or bricks are not used. The wet method of screed leads to deformation these materials. In this place begins deformation, subsidence and cracking of the floor. An ideal option would be a lighthouse from a dowel driven into a slide of a solution.
Difficulties in working with floor leveling
- Before work, you need to learn to work with lighthouses. This is a responsible stage, on which the creation of a flat surface depends.
- The time of grasping the self -leveling floor of Hercules is up to half an hour. Therefore, mix a small amount of solution, take into account your performance.
Paul self -leveling Hercules. Reviews about work on a wooden uneven coating
The story, how the uneven old floor was fixed in the toilet under the subsequent laying of the tiles. Front of work: old wooden floors with a difference up to 15 mm:
- At first, all dry self -leveling mixtures were analyzed on the Internet. At first I liked the mixture of Seresit. But, having calculated its value for a small site and finding out that it does not shrink, the house -building refused to use it.
- The choice fell on the self -leveling floor of Hercules. I arranged the cost of the material and its characteristics for filling the difference in the level of 20 mm.
- The following tools and materials were used to perform work:
- Two levels 600 mm and 1500 mm.
- The container for the preparation of the solution.
- Construction mixer.
- Drill, spatula.
- Self -tapping screws for lighthouses.
- Maslar tape.
- Spacer. Bar.
- Carrying out work:
- Drywall with special processing for a wet room, GKLV brand was covered on boards.
- It turned out that the house gave a shrinkage and the floor in the toilet is uneven.
- I had to remove the toilet, remove the bulk hose, seal the sewer entrance with polyethylene.
- Glue the joints of drywall sheets with a painting tape: together and at the junction with the walls.
- Using a screwdriver, self -tapping screws and level, place the beacons. To begin with, determine the lower point, and then set the beacons. Further, the level is laid on the hats of self-tapping screws and the height of the protruding part of the beacons up and down is regulated.
- Then the drywall was primed and dried.
- The solution was prepared quickly. The user liked the presence of detailed instructions in what proportions and how to knead the solution.
- The solution was mixed with a mixer and a special nozzle to the drill.
- The owner began the fill from the lowest point. Pouring the solution, pierced it with a spatula to release air from the volume. I had to pierce the mixture very quickly, as it hardened quickly.
- After using the first mixture, the second batch was made. And so on until the end of the full fill.
- A bar was installed in the opening so that the solution did not shimmer through the threshold.
- Tips from a home master:
- With a large difference in height, it is necessary to monitor the behavior of a hardening self -leveling solution: check the absence of cracks, scree, voids.
- Cracks that appear are rubbed with a sponge moistened in water.
- Squeezes or fertility mean improper preparation of the solution.
The user notes that this was his first experience with a self -leveling mixture. He got a high -quality coating. It was not difficult to work and, most importantly, repairs with the use of self -alternate is about 15%cheaper than when using ordinary cement with sand. I appreciated the master and speed of work. Compared that with the classical mixture, the work would last 2-3 weeks. The self -leveling floor Hercules allowed to finish work in 2 days.
For information, a self -leveling floor of Hercules, video:
![]()
StrPort construction portal 2011-2018. Articles about repair, construction, building materials.
Copying information from the site is possible only with permission of the editorial office Or indicating a direct link to the source. Legal justification
This video says that g.
This video says that the gender self -leveling does not need to be aligned with anything, just roll with a needle roller. In other sources, infa came across that all the same, lighthouses are needed-at least displayed in the level of screws with stretched threads, or ordinary beacons that lie in a black screed, on them and smooth out a flooded non-vibration. Because this level is still not so liquid as to spread evenly. A month ago, we poured the whole apartment with leveling. They only with a needle roller. The hillocks that were on the draft screed, after 2 layers of the level of levels, remained hillocks. Employees - all trained, from the serious salon of flooring. They suggested that we pour another layer of levels (of course, for our money). By the way, I did not find information - what maximum thickness can there be a layer of leveling in one approach? It is indicated that the layer of 2-100mm - 100 mm is for one application ??? Therefore, in the future I will personally stand over my soul during work. Workers - "at random", then without the rule will come, then without an extension cord, then the material will not be imported the one that has been paid ... I have not yet met good specialists, everything will be squinted. Someone more, who is less
and I would add this
and I would add such an info: when rolling the leveling with a roller - there will be spray (or even waves/influxes) on the walls. If the walls are already putty - you need to pre -sequent a cellophane to a height of 30 cm
I myself work in construction
I work in the construction sector myself. Often you have to equalize the floors by self -alternate. My comments. If the floor difference is more than 1cm lounger than the pit, pour the rude to the spin and let it dry for a day. Pouring a self -alternate do not calculate that he himself spreads, this is not enamel, it must be poured gradually and leveled by the rule or a long spatula at an angle of about 75 degrees to the base. When filling, the mixture spread superficially, thereby making the floor without joints, influxes and scratches. When breeding the mixture, I add 6-7 liters of water by 25 kg. If you add more water, the mixture becomes not homogeneous and quickly settles in a bucket, and the dried floor can crack and remove and, when filling, the floor spread worse, hiding the defects from the rule under a layer of water. Pour the floor quickly to avoid joints. Prepare a container with water and measure for water in advance. I breed a mixture in a plastic barrel without sides with a capacity of 40 liters. I pour measured water into the container, pour 25 kg into the center and measure the mixer until smooth, the mixture is easily mixed. This portion is enough for me to smooth the thickening time. I pour the mixture evenly, quickly disperse the rule and roll with a needle roller, from vibration the floor spreads, merging without joints. If the floor began to grasp the roller, there are traces and drops. Spray is flying from the roller up to 40cm, and dried drops dry quite firmly to any verge, apveriter’s everyday life. For me, the right layer of application is about 6mm, then the half is perfect. The consumption of the material in the sprint corresponds to the bags. And my advice also knead the floor from garbage well, use impregnations with the formation of a small film, the less absorbs the base, the more lustle the floor itself and less bubble. When pouring from the bucket, there are drops on the base floor, do not forget to remove them or they can get into a poured floor like pebbles. In principle, the mixture is not bad, good luck!