Due to its strength, durability, unpretentiousness and multifunctionality ...
|
|
Build a house and plan to use liquid heat -insulating agents? Then... |
Compared to many traditional types of finish flooring ... |
Paul on the balcony with your own hands: step -by -step instructions

For a long time, the apartment renovation was limited to the arrangement of the interior decorated according to all the canons of the design. However, a person’s constant desire to increase the living space and increase its comfort was the reason for the extended repair, including mandatory positions on the arrangement of technical premises. One of these premises is the balcony. If earlier you could not get on the balcony barefoot, since dust and dirt fell into the living room, then after making it repairs, you will forget for a long time about the need to search for your own slippers. Yes, and from now on you will not have to think about warm clothes, which previously helped you be prepared for all the weather surgery outside the window. If, opening the door to the balcony or loggia, you want to get into a cozy room, which is a continuation of your apartment, and not to the street, as it was before, you need to familiarize yourself with our article, which tells how to lay the floor on the balcony with your own hands . But, despite the fact that the balcony, converted for room for year -round use, is often glazed, the floor on the balcony sooner or later becomes unusable, which is due to the effects of temperature extremes and variable humidity. Even if, at first glance, it seems that there will be enough partial repair, do not flatter yourself, since, according to experts, the most optimal option is to complete dismantling the old floor with the subsequent installation of a new wooden coating. Having preferred this option, you can be sure that it is the most reliable and durable, and also does not require special professional skills.
Content
- The need to arrange the insulated floor on the balcony: the relevance of the issue
- Options for flooring on the loggia and balcony: choice of materials
- Alignment of the floor with cement screed: recommendations of masters
- Wooden floor on the balcony with your own hands: step -by -step guide
- How to insulate the floor on the balcony: possible options
The need to arrange the insulated floor on the balcony: the relevance of the issue
Residents of modern new buildings, who do not differ in an excess of free space and rational layout, strive for the most practical use of each meter of free area. Given the fact that in modern apartments every square centimeter is worth its weight in gold, an increasing number of owners of apartments with a balcony decide on the need for its year -round use. Being true rationalizers and pragmatic lovers of logical solutions, they often equip a children's playing area, a study or a winter garden on the balcony, which will become a living decoration of the interior of the apartment.
As for the problem of arranging a heated zone on the balcony, it is solved very simply. To do this, it is enough to glaze a balcony or a loggia and carry out the installation of a warm floor on the balcony with your own hands, which can be made in several ways, each of which is described in the article. How to carry out the installation of the floor on the balcony with your own hands, and what technology of its insulation to give preference we will figure out further.
Options for flooring on the loggia and balcony: choice of materials
In the process of arranging the floor on the loggia, it is important to determine not only the structure of the materials used, but also with its temperature parameters, since several varieties of the floor are distinguished, including cold, insulated and warm. In this regard, we list the main options for mounting the floor on balconies and loggias:
- Floor arrangement, which involves its alignment with a traditional cement screed without the use of thermal insulation materials;
- Option of floor installation, similar to the previous one, but involving the use of insulation (extrusion polystyrene foam, expanded clay, etc.);
- Alignment of the floor with a half -dry screed without the use of insulation;
- The arrangement of the floor on the balcony using a semi -dry screed and insulation;
- Installation of a wooden floor on the lags using or without thermal insulation material;
- Laying a wooden floor on the balcony using or without insulation, followed by the flooring of linoleum, laminate or other flooring;
- Laying of extrusion polystyrene foam with the subsequent flooring of the OSP without arranging the lag;
- Installation of a concrete screed with the subsequent laying of ceramic tiles, linoleum or laminate;
- Installation of the system of a warm floor, for the arrangement of which various heaters are used, while the system is mounted according to several principles and can be either water and electric.
Selection of materials for the floor on the balcony One of the most critical stages of its arrangement, competently approaching which, you can avoid subsequent disappointment. The material selected for the arrangement of the floor on the balcony must comply with a number of certain requirements, among which the leading positions are assigned reliability, durability and decorative characteristics. Due to the fact that modern manufacturers offer a wide selection of materials for flooring, in the process of their choice there should not be difficulties even among the inhabitants who first appeared on the construction site.
An important parameter that determines the choice of material for flooring is the type of balcony. If you plan to equip an open balcony or loggia, it is recommended to use tiles to lay the floor, and if you dream of a glazed warm balcony, give preference to a wooden coating. However, this is not a dogma, and you always have the right to make a decision yourself.
Paul on the balcony of ceramic tiles: work order
The durability of ceramic tiles, as well as its operational and decorative characteristics, are not in doubt, however, this material also has its drawbacks, in particular, this applies to its cold surface. In order to install the tile floor, follow the algorithm presented below.
- First of all, they are cleaned by the mounted surface and lay a waterproofing film;
- Focusing on the height of the surface that they plan to equip, choose a heater of the required thickness, which is laid on top of waterproofing materials;
- Having produced the previously listed stages, the installation of a cement screed is installed, after which ceramic tiles are laid on the glue;
- To provide the floor with a neat appearance, in the process of laying ceramic tiles, the master recommend using a special cross. After the final drying of the concrete screed, process the seams with grout.
All of the above methods have the right to exist, but it makes no sense to describe each of them, since in practice only some options for arranging the floor on the balcony are used, which will be described later.
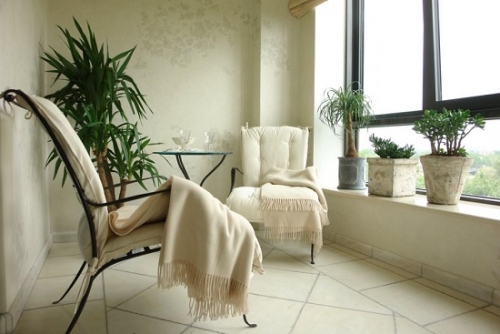
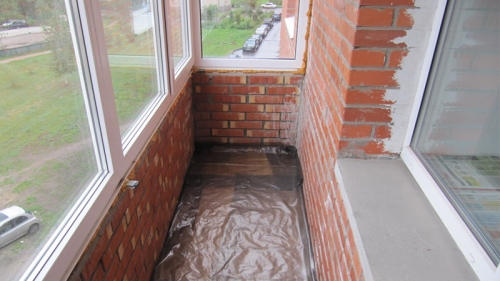
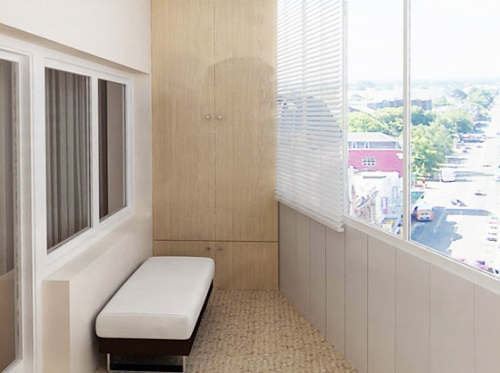
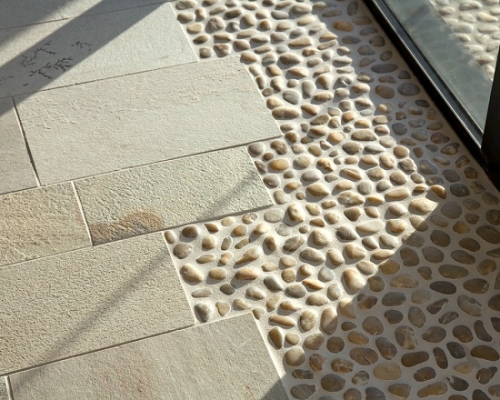
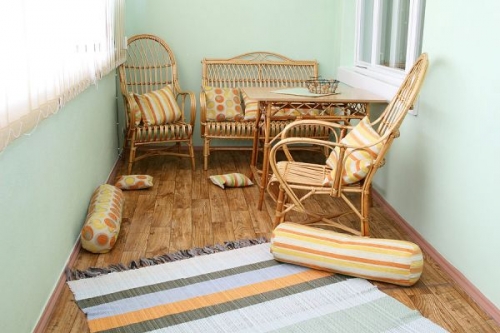
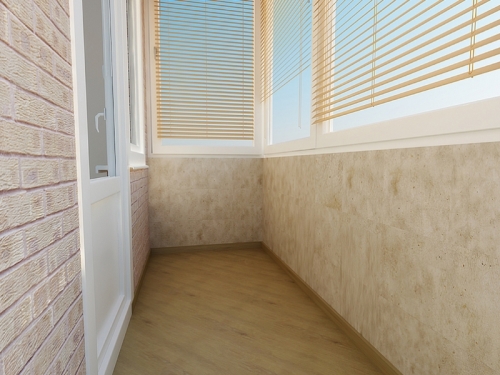
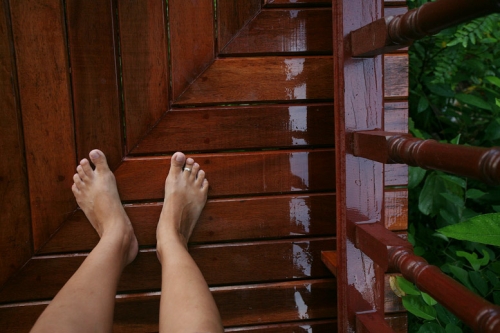
Paul on the balcony with your own hands photo
Alignment of the floor with cement screed: recommendations of masters
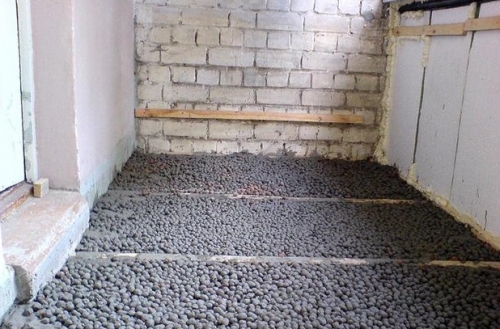
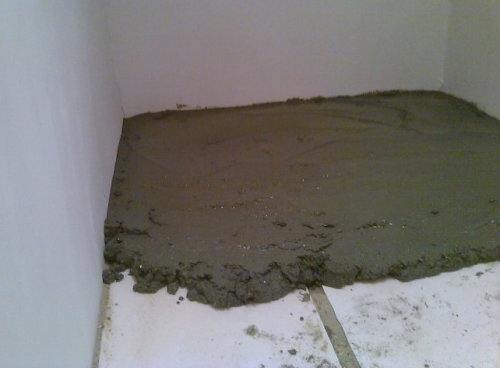
Based on the fact that there are three types of cement screed dry, half -dry and ordinary, before proceeding with the leveling of the floor with the help of a cement screed, you must decide what kind of cement screed you plan to do. At the moment, it makes no sense to dwell in detail on the description of the process of preparing the mixture, however, it is advisable to consider the main provisions. Regardless of what kind of screed you will prepare, the process of leveling the floor using this method involves the priming of the floor and the installation of beacons carried out on a thick cement solution using the construction level. The quality of the setting of lights depends on the quality of the settings of any of the three screeds. If you plan to install the insulated floor, before installing the lighthouses, it is necessary to fill up the expanded clay or lay extrusion foam polystyrene. Thanks to this technique, you will facilitate the process of installing lighthouses.
For the manufacture of ordinary cement screed You will need to prepare a cement-sand mixture, the composition of which depends on the brand of cement. If you work with a brand 400 cement, four parts of the sand will require one part of the cement. If you are not sure of the quality of the sand, experts recommend preparing a cement-sand mixture at the rate of 1/3.
Preparation of the working mixture for a semi -dry screed It is carried out in the same way, but it is necessary to add half as much water to it. Before adding water to the solution, make sure that the mixture is thoroughly mixed. As for the readiness of the mixture, it can be determined by clenching it in a fist. If in the process of compression the mixture resembles the snow in its structure, it is ready. The mixture for the installation of a semi -dry screed is unloaded with a shovel and compacted, pulling off the excess through the beacons in the same way as in the case of the installation of a conventional screed.
The structure of a half -dry and dry screed is prone to the appearance of irregularities and cracks, which must be filled with a mixture and grout them using a special grater or half. In order to avoid cracking of the screed, the day after filling it must be wiped with a grater or semipher.
Important! Knowing the solution, make sure that the mixture is not too rare, since the screed made on the basis of such a solution must crack after drying. The optimal consistency of a conventional screed is the one that resembles potato mashed potatoes. In addition, if you fill the too rare screed on a expanded clay pillow, a constantly pop -up expanded expanded clay will prevent work.
Installation of dry screed The process, the principle of which differs from the previous two, as it involves laying fiber cement and gypsum -fiber plates. The slabs are laid on pre -prepared expanded clay pillow or extrusion polystyrene foam, after which their joints are thoroughly glued. Places of joints of the plates are also fixed with screws every 15-20 cm.
Important! The thickness of the expanded clay pillow should not be less than 3 cm, since otherwise the screed on the balcony will be cold.
Wooden floor on the balcony with your own hands: step -by -step guide
Preparation of lumber
In order to provide a long -term operational period to the wooden floor, it is necessary to treat the lumber with an antiseptic used as elements of the flooring. Having processed, dry the material and repeat the procedure again, also waiting for the complete drying of the wood. Due to the fact that many outlets offer lumber, obviously treated with an antiseptic and carefully dried, this stage of work can be skipped if wood, originally treated with antiseptic impregnations. In this case, the time, of course, will save you what can not be said about the funds spent.
Surface preparation
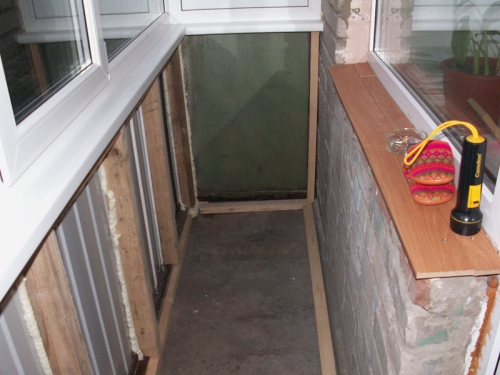
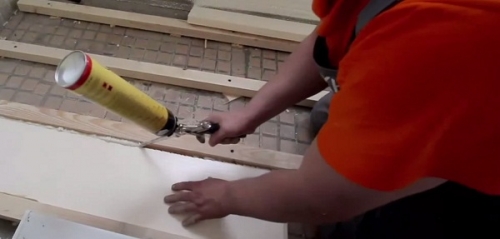
Experts recommend the installation of a wooden floor on a concrete base, which necessitates the complete dismantling of the old coating, regardless of its initial state. After you dismantled the previous flooring, take care of cleaning the room in which you carry out repair work. During the cleaning process, you can use a brush or broom, and at the final stage a vacuum cleaner. Then plastering or using the mounting foam, lay out all the existing cracks and cracks. In this case, pay special attention to the joints between the panels.
Heat -reflecting canvas: the need for laying
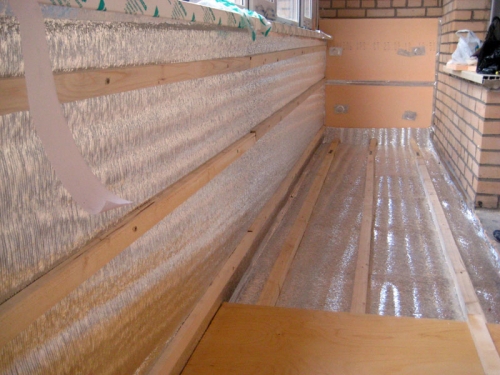
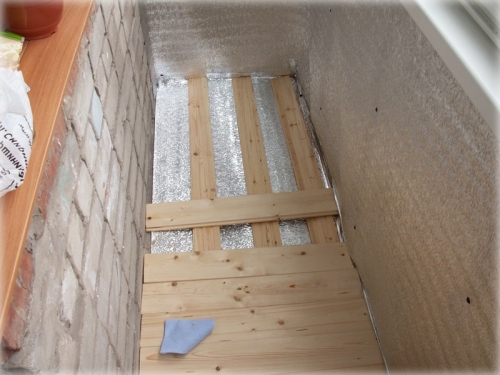
To carry out high -quality floor insulation, it is necessary to make sure that the surface of the walls, floor and ceiling does not pass the heat outward. A heat -reflecting film that closes the described surfaces can easily cope with this function. In order to optimize this physical process, the fabric of the heat-reflective material must exceed the width of the floor surface by 40-50 cm. This is necessary so that after laying the edge of the heat-reflecting film, to the walls by 20-25 cm on each side. The same rule applies to the length of the canvas of the heat -reflective material.
Fixing transverse lag: recommendations of specialists
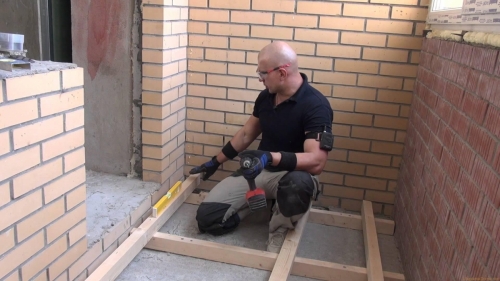
The transverse lags are the structural elements of the floor, the fastening of which is carried out directly to the base of the floor. The lags are located in a pitch of 40-50 cm and attached to the base of the floor with the help of dowel-grooves and anchors. As a lag, a beam is used, the length of which should be less than the width of the repaired floor by 2-2.5 cm, which will prevent the contact of the edges of the beam with the walls. Step fastening the lag at the same time is from 5 to 6 cm.
Main lag fastening: recommendations of specialists
The next stage of floor installation involves the installation of a lag from a more massive board, which are attached on top of the transverse lag. Fastening the main lags of the installation stage, at which the wooden floor is aligned in a horizontal plane. Bars are placed in several rows, along the entire length of the balcony, while the distance between the lags is 4.5 5 cm. To make sure that the main lags are located at the same level, using the installation level, check the installation of each timber.
Important! If you notice the inconsistency of the level of fixed lags, put a piece of wood for the necessary height under them and fix the main beam to the transverse directly through this piece of wood.
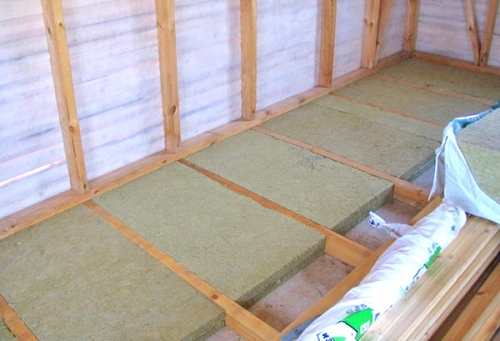
The next stage of the floor insulation. How to insulate the floor on the balcony with our own hands, and what variants of insulation exist at the moment we will tell you a little later, but for now we note that if you have preferred thermal insulation materials, experts recommend using soft types of insulation, for example, mineral wool, which can be cut with a clerical knife .
Laying a massive board the final stage
The massive board must be cut off in size and laid on the base, while not forgetting to saw off the spike from the first board. The mandatory event at this stage is equal to the board of 90 degrees relative to the internal and external walls (experts recommend focusing on both walls). For a high -quality implementation of this work, you will need a construction line. By laying the first board, remember that all of its three edges should touch the walls, and the gap between them and the board should be 1-1.5 cm. The board is mounted using self-tapping screws, which are screwed at an angle of 45 degrees into the groove. At the same time, remember that the first and last boards are also fixed near the wall.
The consolidation of the second and subsequent boards involves the insertion with a spike into the groove of the previous board. Having completed this procedure, prepare a shock block made from trimming the board, with which the newly installed board is knocked close to the previous one and fixed with screws.
How to insulate the floor on the balcony: possible options
Warming and flooring on the balcony with your own hands The stage of work, which can be implemented in two ways:
- Through the use of thermal insulation materials;
- Through the arrangement of the system, warm floor.
The use of thermal insulation materials
Consider the most popular types of insulation used to arrange a warm floor:
- Mineral wool Porous material, in its structure resembling classical cotton wool. For the production of mineral wool, a basalt or fiberglass is used, which has passed several technological stages of processing: melt, stretching, cooling and crushing. When laying this material, it is necessary to take care of the effective vapor barrier, since excess moisture can reduce the thermal insulation properties of mineral wool;
- Styrofoam The material that has earned its popularity due to its low cost and high -quality thermal insulation characteristics. The manufacturer produces foam in the form of plates with a thickness of 2 to 10 cm. The foam is placed between the floor lags, all available cracks are poured with mounting foam, after which the flooring is produced;
- Penophol A new generation insulation, for the manufacture of which foil and foamed polyethylene are used. Being a brainchild of modern technologies, Penophol has not only heat-insulating, but also hydro-, as well as soundproofing properties. The manufacturer proposes to pay attention to one -sided foam, characterized by the presence of foil only on one side, and bilateral, where the foil is located on both sides.
- Foam Or extrusion polystyrene foam is a standard among thermal insulation materials. But this advantages are not limited to this, since this material is also characterized by low vapor permeability, ease and ease of work, as well as inertia to the effects of all chemicals. Its only drawback can be considered a relatively high cost.
Installation of the system warm floor basic options and their brief description
Equipping the system of warm floor, you can go in several ways:
- Install water floors on the balcony with your own hands;
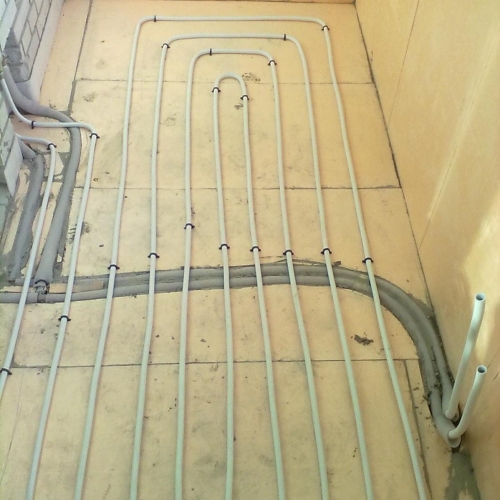
- Choose the most common technology for the arrangement of a warm floor and install the cable heating system;
Important! Advantages of arranging the cable heating system:
Low electricity consumption;
The reliability and durability of the system, due to the location of the heating conductor in the layer of insulating material, which prevents its oxidation. In addition, the cable is protected by a cement-sand screed and flooring;
You can regulate the system.
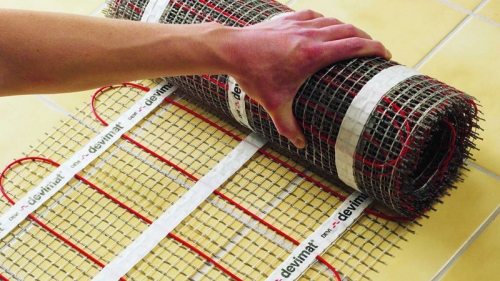
- Install the system of a warm floor using heating mats, which are one -core and two -core heating cables, which are attached to a special grid in the form of a snake.
Important!Advantages of laying heating mats:
- Using high -quality heating mats, you will arrange a warm floor safe for human health;
- In this case, there is no fundamental increase in the thickness of the floor (along with the tile, this indicator does not exceed 1.7 cm);
- If the room in which you carry out the installation of a warm floor is characterized by a complex configuration, you can cut heating mats into fragments of the desired shape, while maintaining the integrity of the cable.
- You can also equip the film infrared warm floor on the balcony with your own hands, which is an alternative solution to the issue.
Important! The advantages of arranging film warm floor are:
- Low energy consumption;
- Ease of installation and the possibility of rapid commissioning of the system into operation;
- The floor heating is carried out within 10-30 minutes;
- The formation of a minimum electromagnetic field in the process of functioning of the system;
- Slight increase in the height of the floor;
- System safety during operation
Floors on the balcony with your own hands video

