One of the most vulnerable places in the house where heat loss most often occur is ...
|
|
High -tech material requires compliance with all the installation standards of plastic ... |
I immediately want to draw your attention to the fact that installation of multi -level ... |
Laying laminate on a wooden floor
Laminate is especially popular among flooring. This multilayer material is characterized by strength, accessibility, easy installation and rich in colors. The article will talk about how to lay a laminate on a wooden floor.
Content:
- Laminate characteristics and properties
- Laying laminate on a wooden floor
- Laminate calculation
- The choice of substrate
- Warm floor and laminate
- Preparation of an old wooden foundation
- Setting the floor horizontal
- Choosing plywood or chipboard
- Laminate installation
- We lay a laminate on a wooden floor in a traditional way
- We lay a laminate on a wooden floor in a diagonal way
Laminate characteristics and properties
Each manufacturer uses its own manufacturing technology. However, in the standard design, the plank consists of 4 layers.

- The upper layer is a protective film made of acrylate or melamine resin. It prevents the appearance of flaws from shock and mechanical loads. The class of operation, the level of resistance to abrasion, wetting depends on the quality and thickness of this layer. The coating can be smooth or embossed.
- The second layer is responsible for the decorativeness of the product. In fact, this is a layer of paper with various color design. There are often boards imitating the structure and texture of natural wood, wild stone.
- The third layer is the basis. For its manufacture, HDF plates are used. It is on the hard part that a lock connection is performed, fastening the strips with each other during installation. The plate is distinguished by water -repellent properties and resistance to various loads.
- The lower layer of melamine paper, covered with highly resistant to various influences of the membrane, provides protection against possible deformations. The functions also include giving additional stiffness to the main layer and an increase in sound insulation.
Today you can find a laminate, where an additional layer of plastic or metal has been added to its lower part. This development allows you to lay the flooring without the use of the substrate.
The advantages of the laminate:
- high-quality manufactured strips withstand contact with water up to 6 hours without any consequences;
- thanks to a special coating, the bar does not attract dust, the connection is considered to be hypoallergenic material;
- environmental purity lies in the absence of harmful substances in the composition of this flooring;
- it has resistance to spots, for cleaning you will need a slightly wet fabric, for more serious pollution acetone;
- simplicity of installation and dismantling;
- perfect for laying in premises of any form, as it is easy to cut under the required configurations;
- high degree of decorativeness
Minus:
- this flooring is not subject to laying in unheated rooms, as well as in rooms with a constant moist regime (kitchen, bathrooms). Under the influence of moisture, the bar is deformed and come into a worthless look.
By operation, the material is divided into the following classes:
- 31 class involves installation in commercial and household premises with a low load;
- Grade 32 is installed in rooms with medium intensity (small offices, corridors, kitchens);
- The 33rd grade is intended for commercial use with high cross -country ability;
- Grade 34 is suitable for styling in large shopping centers, schools, airports and other places with a large cluster of people.
The cost of packaging is in a large price range. It is worth noting that the price has a great influence:
- the thickness of the base (HDF plates), the larger this parameter, the more expensive;
- the thickness of the protective layer, that is, the cost is growing together with the class;
- the presence of additional processing, chamfers, embossing, etc.;
- the price of the material depends on the name of the manufacturer;
- the manufacturer, European production is more expensive than domestic or Chinese.
Laying laminate on a wooden floor
Installation of panels is carried out in 2 ways:
- adhesive method (rare type);
- castle connection (clicking Click locks).
Laminate calculation
- The product is sold packages. A certain area of \u200b\u200bthe coating is indicated on the pack. For the calculation, the total square of the floor is taken, which is divided into square meters of one pack. The result obtained, rounded up, is the number of packages for a particular room.
- When calculating, you should take into account the styling method. With a diagonal layout of the planks and with an even displacement, the material consumption will grow by at least 20%.
The choice of substrate
All the positive properties of the flooring depend on 2 factors: the qualities of the material itself and competent installation. One of the most important points when laying a laminate on a wooden floor is a substrate. When choosing it, you should push back:
- from the thickness and wear resistance of the planks;
- from the presence and size of the base changes;
- the temperature and humid regime of the room.
The layer performs functions such as thermal insulation, sound absorption, moisture absorption, depreciation and leveling of existing irregularities. There are several types:
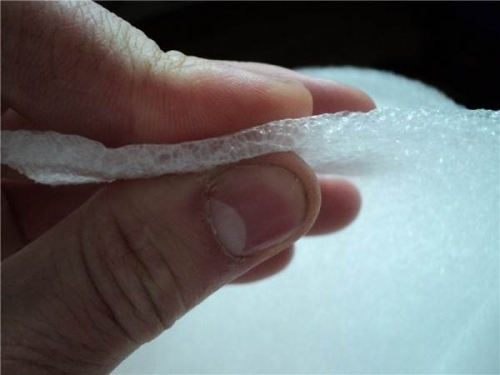
- foamed polypropylene. He is able to hide small changes in the heights of the floor, he is moisture resistant and provides air exchange under the flooring. However, in places of increased patency under the influence of loads over time, the material begins to crush, and as a result, the laminate begins to settle in these areas. The appearance of scripts is the first sign of deformation of the material. Also, among the shortcomings, low soundproofing properties can be noted;
- cork. This substrate has an impressive set of positive qualities. It is durable, in some cases it can perfectly survive the laminate coating, it is not terrible moisture and mold. The obvious advantages include excellent sound absorption and a high degree of softening of the entire flooring when walking. However, after the installation of cork canvases, they must be treated with special compounds, which will reduce the strength of the laminate friction on the substrate;
- foam polystyrene. Extruded polystyrene has a long service life, worthy of resistance to loads, is not afraid of moisture, has high indicators for thermal insulation. However, when burning, this material emits toxic substances, this drawback almost completely crosses out all its advantages. The negative moments include the possibility of flooring only on an even floor.
Warm floor and laminate
The assertion that the system is warm and laminate is fundamentally incompatible. Just the flooring should have the appropriate marking. The index indicates the possibility of exposure to high temperatures on this material without losing its operational qualities.
- Water heating system It is the most time -consuming and costly option. The wiring from the pipes is poured with a concrete screed, this approach prevents the risk of leaks. However, the flooring will require the use of high -class resistance laminate. The obvious plus of this tandem lies in gradual heating, excluding sharp heat strokes on the planks. For uniform heating, it is recommended to have pipes in a spiral or serpentine form. The installed sensors and thermostats will allow you to control the temperature parameters.
- Infrared film floorIt does not expose laminated coating by temperature differences. A heat -cutting material is spread on the draft surface, on top of which an infrared film is laid. The polyethylene membrane will serve as a dividing layer between the heating system and the laminate. Such a floor is universality and is characterized by greater heat transfer. The environmentally friendly and convenient infrared heating system does not affect the durability of the flooring and shows high compatibility with laminated planks.
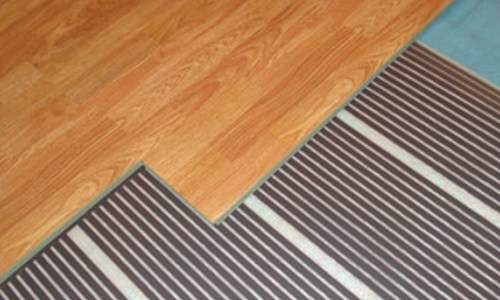
- Electric heating Allows you to quickly dial the desired temperature with subsequent adjustment. In the depths of the sand and cement layer, a low-power cable is securely hidden. Before the flooring of the flooring, a special substrate is laid with a thickness of not more than 3 mm. When the system is turned on, the concrete layer first occurs and only then the laminate. It is not recommended to supply thermal power over 100 W/ sq.m., overheating will lead to cracking of the planks and loosening the locks.
Preparation of an old wooden foundation
Before putting a laminate on a wooden floor, a thorough examination of the floorboards is required. The following results should be here:
- the old coating has no damage in the form of cracks, depressions and bulges. The boards are tightly fitted to each other, without the formation of gaps;
- when walking, there is no creak, and the floorboards will not spring;
- the height difference does not exceed 1 mm per square meter of surface.
Only with such parameters can you start work. After all, not a rigid base will lead to a breakdown of locking joints, and therefore to deformation of the new coating. Moisture will fall through the emerging cracks, which will accelerate the failure of the finishing material.
If the diagnosis has shown that the floors need to correct the shortcomings, then it is performed:
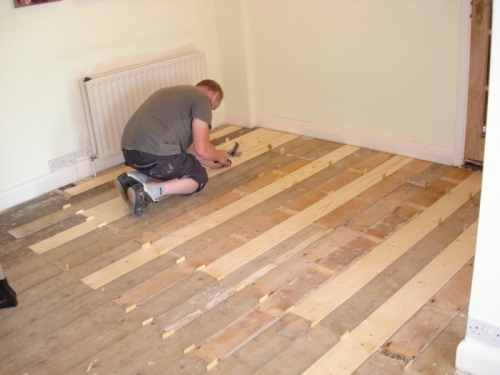
- replacing the rotten floorboards. If damage is superficial, then the dismantled boards simply turn over. With serious defects, they will have to be completely replaced;
- strengthening sagging boards. Rubbed wooden elements are tightly fixed by means of nails or screws. The hats of fasteners are recalled by at least 3 mm from the base surface. Before laying the laminate, the base is cycle;
- lag repair. Construction logs of strong bars must be fixed tightly to the concrete base. To do this, you can use dowels and anchor. The rotten wood is replaced by new bars;
- leveling the surface. With significant changes in heights, the entire floor will have to be dismantled. Clines are inserted under the lags, so that the base becomes as smooth as possible;
- closing the cracks. If there are cracks between strong and stable boards, then they can simply be filled with mounting foam, after drying the excess is cut off with a sharp knife. To cover the gaps, such an option as flooring sheets of fiberboard or chipboard is also used.
Setting the floor horizontal
- A large difference in heights is corrected by means of cycles. The basis is divided into small areas and made appropriate notes. After processing, the surface is checked not only with horizontal, but also the quality of the grinding.
- Small, fragmented irregularities are removed with sandpaper. Cycle equipment can be replaced with an electric rhuban, however, you should monitor protruding fasteners (nails or screws). Their hats are quite capable of damaging the tool.
- For alignment, plywood or sheets made on wood-based. The thickness of the material should be at least 15 mm (the thicker the base, the more reliable). The sheets are mounted is raised. The surface leveling is carried out by placing the rails of the desired thickness.
If the irregularities are visible even with the naked eye, then trying to fix it with plywood or chipboard a waste of money and effort. In this case, it is recommended to dismantle the entire floor, fall asleep with expanded clay and pour a new screed. And then you can lay the sheets.
Choosing plywood or chipboard
The quality of the final coating depends on the leveling material. Therefore, before laying, make sure:
- the sheets were kept at room temperature at least 2 days. A peculiar acclimatization will help adopt the features of the microclimatic regime of the room;
- there are no defects on the surface of the products, and on the ends not signs of stratification;
- working with whole sheets will be convenient. If the equipped room of a small area, then it makes sense to cut the material into squares;
The laying of the material is carried out from the far corner of the room, leaving a gap near the walls. The sheets are fixed with screws with a step of 15 cm. The fasteners are carried out along the perimeter and the center axes.
Laminate installation
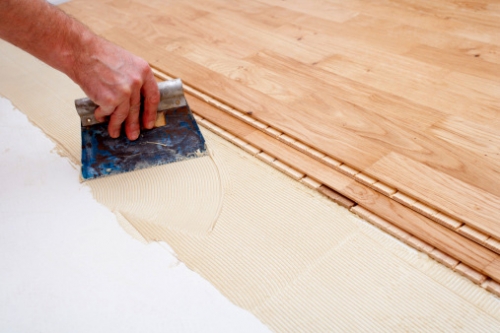
- After all the preparatory work on leveling the surface was carried out, it is thoroughly cleaned of construction debris and dust. The first layer is spread out a plastic film that serves as hydraulic protection. The stripes are overlapping 15-20 cm and with stasis on the walls, the joints are fastened with tape.
- The second layer of the substrate. Any material is laid on both each other and relative to the walls. The seams are also connected by a glue tape.
- The final layer is a laminate; when installing it, a straight or diagonal method is used. The latter option is usually used in rooms of non -standard geometry, in addition, this method allows you to unique the interior as a whole.
- To mask the transition between the laminate and other floor coverings, special accessories are used.
We lay a laminate on a wooden floor in a traditional way
- This method consists in the parallel arrangement of the planks relative to the walls and each other. The work begins with the arrangement of wedges around the perimeter of the room. It can be small pieces of laminate or special devices. At the end of the work, technological gaps will be closed with skirting boards.
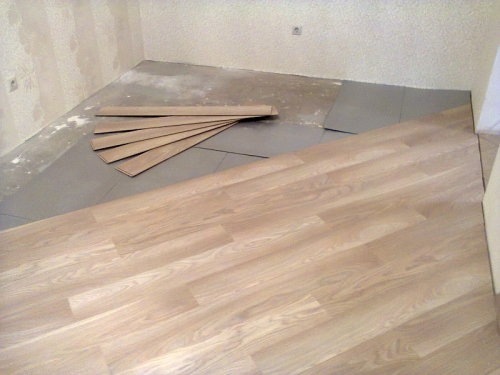
- The first panel is installed in any corner opposite the door, the second element immediately lays down the short side. It is put at an angle of 20-30 relative to the previous bar, and with a light press to a characteristic click, the element drops to the floor.
- Thus, the first row is installed. If necessary, the last plank is cut to the desired size. Here they use a regular hacksaw with a file for metal, as it has small teeth that will not damage the processed bar. The second row begins with the remaining segment. However, it is impossible to use a bar with a length of less than 30 cm.
- When going around the pipes and protruding elements in the planks, holes are drilled or an electric jigsaw is used for curly fitting.
- Installation of the next strip is already carried out on the long side of the laminated material. At a small angle, locking elements are connected, after clicking, the panel is in its place. For a dense styling, a small wooden block, wrapped in a cloth and a hammer, is used.
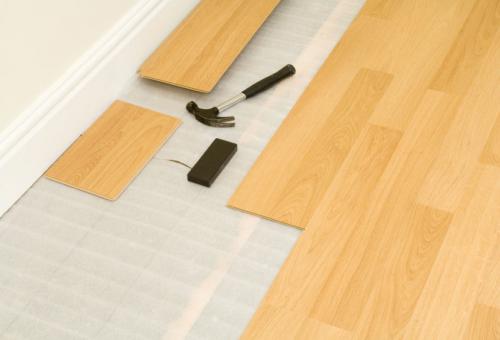
- The bar is attached to the laminate with a long side. With the help of light tapping, the position of each plank is adjusted. Through such manipulations, the whole area is covered. If in the process of the previous strips begin to disperse, put the load on them and continue the installation.
- If it is supposed to lay the coating with the same displacement of the strips, then it should be noted that the consumption of the material will increase significantly.
Laminate on the wooden floor video
We lay a laminate on a wooden floor in a diagonal way
- Diagonal technique is relevant in rooms with uneven walls, and is also used to hide the defects of the layout. Laying will look spectacular in spacious areas with a minimum amount of furniture.
- Such a flooring compared to the traditional way will require more time and effort, and the material consumption will increase by at least 20%. Installation technology does not differ from the parallel method of the same angle of inclination and click of planks.
- For installation, it is necessary to pull the rope between the opposite angles of the room. It will serve as a guideline for the location of the planks. You can use the painting cord, drawing with its help line.
- Laying is made from the window towards the door. The corner bar is cut to the desired dimensions. The row is more by the opposite angle on the short side of the planks. The last element is adjusted to the dimensions. The next strip begins with a cut of the material and already on the long side of the laminate, a row is increased.
- Here, the displacement of the strips is also observed by at least 30-40 cm. This method will give the coating of strength and reduce the risk of its deformation.
If you doubt their abilities or scares the upcoming volume of work, including preliminary alignment of the old wooden floor, invite professionals. Of course, you will have to pay money, but the quality of styling will be guaranteed.

