In the process of choosing building materials for the construction of the garage, foam blocks differ ...
|
|
The active development of technology allows today to create unique construction ... |
The architecture of modern buildings involves a wide variety of aesthetic ... |
Laminate repair: step -by -step instruction
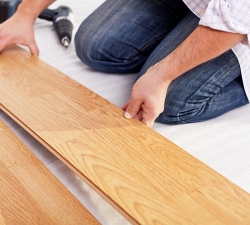
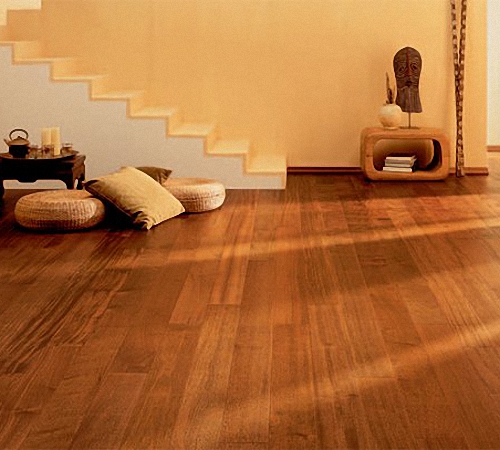
The laminate is a strong and stable coating, but over time the surface can scratch, and probably chips, cracks and swelling will appear. The article presents a step -by -step instruction for repairing various damage to the boards with described recommendations from specialists.
Table of contents:
- How to remove scratches on a laminate
- Replacing the laminate board
- How to remove gaps between laminate boards
- Dismantling and new laminate laying
- Options for solving bloating details of the laminate
- The problem of relaxation of the laminate
How to remove scratches on a laminate
There are many reasons for the appearance of scratches on the laminate, for example, when moving furniture without stands or during the damage of heavy objects to the floor. Even with a very accurate handling of the floor, it is impossible to exclude the appearance of scratches or other damage to the surface. Carrying out the repair of the laminate is not a laborious process, it is only important to follow the instructions and recommendations of specialists.
In order to prevent scratches on the laminate, it is advised to put small rugs under all furniture, especially when moving it. Also, it is not recommended to walk in the room in the room, especially in high -heeled shoes, which can form many different scratches. At the same time, it is necessary to wash and clean the floor with special means that the manufacturer offers.
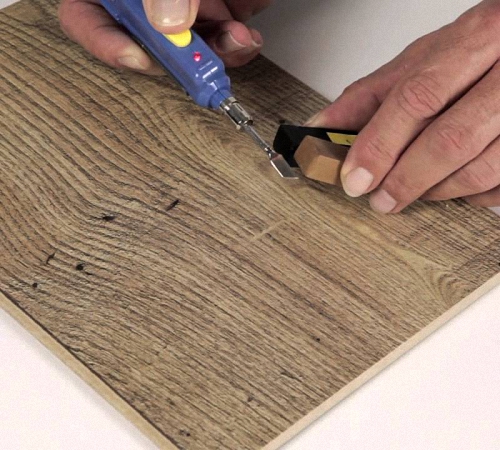
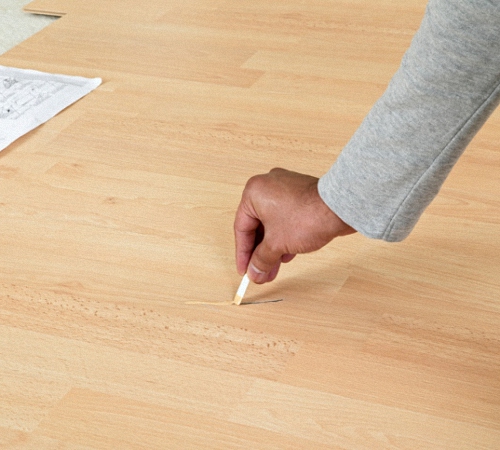
Before starting the repair of the damaged area, analyze the degree of damage. In some cases, different products cannot fix or cover scratches, then it is necessary to replace the laminate board. The simplest and most affordable tool is crayons made of wax, which smear small scratches, and for deeper damage it is recommended to use special putty.
For repair work, it is necessary to apply the following devices:
- ready -made sets for repairing laminate boards;
- a vacuum cleaner;
- putty knife.
Important! The purchased set according to color parameters should meet the shade of flooring. The approximate time of the scratch of scratches is 15 minutes.
Hacking scratches:
1. In the store, it is necessary to purchase a wax crayon, designed to repair a laminate, which must meet the shade of the floor.
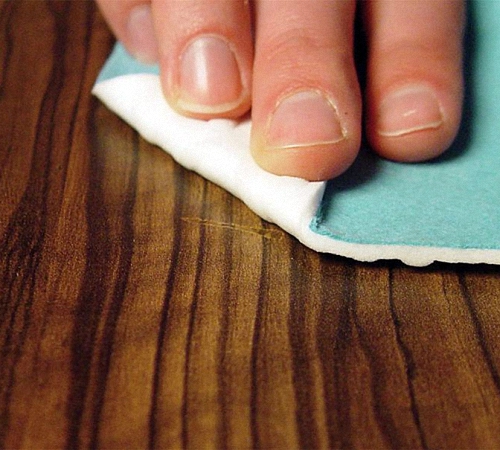
2. The places of scratches must be cleaned of dust using a vacuum cleaner. After that, they can be painted over with crayons. To remove excess wax, it is recommended to use a dry rag and further, to polish the place of damage.
Instructions for the tsarapin with a special putty:
1. In order to choose the right repair kit, you need to go to a store with a piece of laminate board. Next, you should choose a set of a suitable shade, while it is important to find the most accurate color so that the processed area does not stand out.
2. To seal scratches, choose a spatula. For beginners, it is recommended to first practice on a separate part so as not to spoil the flooring. After that, remove excess paste from the surface and set aside the repair area for drying for several hours.
Replacing the laminate board
Sometimes, the repair of the laminate floor cannot be carried out due to huge damage, which cannot be smeared with small or packed with lubrication. Then work is carried out to replace a separate site. The whole process is not difficult if you follow the instructions and use the right tools.
There are several options for replacing a laminate board. The easiest way is the dismantling of details that lead to a damaged place. Choose a place where the scratched board is closest to the wall so that you do not have to disassemble the great area.
First of all, do the dismantling of the plinth, and sequentially disassemble the floor to the problem area. After replacing the board, you can carry out the repair of laminate, and last to install the skirting board in place.
In some cases, getting to the damaged area can be quite difficult. For example, a scratched board can be located in the middle of the room and, with large sizes, the laminate will have to be disassembled for a long time. In this case, there is a separate method that allows you to replace without dismantling the flooring.

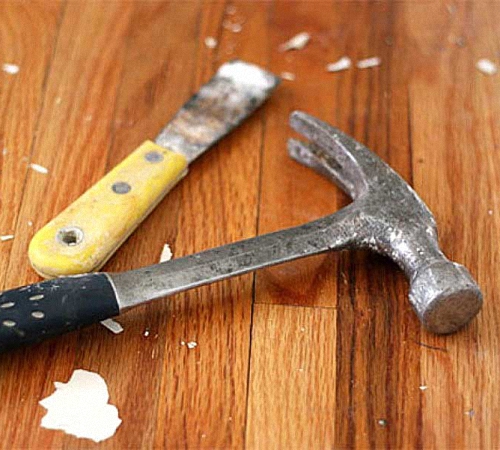
The work performed will require the following tools and materials:
- a new laminate board, which should correspond to the old flooring;
- a circular saw;
- protective glasses for work;
- rubber hammer;
- roulette, cutter;
- a vacuum cleaner for cleaning the workspace.
Important! When cutting a laminate board, you need to wear special glasses so that dust and chips do not get into the eyes. Before starting work on laying new material, it is recommended to vacuum the workspace. All boards should be from one manufacturer and the same brand. In the process, you will have to spend 2 hours on the restoration of one board.
Laminate analysis instructions for replacing the damaged element:
1. It is necessary to carefully remove the baseboard on that wall, which is located closer to the damaged area. It is important to extract the baseboard in such a way that it can be applied for the second time.
2. Next, laminate boards should be dismantled to the damaged area. To carefully disconnect the boards, it is recommended to raise each part 45 degrees until it is released from the grooves.

3. The scratched board must be removed, and a new one is inserted instead. Next, you can fold the boards back, but they should be carefully connected so that there are no intervals.
Step -by -step instructions for repairing a laminate with your own hands using a circular saw:
1. In the damaged laminate, it is necessary to drill four holes along the edges of the board. The distance from the edge should be 1-1.5 cm to prevent damage to other parts. Next, we begin to form holes along the entire length of the damaged laminate every 25 centimeters.
2. All points must be connected conditionally using a pencil, thereby forming a straight line.
3. Set the circular saw so that its thickness corresponds to the size of the laminate.
4. Next, we do it on the line, starting to work from the middle of the board.
5. To cut the smaller side of the laminate, use a small knife and remove the entire inner part of the board.
6. All other elements can be easily removed, and then clean the working area with the use of a vacuum cleaner.
7. Choose a new replacement board, the connecting parts of which need to be cut off with a knife from all sides.
8. A special glue must be applied along the entire perimeter of the board from the back. Put the board in the place of the old one. With the help of a piece of fabric, it is important to wipe the glue that performed on top of the laminate, and place the load so that the board is better to hold out.
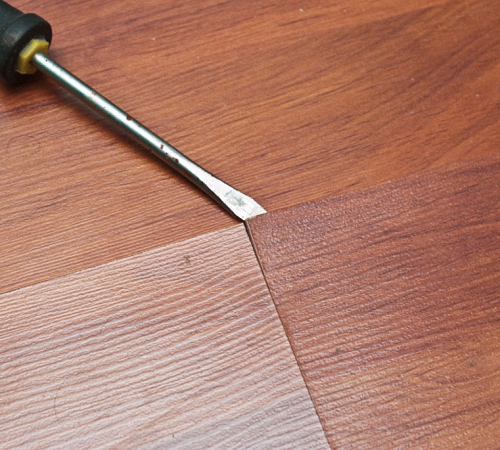
How to remove gaps between laminate boards
Over time, many gaps are formed between the laminate boards, the appearance of which is affected by many factors. The fact is that before repairing the floor of the apartment, it is necessary to adhere to some rules. For example, before laying the initial coating, it is important to acclimatize it, which is one of the main requirements of manufacturers.
Laminate is necessary on a perfectly flat floor, as mentioned in the instructions when purchasing goods. To prevent deviations, it is recommended to use a special level and, of course, make a screed of the floor before laying. Next, it is necessary to remove all the irregularities on the basis. Correctly and professionally laid laminate will not leave gaps between the boards.
If you have a similar problem, then there are two ways to solve all issues:
- the first option is to fill in the cracks with special tools, which is made on the basis of the wood component;
- the second method consists in repeated installation of the entire flooring, only with the following all the rules and recommendations.
Important! Filling the cracks of fillers is allowed if the gaps of small sizes present in it. Otherwise, the laminate will have to be dismantled and lay in a new way.

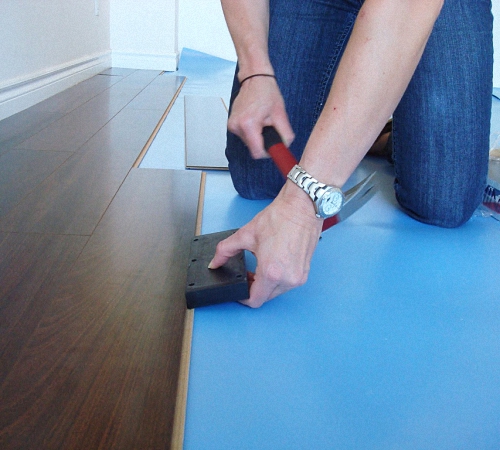
Dismantling and new laminate laying
When you started repairs of laminate tiles and you need to reest and remove all the gaps, pay attention to several factors. When dismantling, it is necessary to view all the boards and check them for quality. If the grooves and crests are in excellent condition, then leave them, and change all the damaged boards to new ones. If this is not done, then in the future this will cause other gaps.
In order to maintain heat in the room and smooth out all uneven sections of the floor, it is recommended to purchase a special substrate for flooring. All material is sold in rolls or sheets, while you can choose an object of different thicknesses and sizes.
With a new styling, try to properly lay all the boards, the joints between which should be perfectly connected. The old boards extracted from the floor should be carefully vacuumed to remove all the dust and other particles. When laying, use a special building level. It is important that the laminate lay down on a flat guide, otherwise with the slightest displacement of the line, gaps will again arise.
If the distance between the elements is more than 2.5 millimeters, then this indicates an increased level of humidity in the room. The laminate is a material that is very susceptible to different temperature fluctuations, which should be taken into account when laying. For this, manufacturers set the requirements for acclimatization.
The method of more reliable fastening of the boards and removal of the gaps can be obtained with the method of applying special glue to the grooves of the laminate. At the same time, it is worth making sure that the boards do not stick to the floor. However, once using such an option, you can already re -disassemble and lay the coating, since the boards will be damaged.
Important! There is a way to reduce the gap between the elements if the laminate is easy to proceed with a boot. However, all actions should be carefully carried out so as not to damage the details and elements of the flooring.
This method is simpler in solving and will not require a long process of analysis of the laminate. Experts recommend using it in cases of altered humidity in the room. In the situation with improper styling, such a procedure will be useless.
Options for solving bloating details of the laminate
Incorrect styling can cause bloating of laminate details, photo - instructions for the correct styling is presented in the article. This is due to the fact that when installing the laminate, the boards are too pushing each other as if they form an inclined joint.
Another reason for the appearance of bloating is the reason in the initial styling. The fact is that the workers do not leave the gaps between the laminate and the wall, and put it closely. As a result, there is no free space to expand or narrow the boards under the influence of moisture and temperature.
In such a situation, the extreme board from the wall must be removed and cut a little along the long side and place it back. The width of the cut can be from 1 to 5 centimeters, from the place of bloating. If this did not work, then find heavy objects and put them on the problem area for one day.
Another reason may be the attachment of a plinth to the base, which does not allow the laminate to expand. It is worth noting that this coating is manifested by a floating floor, and it is not recommended to attach it to some reason.
To avoid similar situations, some specialists between the floor and the wall install special spacers. They allow you to maintain the same distance and do not lead to bloating of the laminate.
Important! If you do not know where to purchase spacers of the same thickness, then you can use cut pieces of laminate and insert them between the wall and boards.
The problem of relaxation of the laminate
One of the problematic situations contributing to damage to the surface of the laminate is to delay it. To prevent this, it is not recommended to wash the floors with water and soap solutions. In stores, special products that clean the surface of the laminate are offered to choose from. For this, the solution is applied to the floor and wiped with a clean dry rag.
If you accidentally pour water on the coating, then you must immediately wipe it with a dry cloth. If you leave everything as it is, then you will only increase the risk of greater stratification of the boards.
There are different methods of damage to the surface of the laminate, which are caused by certain factors. To better understand the process, we recommend watching a video of the laminate repair and carry out all the necessary work to remove damage, bloating or stratification of the flooring. In the article you can find instructions for resolving all issues regarding recovery.
![]()
StrPort construction portal 2011-2018. Articles about repair, construction, building materials.
Copying information from the site is possible only with permission of the editorial office Or indicating a direct link to the source. Legal justification
Very simple, work on
Very simple, almost everyone can do the replacement of a spoiled laminate panel, you only need to stock up on patience and tools. I repaired my floor in 30 minutes!