During the construction of any house, it becomes necessary to use reinforced concrete ...
|
|
To build a building from a cinder block yourself is quite real even an inexperienced newcomer ... |
The technology for the construction of a classic log house made of circle has been formed for centuries, and ... |
How to pour concrete floor
The floor is perceived by many as a ready -made finish coating of linoleum, parquet or ceramic tiles. In fact, it is a multi-level complex pie, which includes concrete ceiling, a steam-hydro-insulating layer, insulation, another steam-hydro-insulating layer, screed and only then a decorative coating. In the article, we consider how to properly pour a concrete floor.
Content:
- Concrete floor filling technology
- Types of wet floor screeds
- Lighthouses for screed
- The correct proportion of concrete for filling the floor
- We warm the concrete floor
- Protection of the concrete base
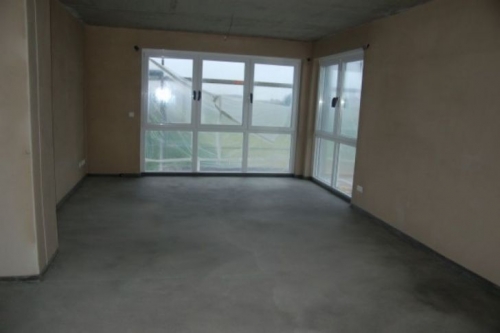
The technology of filling the concrete floor in private houses and apartments varies. In urban conditions, these works are much easier, because initially there are inter -story floors. Therefore, it is enough to perform the so -called screed here, after which the surface is ready for laying the finish coating.
But to make a concrete base in the suburban structure a laborious process. After all, the floor should be not only even, but also warm, and not to miss moisture. In this case, it does not matter whether the black floor is poured or a new surface is formed, the main thing is to adhere to the basic rules for the collection of the solution and observe the technology.
Concrete floor filling technology
Zero level of concrete floor
- The horizontal level is most easily determined by laser levels, but if there is no one, then the usual Waterpas is quite suitable.
- The work begins with the doorway. From the threshold, 1.5 m is measured upwards and a line throughout the room is drawn from this point.

- The same 1.5 m are measured down from it. All risks are sequentially connected by a flat line. The more often they are located, the more accurately the result will be. The lower horizontal will become the level of future sex.
Preparatory work
- Before pouring the concrete floor, it is recommended to remove the upper soil layer to a depth of 35-40 cm. Next, the crushed stone of the fraction of 20x40 mm is filled up, the thickness of the layer should be at least 10 cm. A 10 cm layer of sand is arranged on top of it, which is again covered by crushed stone . Each layer is moistened and trampled by a shovel, a trowel or special equipment.
Important: after the tamping, the thickness of the pillow decreases by about 20-25%, so when arranging it should be taken into account.
- Now there is a turn of waterproofing material, it can be a film or roll type. The membrane is spread over the entire surface, the edges must go to the wall, and above the marked line. All seams are glued with tape. In the same way, the film is fixed on the walls along the perimeter of the room.
- After the arrangement of the finish coating, the edges of the waterproofing material are cut off.
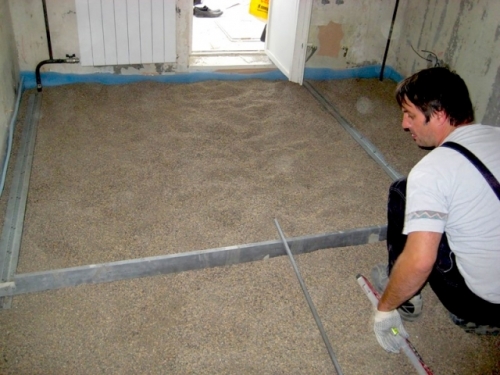
- Ceramzit, impatient popularity due to its characteristics and accessibility, is ideal for insulation. But you can also use plates of basalt wool or polystyrene foam made by extrusion.
- Reinforcement is mandatory, it increases the strength of the concrete base. The metal grid, where the thickness of the rod is at least 4 mm and with cells of 150x150 mm is installed on fitted stones, chairs, and stands.
- If a large load is provided for the floors, then it is better to use the reinforcement of a larger thickness of 10-16 mm.
Lighthouse arrangement
- The beacons are guides, according to which the concrete mixture will be straightened. Any material can be in their quality, the main thing is that it is a hard pipe, profile or wooden rail.
- The guides are arranged as follows. About 20 cm are conceded from the wall and sand-cement mortar is laid out in a line with a step of 30-40 cm. The next row is located at a distance smaller than the length of the rule that will be aligned with the concrete mixture.
- A profile is installed on top of a peculiar structure. If necessary, it is slightly crushed or added a little mixture, achieving absolute horizontal. You should start filling only after the final drying of concrete buns.
- For reliability, you can knock down the formwork, its height should correspond to the level of the future sex and divide it into segments. In principle, the frame is needed with large areas of the premises, when it is not possible to pour the entire surface during the day.
Concrete mixture for pouring floor
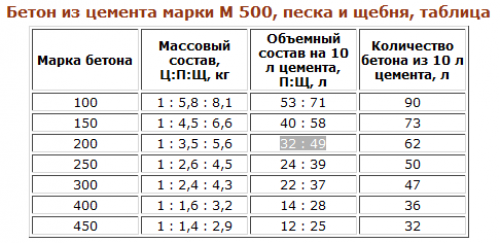
- As a rule, the floors are filled with concrete of brand 200. This species is the most common for such work. It is ideal for individual construction. It is used for strip bases, concrete-armature structures.
- The concrete M200 is based on a fine -grained filler, which, in turn, allows you to not use deep vibrators or vibro -ramps when working. Thus, significantly facilitating the process of work for humans.
Important: use the finished mixture for the first time for a couple of hours. After this time, concrete grabs, excluding the possibility of obtaining an ideal surface.
- The final hardening occurs after 28 days. Good characteristics, as well as the ratio of price and quality make this class of concrete so popular among private homeowners.
- Of course, it is easier to order the required volume from the manufacturer. But if the minimum party, which he is ready to provide too large or there is a kind of barrier that interferes with the entrance of special equipment to the object, then the only way out will be a knead of Beton with his own hands.
- For example, 280 kg of sand, 480 kg of crushed stone or gravel and slightly more than 50 liters of water, for 2 bags of cement M400 M400 per 50 kg. As a result, it will turn out about 900 kg or 0, 4 m of the mixture.
- To calculate how much concrete will be needed for a certain area can be as follows:
- the area is multiplied by the thickness of the fill. For example, the area of \u200b\u200bthe room is 35 m, it is planned to perform 15 cm layer of concrete. This means that 35 mx0.15 m \u003d 5.25 m of the mixture is necessary for this room.
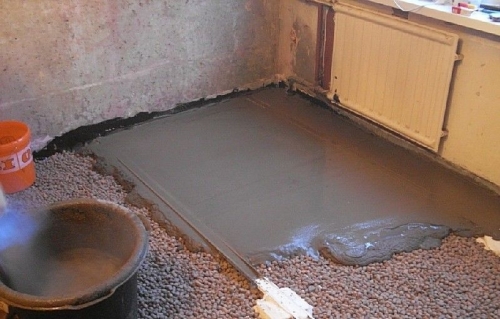
Pour the base of the floor
- The concrete mixture should not fit close to the walls; in this situation, a damping tape glued on the protruding surfaces will help. Pouring is made from the farthest corner, heading for the exit.

- The mixture is leveled and trimmed by means of a special vibrator or often pierced with a trowel, a segment of the reinforcement. Concrete is added to the voids.
- The rule should be controlled by smooth movements from side to side, moving strictly along the guides.
- The finished base for a week is wetted with water and covered with a film. Because the rapid drying of concrete leads to its cracking, and therefore to a decrease in its strength characteristics.
Floor screed work
- Determination of the zero level is made by almost the same method as for filling the concrete base. The height of the beat is also carried out, starting from 1.5 m. It is from this level that they are repelled in further calculus.
- Now the maximum height difference is revealed. The height from the zero line to the existing base is measured. The results can be fixed directly on the wall.
- But, if it is planned to glue the surfaces with wallpaper or plastered the walls and cover them with water-dispersion paint, then it is not recommended to use a bright marker for recordings. He will certainly show himself on a new coating.
- Next, the indications are compared, for example, the maximum value is 1.52 m, and the minimum is 1.45 m, which means that the difference is 70 mm. Upon receipt of more modest values, remember: it is impossible to fill the floor with less than 30 mm, such a surface will quickly crack and crumble.
- However, the exception is a polymer coating. A special self -leveling composition is selected depending on the outgoing information indicated on the package. The manufacturer indicates the maximum and minimum value of the thickness of the mixture layer.

- Sometimes in one room in different rooms, various flooring are laid. So, for example, in the lobby of a parquet board or laminate, in the bathrooms ceramics, in the bedrooms of the carpet. Therefore, when calculating the level of screed, it is necessary to take into account not only the thickness of the material, but also the previous layers: cement glue, mastic, substrates, etc.
Tip: for laying a parquet board: plywood 10 mm + layer of mastic or glue 2-3 mm + Parquet itself from 8 to 22 mm. When installing ceramic tiles, the thickness of the product and glue is taken into account, respectively, 8-11 m + 4-5 mm solution.
- It is worth focusing on the following, the thickness of the parquet cake remains almost unchanged, but with the thickness of the adhesive solution for ceramic tiles you can still play.
Types of wet floor screeds
This kind of screed is divided into 4 subspecies, which differ among themselves by the device and the organization of the process:
- With reinforcement.This option is usually used in apartments, where it is necessary to make a flooring on reinforced concrete slabs. The metal grid in plates or rolls is installed on the supports, then completely covered with the prepared mixture. To do this, you can take a grid with rods of 4 mm and cells 10x10 or 15x15 cm. The reinforcement should not rest against the walls. A concrete layer that covers the frame at least 5 cm.
- With waterproofing. This species is recommended for rooms with high humidity, where there is always a risk of flooding (bathrooms, kitchen). It is used when pouring floors in apartments on the first floors, because the floor often borders on the basement or private buildings to protect housing from the cold coming from the cellar. Hydrosthelizol, an ordinary rolled roofing material or other bitumen-polymer material is spread over the surface of an overlap and with a mandatory setup on the walls.

- With thermal insulation. When the soil is made, in this case it is better to lay the thermal insulation membrane. In addition, this method is relevant if the warm floor is equipped. Then all heat will rise up, and not heat the soil. A layer of expanded clay (at least 10 cm) of a 5x20 mm fraction is suitable here or you can use extruded polystyrene foam plate with a thickness of at least 50 mm.
Lighthouses for screed
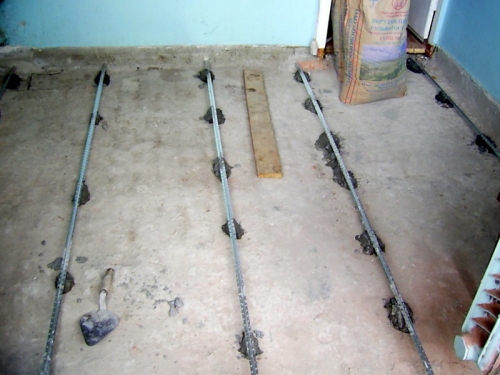
- Lighthouses are mounted on the same principle as for a concrete foundation. Only for reliability in the floor with the help of a perforator, holes for the dowel are drilled.
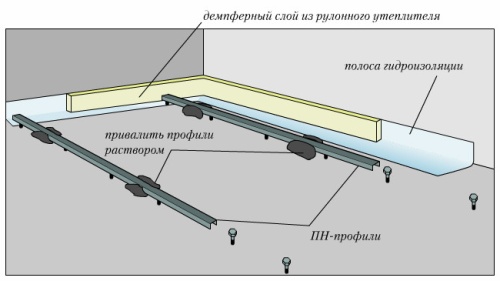
Important: the screws are not screwed to the end, their height is regulated in accordance with the marking of the zero level.
- The metizes are installed in one line with a step of 60-80 cm. A mixture prepared in the same way as for filling the floor is laid out between the screws with some slaps.
- Subsequent lines for guides are made similarly. The distance between them should be less than the length of the rail, which the solution will be leveled.
- At the points where there is a maximum difference, it is recommended to make the formwork in order to avoid the penetration of the solution into another screed area.
- Of course, you can greatly simplify your task if the guides are set only on the solution, but still with screws it will turn out more reliable. You should not refuse at all, even if the area of \u200b\u200bthe room is very small.
The correct proportion of concrete for filling the floor
- The recommended layer thickness is 40-50 mm, and the laying area is about 20 m. Such parameters contribute to the uniform distribution and drying of the mixture. With an independent batch of a concrete mixture, it is important to observe the ratio of the source materials.
- Usually for these purposes, concrete with a strength of at least 200 kg/m is used. This solution is obtained when mixing cement M400 with sand in a ratio of 1: 2.8. So, 10 kg of cement is needed for 28 kg of sand. If the M500 cement is used, then the sand should be 3-3.5 parts, respectively, 10 kg will take 30-35 kg of dressing room.
- The amount of water for the preparation of the mixture is always exactly half of the volume of cement, that is, the ratio in any case will be 1: 0.5.
- How to find out how many solution will be needed for a certain room, it is necessary to multiply its area by the thickness of the screed. For example, a room of 5x4 m is poured, the estimated layer thickness is 4 cm, which means 20 mx0.04 \u003d 0.8 m.
- When calculating, you can rely on the following data:
- from the cement of the M400 50 kg (average weight of a conventional bag) plus 140 kg of the dressing room and 25 liters of water (the required amount to observe the proportion) will be 215 kg or 0.144 m of the mixture.
- for the same amount of cement, but with a brand 500, 35 kg of sand is taken and again 25 liters of water. As a result, 560 kg of 0.374 m of the finished solution.
We warm the concrete floor
Despite the increase in the price of pouring the concrete floor, it needs mandatory insulation. This is especially true for apartments of new buildings. Thus, significant heat loss, and, accordingly, the formation of condensate, leading to the development of mold, can be avoided.
Insulation is carried out in 2 ways:
- the most popular method is the flooring of special materials on the finished concrete base;
- less commonly, the option used consists of mounting the frame (lag).
The heat -insulating product should have the following properties: low weight, low thermal conductivity, high coefficient of compression strength, and, of course, moisture resistance. After all, no one is safe from flooding.
Work and nuances for laying thermal insulation materials
- Preparatory measures are to close up all cracks and recesses, removing tubercles and final grinding of the surface. Work is considered completed when the concrete floor becomes even, clean and dry.
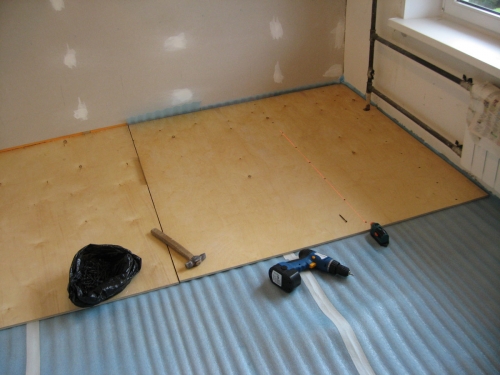
- As a heater, you can use chipboard 22 mm thick. Such material also has soundproofing properties. Before making it installation, a plastic film that protects the wood-and-wrapping product from moisture in concrete is laid on the base.
- Plates must be placed in disadvantage, cross -shaped seams are unacceptable. A gap of at least 15 mm, which is fixed by wedges, should remain between the material and the wall. A plaster mesh is laid on the joints, a putty is applied on top, mixed with a small amount of oil paint.
- You can apply more expensive material cork plates, characterized by moisture resistance, a high heat -saving coefficient. The optimal plate thickness is 10 mm. Such a coating can be equipped with a castle connection or mounted on the adhesive composition. The styling technology is similar to the installation of chipboard.
- If the housing is initially warm, then an isolon, which is more often used as a substrate for laminate and parquet board, can serve as an additional insulation. The foamed structure provides heat and sound insulation. It is spread over the entire surface, all seams are glued and strengthened by foil tape. On top of it you can spread the carpet, linoleum or mount the same parquet.
- If it was preferred to insulate with the help of lag, remember, this method is rational for rooms with high ceilings. Since the floor will rise by at least 30-40 cm.
- The surface is covered with waterproofing film. The forest treated with an antiseptic is installed parallel to the window. The horizontal level of wood is must be checked.
- The distance between lumber should be no more than 60 cm. Intermediate lags are mounted with a step of 40-50 cm. Mineral or foam plates are placed in the resulting honeycombs. The frame is covered with plywood, chipboard or a plank floor is creeping. Next is the turn of the main flooring.
Protection of the concrete base
- Speaking about such a material as concrete, the idea that he needed protection, but, nevertheless, this is so. After some time, the concrete floor begins to dust, crack, sprinkle, which contributes to the rapid process of destruction. It is worth noting that the brand of the strength of cement does not play a special role.
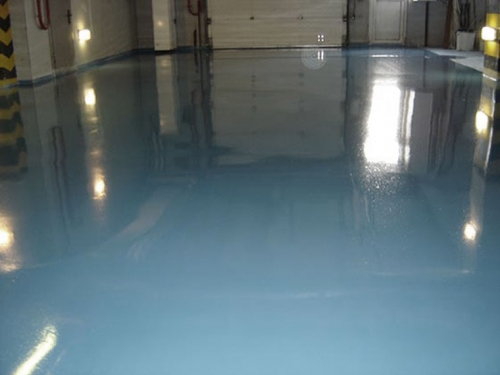
- The technology for pouring industrial concrete floor in production facilities, garages, in warehouses and so on implies the use of polyurethane varnish. It penetrates deep into the screed and forms a protective film, increasing the strength of the surface. The color of the floor can be changed by performing varnish tint.
The floor in apartments, office premises, schools, kindergartens are poured with a special composition on a polymer basis. The so -called bulk floors seal the surface, forming the durable, resistant to mechanical influences coating. The shade can also be selected for any interior, by the way, you can purchase a novelty with a 3D effect, however, the cost of filling such a concrete floor will be significantly higher.

