Installing the fence on brick pillars is distinguished primarily by good ...
|
|
Any private plot of land needs to be surrounded by a fence. Sometimes he performs ... |
The living attic is called an attic. It should be warm and suitable for ... |
How to update tiles
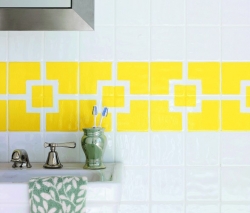
Almost every interior element in the house lends itself to renewal. Of course, breathing new life into furniture, textiles and decorative accessories are not difficult. But what about the durable decoration of tile and ceramic tiles?
Over time, even the most interesting interior annoying, tastes and fashion are changing, bright colors burn out, and there is a desire to update the room. At the same time, I do not want to turn the house into a dusty construction facility and pay for expensive repair work. An alternative to the complete replacement of the tiles its update, which can be performed in different ways.
- How to update old tiles: available options
- Update the seams
- Partial replacement of tiles
- Decorating old tiles
- Complete reproaching tiles
How to update old tiles: available options
It is quite possible to improve the appearance of the tile and transform the kitchen or bathroom, without resorting to overhaul. Designers advise not to rush to knock down the old tile coating, but to work on its update. It is enough to use one of the tested methods:
- Update the inter -seams.
- Replace damaged sections of finishing material.
- Select original stickers and apply them to the old tile.
- Draw unusual patterns on the surface.
- Complete the tile surface.
Some methods require more skills and material costs, others are less. The choice of how to update ceramic tiles depends on the desired result: a complete transformation of the interior or refreshing the design of the room. Consider each of the methods of restoration of tiles in detail.
Update the seams
The perception of wall tiles and floor tiles is greatly influenced by a neat grout of the seams. Cleaning tiles with abrasive substances, the appearance of fungi and mold have a negative effect on the coating, and inter -seams lose their expressiveness. On the grout of the kitchen tiles, soot, fat, dust settle, and as if not thoroughly washed the apron above the working surface, the space between the seams loses its appearance, rinses, cracks.
The seams can be restored partially or completely replaced.
Switch renewal procedure:
- Remove the stream of grout from the seams. You must act very carefully so as not to damage the tile itself. A construction knife is suitable for wrapping the grout. It is better not to use the risk of damage to the edges of the tile. You can use a special means to soften the grout. After applying the composition (after 2-3 minutes), the grout will become soft, like a toothpaste, and it will be very simple to remove it.
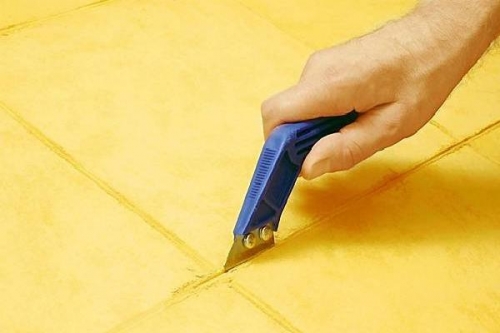
- After removing the grout, the coating must be washed, cleaned and dried.
- Prepare a new grout and apply the resulting mass in a new way.
- Clean the tile from the remnants of the grout.
Advice. Designers recommend using grouting, contrasting with the main surface of the surface. Experimenting with color, it will be possible to update the tiles of tile to recognition
For the restoration of inter -seams, it is not necessary to remove the old grout. You can use this method:
- Clean the seams of dirt with a detergent and a hard brush.
- The bluish and black spots should be additionally treated with a weak solution of vinegar.
- Rinse the surface of the tile with water and dry.
- The gaps between the tiles are painted with a marker or suture paints.
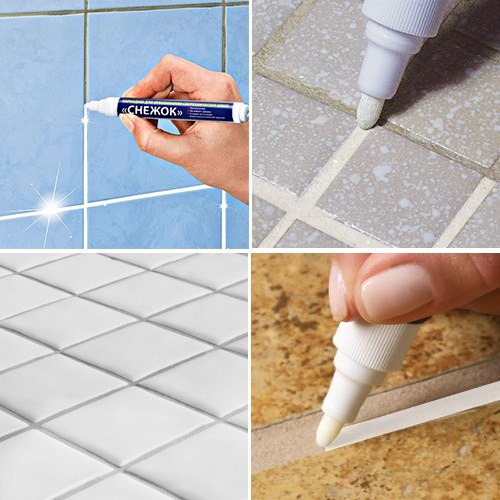
Important! Switch painting is a simple way to update the tile coating. The full replacement of the grout is longer, but at the same time, a more durable restoration method
Partial replacement of tiles
A broken, faded or damaged tile will have to be replaced by a new one. This work often has to be done with floor tiles located on the porch of the house, in the corridor or kitchen.
When changing spoiled tiles, you should not immediately take a bit or chisel. In order not to spoil entire neighboring elements, you must act gradually:
- Peel the seams around the broken tiles with a specialized scraper.
- In the center of the tiles, drill a pair of holes using a concrete drill.
- Gently remove the central part of the tiles with a chisel. Knock the remaining parts in the direction from the center to the edges.
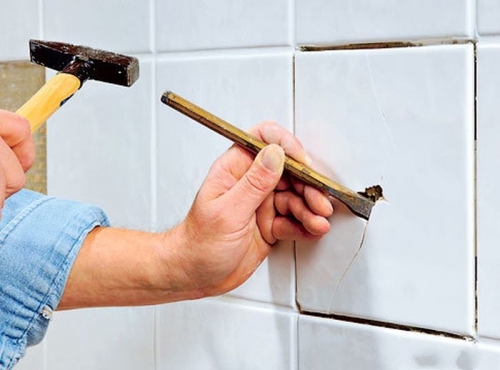
- Clean the surface where the old tile was located to remove the grout and the remaining glue.
- Try a new tile. It must accurately correspond to the size of the previous one so that the thickness of the seams between the tiles remains the same.
- Apply tile glue to the prepared tiles and attach it to the empty section of the wall or floor.
- Cross the glued tiles on the sides of the crosses.
- Visually evaluate the correspondence of the new tile with the total color scheme of the wall/floor.
- Remove crosses when tile glue dries.
- Choose the desired color of the grout and fill the seams with a mass between new tiles and old elements.
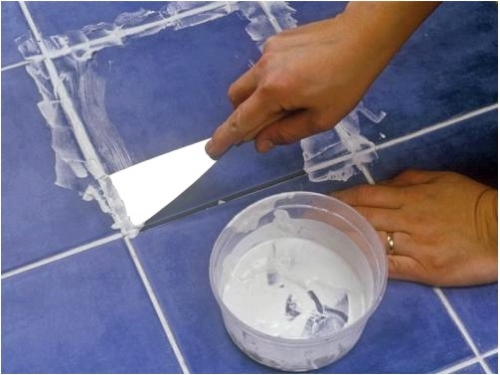
- When the grout dries wipe the tile with a damp cloth and clean the surface of the remains of the grout.
Decorating old tiles
Using vinyl stickers
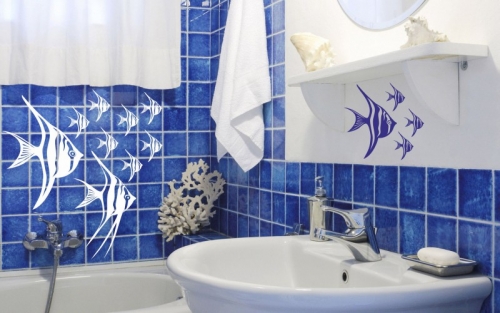
You can update the tiles in the kitchen or in the bathroom using special stickers. The material has many interpretations and color solutions. The advantages of using decorative stickers include:
- a wide range of drawings, textures and materials of the execution of stickers;
- resistance to humidity and temperature fluctuations;
- resistance to aggressive environments;
- the ability to order a sticker according to an individual, your own sketch;
- simplicity of care;
- long -term preservation of an attractive appearance.
Vinyl stickers for tiles: photo
When choosing a self -adhesive coating, the following parameters must be taken into account:
- Production material:
- silicone stickers are translucent and transparent, dense and soft; the material tolerates moisture well;
- vinyl stickers have a variety of patterns, colors and shapes; They are well glued and very durable with proper application.
- The individuality of the picture. Of course, the choice of ready -made stickers is very large, but you always want to emphasize the individuality of its room with an exclusive element. How to do it?
- on paper, draw an approximate image or choose a thematic photo on the Internet;
- find a small -scale enterprise (a large company is unlikely to take up the implementation of a single project); It is desirable that the sticker is printed on a large format or interior plotter with solvent paints;
- make a layout in a graphic editor (a manufacturer can take this work on itself);
- send a prisoner;
- the finished sticker will need to be cut and applied to the wall.
- The compatibility of stickers and tiles. Here are some recommendations that will help you choose stickers that are optimally combined with tiles and interior of the room as a whole:
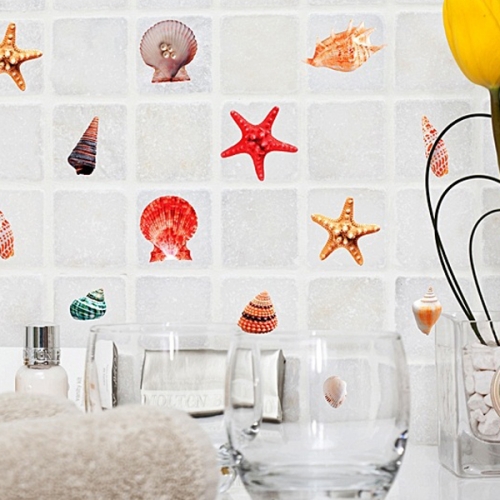
- when choosing a decor for the bathroom/kitchen in natural colors, you can look at the color of the flowers will understand the correct, natural combination of tones;
- it should be remembered about the reasonable contrast of colors on the dark surface that light elements, and vice versa;
- using drawings, monograms and ornaments, you can connect the interior elements incompatible in shades and, as a result, get an organic, finished picture.
We describe step by step how to update the tile in the bathroom using decorative stickers:
- The surface of the tile must be degreased and washed. For this work, ordinary toilet soap or dishwashing liquid is suitable.
- Wipe the tiles dry. The glued surface must be dried, otherwise the sticker is quickly peeled off, but it will not work to re -glue it.
- Apply the sticker to the wall and choose the most successful location.
- A small sticker can be immediately glued to the tile. Remove the protective paper, attach with the sticky side to the surface of the wall and smooth out with a soft cloth in the direction from the center to the edges.
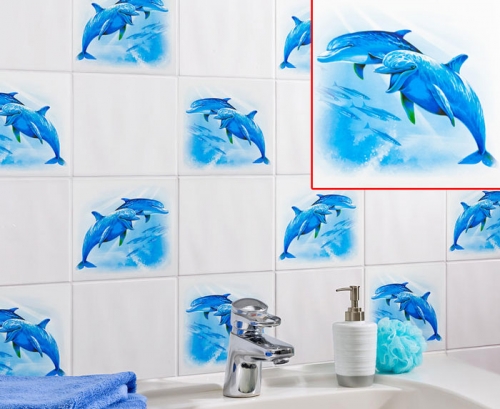
- It is advisable to first transfer a large sticker with thin edges to the mounting transparent film.
- put the sticker on a flat surface and smooth the folds;
- apply on the sticker the mounting film the drawing should be on the sticky side of polyethylene;
- gently remove protective paper from the stickers;
- apply the drawing to the selected place of the wall, smooth the sticker and carefully remove the mounting film.
Advice. Sticking care is very simple. It is enough periodically wipe it with a sponge with a detergent. It is desirable that in the composition of the cleaning substance there are no abrasive particles that can scratch the film and ruin the pattern
Manual painting of tiles
Hand painting looks creative on tiles. It can be performed in two ways: apply a pattern without a template or use a stencil.
Important! The painting without a stencil is more likely to be able to people with professional artistic skills. It is better to use the template for home craftsmen this will greatly facilitate the work and help to avoid errors when applying for a picture
To create a stencil and apply the pattern on the tiles, the following tools and materials will be needed:
- cardboard of minimum thickness or laminated film for creating a stencil;
- lining material for cutting a stencil;
- deep penetration (moisture resistant);
- paper adhesive tape;
- aerosol glue;
- acrylic or water-dispersion latex paint is suitable for ceramics;
- lips and brushes are different thicknesses;
- sandpaper (fine -grained);
- hard brush;
- cleaning remedy;
- side solution can be used alcohol;
- marker and pencil;
- a knife for cutting cardboard.
The creation of the template is performed in several stages:
- Select a drawing or pattern. Do not use complex ornaments with many small details. They cannot be drawn clearly on the tile and the image will seem blurry.
- Turn the drawing to a laminated film/cardboard by laying tracing paper.
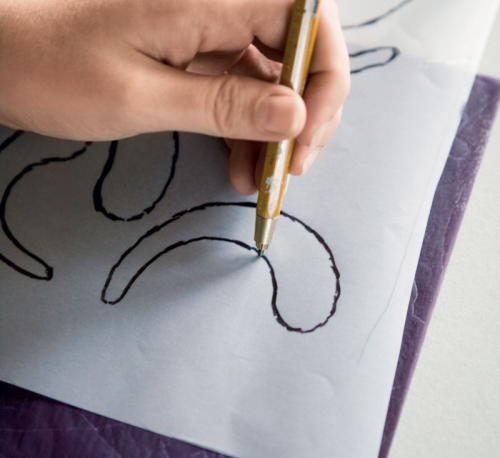
- Cut the marking pattern.
- Prepare a couple of copies of one drawing.
Approaching the drawing with paints to ceramic tiles:
- Prepare the surface:
- clean the tile with a rough brush and sponge with a detergent;
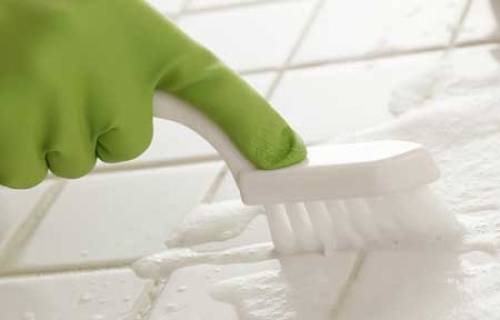
- rinse with water;
- the surface of the coating is treated with sandpaper until a slight roughness appears;
- remove the remains of dust with a wide brush or rag;
- wipe the tiles with a degreasing solution;
- dry the surface;
- glue ceramic tiles;
- wait for the full drying of the primer.
- clean the tile with a rough brush and sponge with a detergent;
- Attach the template to the wall. To do this, you can use adhesive tape or aerosol glue.
- Pencil to apply the contour of the pattern.
- Circle the circuit corresponding to the color of the pattern.
- The technique of applying the paint is point, the brush must be kept at right angles to the surface of the tile.
- Wait for the contour drying out (about 30 minutes).
- Fill in the inner part of the pattern.
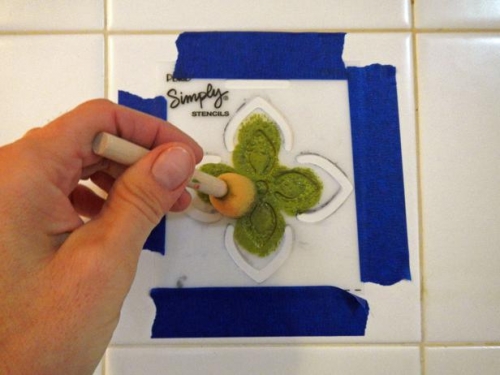
- When applying for a painting, it is advisable to use not only a brush, but also a sponge. Smops differ and are created by interesting visual effects, and the whole image is more attractive and interesting.
- If the picture was applied not pointwise, but with strokes, then you need to repeat the painting procedure 2-3 times.
- Wait for the entire pattern to dry and remove the stencil.
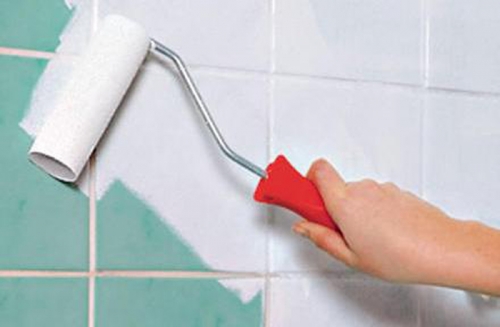
Breaking tiles
For painting tiles, you will need paint for ceramic products or universal paint, for example, acrylic. In addition, it is necessary to prepare epoxy primer, fine sandpaper, brush and roller.
The process of repainting the tiles occurs in several stages:
- Peel the tile. There should not be fat spots, yellow plaque and visible pollution on the surface.
- Stir the surface with sandpaper.
- Cover the tile evenly with a primer.
- After hardening, the epoxy primer turns into a strong film, which must be a little cleaned with fine -grained sandpaper. On a rough surface, paint will lie more evenly.
- Apply the first layer of paint, let it dry and repeat staining. Usually the paint is applied in 3 layers.
- After drying the last layer of paint, the tile should be washed with soapy solution and rinsed with clean water.
Updating the tiles in the bathroom or in the kitchen is quite simple. You can use the simplest method to stick stickers, or replace the seams or decorate the decoration with painting. The choice depends on the personal wishes of everyone, the presence of free time and the condition of the old tile coating.

My wife and I decided
Recently, my wife and I decided to make repairs in the kitchen, and capital. When it came to the replacement of the mixer, I tried to look for a suitable in online stores and accidentally found the site http: // Republicsmansa.rf/. After looking at the whole catalog, I stopped at Blanco Fontas granite. I ordered it on this site. They delivered it to me in a short time. It turned out to be very convenient in use, the quality also pleased, plus a beautiful, original design. I liked the wide range of colors.