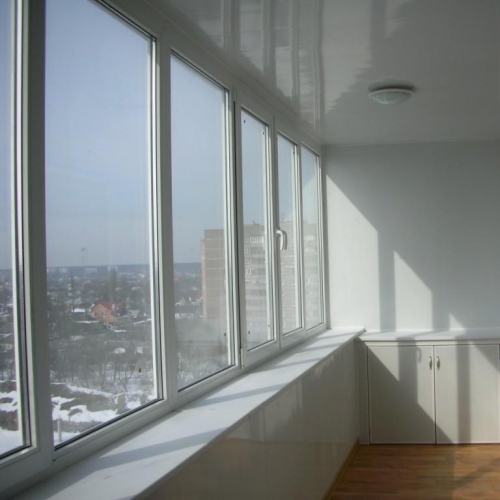
Lodge is the best option for continuing the apartment at the junction with open spaces ...
|
|
To insulate in the house the floors on the ground floor is a mandatory task. She can not... |
During the construction or during a thorough repair, the question arises of ... |
How to install plastic balconies with your own hands
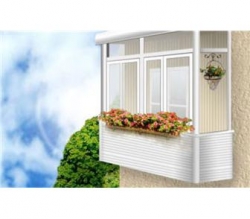
When the balcony requires a capital repair, it is important to think over everything. This is a new glazing, internal and external sheathing, window sills and threshold. Of course, I want to do everything beautifully, durable and at the same time not very costly. Such modern material as plastic meets all these requirements. It creates beautiful and modern coatings that serve for decades. The article will talk about the finish of the balcony with plastic.
Content:
- Plastic materials for external balcony skin
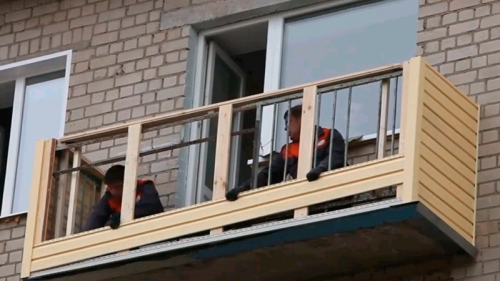
- Install a plastic balcony from siding with your own hands
- Install plastic windows on the balcony
- How to install a plastic windowsill on the balcony
- How to install a plastic threshold on the balcony
Plastic materials for external balcony skin
Lodges and plastic balconies are increasingly popular and supplant the classic wooden casing. This is due to a number of factors:
- simple and easy to sheathed even on your own:
- low cost of materials;
- a large range of colors, shapes and textures;
- long life without additional care.
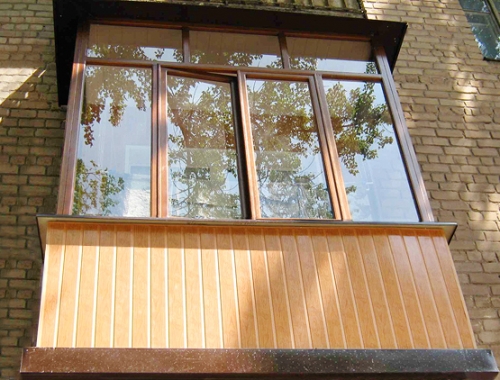
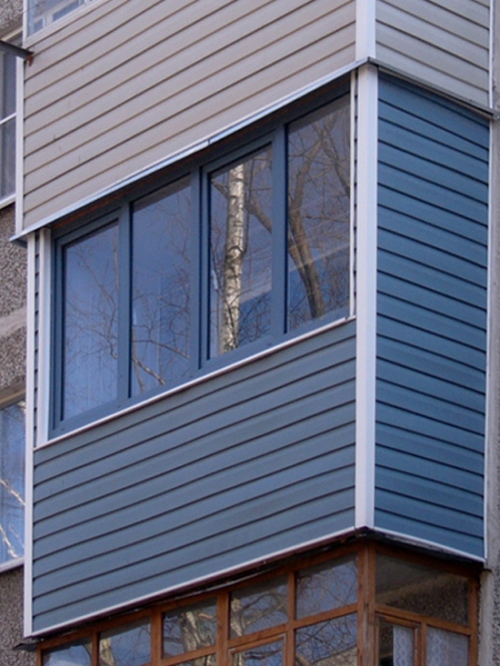
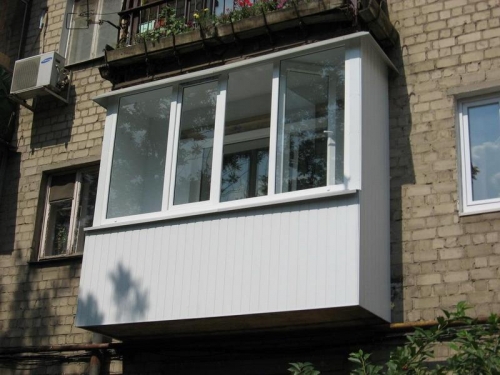
Plastic loggia photo
Tip: When choosing siding for a balcony located on the south side, it is not recommended to use bright colors. Over the years, they will fade and the difference in several tones with side parts will appear.
Plastic siding
- It imitates a wooden lining in shape and texture. More expensive models have a pattern resembling natural material. These are inexpensive inexpensive panels having a groove/crest system. Each bar imitates the connection of two or three wagons, due to which installation is made easily and quickly.
- It creates a vapor -permeable coating and requires the arrangement of a ventilated facade. Properly installed, it will become a decoration of the balcony for many years.
- Dust and other pollution on the balcony, sheathed with plastic, is easily washed off by rain.
- This material is not afraid of atmospheric influence and is not subject to it in any way. Therefore, it is recommended for lining the outer walls of loggias and balconies.
Plastic panels
- Made of extrusion polyvinyl chloride, they have sufficient strength to be used for external cladding of the balcony or loggia. Save its color, even with constant exposure to ultraviolet radiation, special lamination of panels helps.
- More recently, it was a boring, devoid of aesthetics cheap coating. But modern lamellas are distinguished by a variety of not only color variations, but also textures, as well as imitation of natural materials.
- Plastic panels are especially suitable for balconies. Coming to lively streets or motorways, devoid of greenery. Since they have an antistatic coating that repulses dust and easily washing rain.
Tip: When buying in the store, you need to make sure that the plastic panels are designed specifically for external work.
Advantages of the lining of the balcony with plastic
- Although siding belongs to the line of goods of the middle price category, its installation by experts is not cheap. Thus, when ordering the casing of the balcony in the company, its total cost will be quite high. It is for this reason that many are trying to carry out work on their own, and the family budget is practically doubled.
- It will not be difficult to mount the material itself and the crate to it, the main difficulty lies in high -rise work. It is convenient if a regular balcony in Khrushchev is glazed, which has a fence made of metal rods. Then everything can be done from the inside. It is much more complicated if you need to sheathe the loggia, whose wall is made of monolithic masonry. In this case, you need to stock up on a special high -altitude equipment or a safety cable with a reliable carbine.
Install a plastic balcony from siding with your own hands
- Siding is convenient in that it has special additional elements, thanks to which it is easily attached and does not require additional fitting of corners and other places of joints. First, the external dimensions of the balcony are measured, the quantity and length of the external and internal angles, as well as the finish and starting planks, are calculated. For window facing, a special F-figurative and J shame for the junction of the balcony with the wall of the house is used. The length of the standard panel is 3 m, this is quite enough to make a seamless coating, but if the joints are inevitable, then separate connecting profiles are bought for them.
- The size of the balcony is quite small, so it is most convenient for the correct calculations to draw its drawing with all sizes and already calculate the desired amount of siding and components on it. It is recommended to buy with a margin of 10 % more. But siding is sold only in packs, so additional panels will be in any case.
Necessary tools:
- bulgarian for cutting siding;
- marker;
- level;
- roulette;
- punch;
- screwdriver;
- reiki with a section of 3x4 cm for a crate;
- if the balcony is insulated, then a vapor barrier film;
- fasteners.
Balcony lining with siding. Stages of work
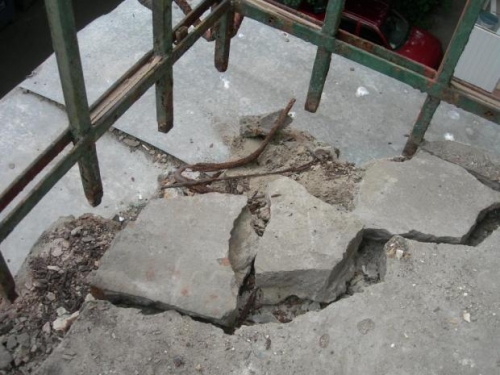
- By the time of fastening the racks of the crate, the concrete slab and its fences should be examined and, if necessary, repaired. Cracks in concrete are poured with a solution with additional reinforcement, and all metal elements are boiled or additionally strengthened. When the concrete base was damaged very much, for example, the reinforcement was crushed and the reinforcement became visible, the metal corner is boiled along its perimeter as an armored one and everything is poured with concrete solution.
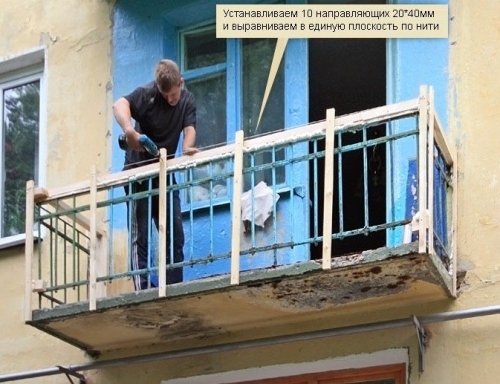
- It is easier and cheaper to make a crate from wooden bars. Thanks to the formed vents, they will last many years. The guides of the frame are placed perpendicular to panels. So, with their horizontal location, the crate is only vertical rails.
- First of all, the upper and lower horizontal rails for the finish and starting profile, respectively, are attached. This is done around the entire perimeter of the balcony. Then the vertical rails are attached with a step of 40-60 cm. That is, only three guides are placed for the lateral part: two in the corners and one in the center. For the central part, two are enough in the corners and four in the center. Each time, the vertical and horizontal of the structural element is checked. Even a slight inaccuracy when facing will lead to distortion and inconsistencies of parts.
- Initially, angular dobages are attached. Having measured the desired length in advance, they are cut off with scissors for metal or a grinder. Then, having vertically set up the level, they first attach one side of this profile. Only after making sure that it is standing absolutely evenly, you can fix the second side. Since the plastic siding is quite soft and easily overwhelms, the second side is also put by the profile, and, pulling up or pressing in the right places, they begin to be attached alternately over the entire height.
- In the same way, J-shaped profiles are placed at joints with walls.
- Now they also carefully put the starting bar at the very bottom. It represents a rather thin strip of plastic, which is easily bends. Having cut off the desired size (so that it enters the corner profile, but at the same time remains even without waves), it is fixed, below maintaining the level at the same time checking its correct location.
- Fixing siding itself is more convenient starting from the central part. It is recommended to check the length of each panel before cutting. It is equal to the distance between the corner profiles with a small allowance to be inserted into them.
- The first panel is fixed behind the starting bar, so that it is completely closed. Sometimes for fixation you have to apply physical effort in the form of light pressure or tapping the palm from the bottom up. This is due to the fact that the connection of the panels is quite tight, and it is necessary to achieve complete snap. It is important not to damage the material, since a dent will remain from too strong pressure that cannot be fixed. It is attached to self -tapping screws to each rake of the frame. Further, on a similar principle, all facing are established. The last bar is cut off along the length so that it fits tightly under the windowsill. Turning to the sheathing of the side parts must be watched so that the drawing completely coincides.
- If there are places of joints on the balcony, then an additional mortgage rack is screwed in this place, and a connecting profile is placed on it. And each of the panels will be started into a corner and connecting guide.
Install a plastic balcony video
Install plastic windows on the balcony
- The next important step in the repair of Kon will be the installation of plastic windows. The first step is to be determined with the design. Whether the side sash will be deaf or it will be panoramic glazing on the floor. It is also determined which windows will open and the presence of micro -spacing. Further, using a long roulette, all the necessary dimensions of the balcony are measured and ready -made double -glazed windows for the balcony in a specialized company are ordered. Sometimes, they provide meters for free.
- Balconies in old houses cannot boast of their exact dimensions, so pi to measure the height of future windows is done at several points. The order is the smallest parameter. It is much cheaper to glaze a loggia, since only one facade block is ordered, a balcony is somewhat more expensive due to two side glasses, but if you want to reduce the cost of glazing, they are made deaf. Which significantly reduces daylight in the apartment as well.
- Depending on the condition of the balcony, either lighter, but expensive aluminum frame, or heavier, but cheap metal -plastic, is selected.
- When working on the top floor, a roof should be mounted or available.
- Further, plastic castings are attached to the concrete plate of the upper balcony or hinged roof, which play the role of the visor.
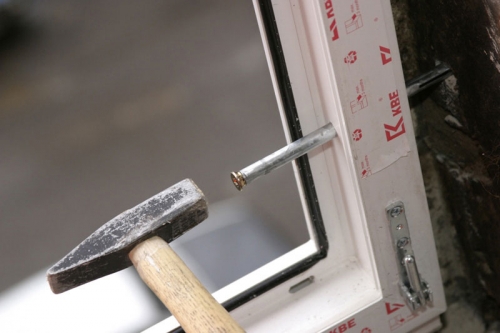
- The balcony block is assembled on the ground, under the windows. Connect the central part with the side using corner profiles. All joints are immediately sealed. On the sides and upper part of the structure, special fasteners are mounted on screws. The more there are, the more. The lower part will be attached to the anchor bolts to protect the balcony.
Tip: When, instead of metal railing, a masonry of foam blocks is made on the balcony, the width of which is much larger than the width of the plastic profile, the windows are exhibited on a flush with the inner wall. During operation, this will prevent icing or condensation.
- With the help of strong cables, the frame without glass rises to the balcony and is set in level. Immediately it is mounted on the plates screwed in advance.
- Next, the cornice is mounted, which is screwed to the lower window profile with screws. All big cracks are blown by mounting foam, and small gaps are filled with a transparent sealant suitable for external work.
How to install a plastic frame on a balcony
- The final stage is the installation of deaf double-glazed windows and the fastening of rotary-oxide window skeletons.
Installation tips for plastic windows
- Although plastic profiles are poorly affected by temperature fluctuations, it is recommended to carry out their installation in the warm season. So, if the temperature dropped below the +5 C mark, then later the necessary tightness of the seams may be violated in the windows, which will lead to drafts.
- With independent installation of plastic glazing, you need to know the golden rule: at least 12 fastening points are required on a standard small balcony.
- The window structure throughout the bottom should have an installation bar calculated for the installation of a window sill. In its absence, the balcony block is recommended to independently raise to the desired height so that the window sill enters it, and does not fasten to the profile itself.
How to install a plastic windowsill on the balcony
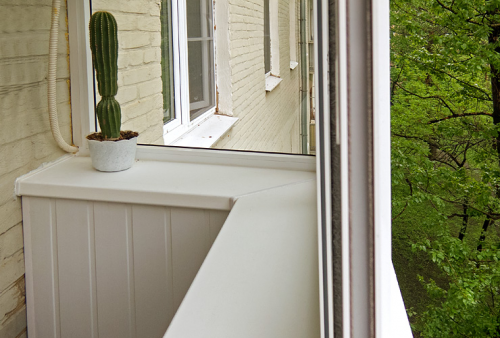
- But the installation of plastic windows is unfinished on this. It is required to correctly install a window sill, which will become a finish line in glorifying the balcony.
- It is often made multifunctional. For example, in the classic version, it serves as a stand for flowers and seedlings and the wider it, the more it can fit on it. Sometimes he acts as a table for the workplace. And if its width is artificially increased, then it is convenient to equip a cabinet for storing blanks under it.
Stages of work
- First of all, measurements of the future windowsill are held. If necessary, a drawing is made on which all sizes are noted.
- Next, the surface is cleaned of construction dust and garbage. It is better to do wet cleaning, so that with subsequent disconnection, the material has a good adhesion.
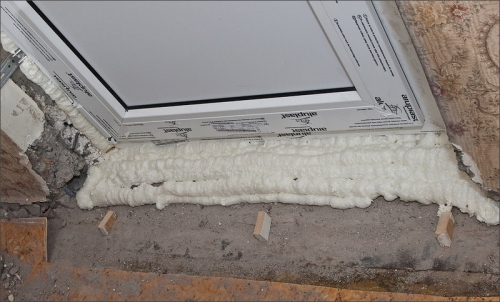
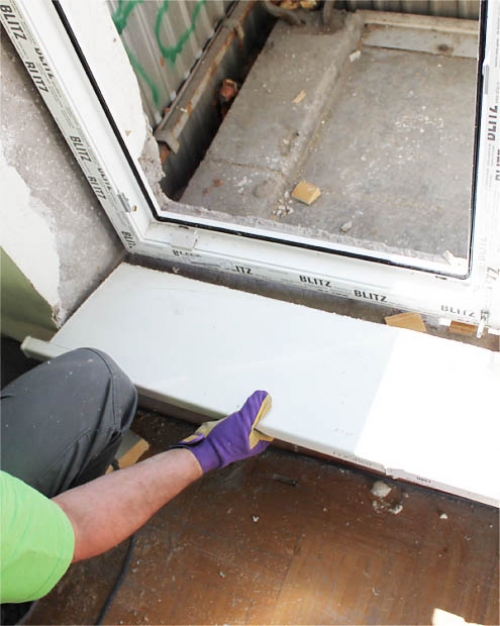
- It is most reliable to install a plastic window sill on brackets. To do this, it will be made under a plastic frame (as a rule, it sits on foam, so it is easily feasible). It is not attached to the frame itself, but only in the future is the joint is sealled with a sealant. Under the windowsill, special corners are screwed to the wall with a step of 20 cm, and to them, on the lower side, fixation on screws occurs.
- If the width of the base under the windowsill of sufficient width, then the installation is carried out simply on screws. The panel of the plastic window sill is also trained under the profile and with self -tapping screws directly to it.
- In both cases, the space formed from below is completely filled with mounting stumps when it dries, it is carefully cut off. The joints of the window sills and windows are sealed.
How to install a plastic threshold on the balcony
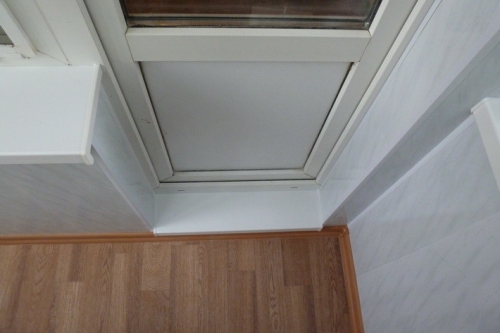
- An important detail in the installation of a plastic balcony is the door threshold. Some refuse him, considering it too soft and fragile. In fact, this is a reliable and convenient material in operation, you just need to approach its installation with all responsibility.
- When the plastic threshold on the balcony door bends under the weight of a person, this only indicates that his unskilled masters were mounted. Undoubtedly, the threshold itself in appearance and rigidity is similar to the windowsill and is quite flexible, but with proper preparation of the base for it, it will last more than a dozen years without deformation.
You can go in two ways, both of them guarantee a high -quality result. But one of them is more easy to perform, the other will require great effort:
- installation of the threshold on separate uniformly located supports;
- the arrangement of a monolithic concrete slab.
Installation of the plastic threshold of the balcony door to separate supports
This type of installation is the simplest, and as a result, the most commonly used.
Tip: Experts recommend placing a plastic threshold only from the side of the apartment. On the balcony, it will not only take up a place, but it is not provided by the design of the balcony. This will lead to the fact that you will have to take a rather large step in order to step over it and go to the balcony. If in the apartment the width of the standard threshold corresponds to the foot of a person, then narrow, about 15 cm of panel is installed on the balcony. This is clearly not enough for an adult to come. Next, we will consider in detail how to install a plastic threshold on the balcony door from the apartment.
Tools necessary for work:
- a level equal or slightly less than the width of the doorway;
- a square with a right angle;
- a hammer;
- a construction knife with a strong and sharp blade;
- support points from sawn bars (you can use old window frames from the balcony).
Stages of work
- The length and width of the thresholds sold has standard dimensions, so when you prepare them for a specific door, there always remains a wrapping. It will come in handy to make a preliminary fit in height.
- It is placed from below under the door frame from one of the edges and the prepared wooden supports are placed. If there is no power tool for sawing, then it is allowed to be chopped using a chisel or knife and hammer. Their size is adjusted in such a way that the trimmed piece of the threshold tightly presses against the frame.
- When this is obtained, it is immediately aligned horizontally. And they begin to lay down the next row of reference points from below, immediately aligning the entire structure with a level. As already clear, all preparatory work is performed on this segment, before installing this threshold. To make the structure hard, it is enough to install 6 such stands on a medium -sized door.
- We remove the cuts and put in its place the prepared threshold. With the help of the square and the level, its location is verified. The possibility of a deflection is determined at the same stage. Why they get up on him and pass several times along the entire length. If necessary, support is added in certain places.
- And only by making sure of the quality of the work, the threshold is removed to apply the mounting foam to the point support with an uniform layer. It is recommended to pre -slightly moisten them with water from the spray gun. The threshold is laid on top and pressed by the load until the foam is completely dry.
Installation of the plastic threshold of the balcony door on the screed
This method takes a lot of time, so companies engaged in the installation of plastic windows on the balcony do not use it. But if the work is performed independently, then it is preferable to make this principle.
- First of all, a blind area of \u200b\u200btightly knocked out wooden boards is mounted. Since the door width is small, it is not necessary to put the spacers outside. Reinforcement is laid inside. You can put a metal mesh made of wire with a diameter of 3-4 mm or cut fiberglass reinforcement without knitting.
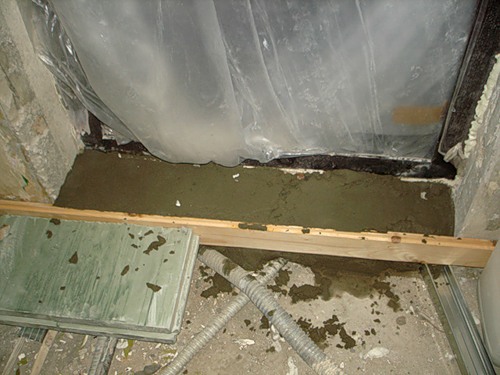
- Since a small amount of solution is required, it is easier to buy a ready -made mixture in which sand, cement and CPS are added in the right proportion. The right amount of water is poured into the bucket (the recommendations are indicated on the package of the mixture) and dry components are gradually added to it, stirring with a shovel.
- The resulting concrete solution is poured into the formwork and leveled with a wide spatula, slightly vibrating to remove all air bubbles. And they leave until completely harden.
- When the threshold is ready, a plastic lining is planted on a foam. The work is over.


