Since ancient times, man has tried to protect his housing as much as possible, installing ...

|
|
An important stage in the installation of plastic windows design of window openings. Slopes for ... |
Lights for screeding the floor is an important and necessary measure when laying the surface ... |
How to dismantle a plastic window
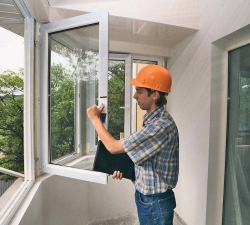
Sooner or later, the question arises of the need to dismantle the old double -glazed window. According to experts, this is one of the most time -consuming works, in its complexity superior process of installing new windows. Therefore, you need to know all the features of the dismantling and the subtleties that will be discussed later.
Table of contents
- In what cases will the dismantling of plastic windows be required?
- Preparation for the dismantling of a plastic window
- What tool is required to dismantle a plastic window?
- Stages of work on the dismantling of a plastic window
- Removing window sashes
- Sprinking the design of the window frame
- Dismantling the old window frame
- Removing the tide
- Removing the windowsill
- Finish work
- Removing a double -glazed window from window sashes
In what cases will the dismantling of plastic windows be required?
Plastic windows are not least of their last popularity due to their durability. Their life is up to 50 years, so the issue of dismantling and replacing is more in the desire to establish a new double -glazed window with the best heat -protective and energy -saving characteristics, or in case of mechanical damage to the window frame or glass. The question of how to remove the plastic window is more in exactly what stages of work must be done.

Preparation for the dismantling of a plastic window
The dismantling of a plastic window requires preliminary preparation. It means:
- the liberation of the premises from household items and technology,
- insulation of furniture with a protective film to protect it from damage and dust,
- insulation of the floor and walls.
In case of any dismantling, no matter what accuracy it is carried out - a sufficient amount of construction dust is formed. To cover the flooring at the place of work, it makes sense to purchase dense construction polyethylene.
The second important aspect during dismantling is security, so it is important to protect and designate the place in which work will be done. Outside, a marking tape is stretched to inform random passers -by about the possible collapse of stones or other construction waste. It is necessary to exclude the possibility of the loss of random elements of a window frame to the street in order to avoid dangerous situations.
What tool is required to dismantle a plastic window?
After the preparation was performed, it is necessary to stock up on the tool for work. In order to remove the plastic window double -glazed window, the following is required:
- a boot or multifunctional knife with a folding blade,
- chisel,
- screwdrivers,
- putty knife,
- a pair of scraps of small sizes that are used as levers,
- hacksaw on plastic and metal,
- passatigi,
- a hammer and a chisel.
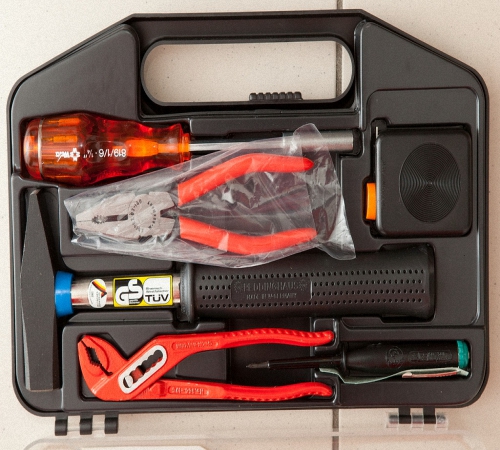
In the event that there is a perforator and a screwdriver, then this will significantly accelerate the dismantling process.
Stages of work on the dismantling of a plastic window
It makes sense to divide all the work into several points:
- removing window sash,
- sprinking the structure,
- dismantling the old window frame,
- removing the tide,
- removing the windowsill,
- finish work.
Since the double -glazed window itself is quite advisable to use it again, then the method of safely removing glass from window sash will be considered further.

Removing window sashes
Each of the stages is important in its own way. For example, without removing the old wings, it will be extremely difficult to install a new window. You need to know how to remove the window sash and what is required for this.
To remove the sash, it is necessary to arm yourself with a chisel or a large flat screwdriver, a hammer and pliers. The work consists of the following stages:
- The window sash is put into an open position. At the same time, attention is drawn to the upper part of the window, in the place of the connection in which the loop passes. It is her that will be necessary to remove.
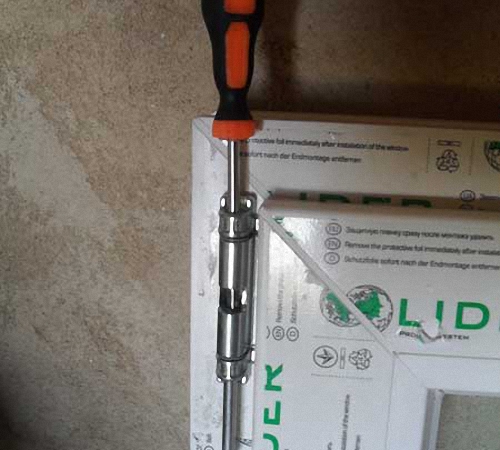
- From the loop with the help of a small cross and a hammer, a rotary shaft, which is also called a spindle, is neatly knocked out.
- After the spindle was knocked out, the window sash is pulled over and up, gradually releasing it from fasteners.
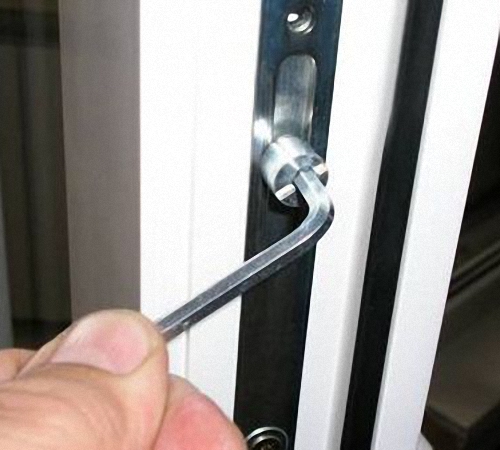
In those cases, if the installed slope interferes with the screwdriver and knocking out the spindle from above, the spindle is pulled out with the help of pliers from below. At first, a small effort needs to be made on top of it to grab the protruding part with pliers.
The sash is installed in the reverse order back into the frame, when the lower loop is put on the spindle, then the upper one is combined and another spindle is inserted into it, after which the sash is fixed. If it enters with significant effort, then you should use the hammer. In order not to damage the spraying on the surface, you need to use an intermediate gasket, the role of which can be played by a thin piece of plywood, according to which a hammer is already inflicted. This solution will evenly distribute the load over the entire surface.
Sprinking the design of the window frame
Next, in the double -glazed window you will have to make several cuts in order to facilitate the removal of the panels. This stage will take a little time for the reason that all the cuts are required to be done manually, using a hacksaw on plastic or a simple wood saw. It is impractical to use the grinder, since in this case the working area will be severely clogged with small particles and smoke. In addition, simple metal or wood wheels are periodically jammed in the material, or even capable of cracking - which will cause injuries.
Two cuts are made along the width of the window frame, three in height, after which they proceed to the next stage of work.
Dismantling the old window frame
Springs are necessary so that the old window frame is easier to dismantle in parts using improvised means like a crowbar, or a perforator with a nozzle nozzle.
If the design of the window frame was fixed in place with bolts or screws, then in this case they simply unscrewed from the grooves and parts of the frame are removed.
The installation foam at the site of the frame with the wall is best cut around the perimeter using a boot knife, after which the frame is in parts.
In some variations, plastic windows are installed in wooden frames. This cannot be called appropriate, and when dismantling the window, such a frame is also subject to removal.
Removing the tide
It is necessary to carefully dismantle the tide so as not to damage the other elements of the window opening. The tide itself uses force, tearing it off from the surface of the opening and the applied sealant, which is more often used by the mounting foam. In that case, the spruce of the ebb was additionally fixed using screws or bolts, it is necessary to remove them first and after that with the help of gross force to directly withdraw.
Removing the windowsill
The process of removing the old window sill depends on the material from which it is made. As a rule, plastic windows are installed complete with castings and window sills from PVC, since they have several advantages, such as:
- light weight,
- a significant service life of up to 20 years,
- have self -adjacent properties and do not support combustion,
- racks to the effects of sunlight,
- the simplicity of cleaning and caring for them.
They need to be dismantled by analogy with the tint.
In the case of wooden window sills, they must be tied in several places with a hacksaw on wood and then removed with your hands, or with a scrap.
If the windowsill is made of concrete, then it will have to be divided into pieces with the help of a perforator, put up for a chipper mode, or manual labor: a hammer, a chisel or crowbar. If there is a grinder in stock with a circle of concrete, then this will become the fastest way, but in this case it should be borne in mind that when the concrete surface cuts, a significant amount of construction dust will form. Therefore, after each cut, it is necessary to sweep out the resulting garbage using a broom. In addition, when working with a grinder, you need to remember about the means of protection:
- respirator to protect the respiratory tract from dust that winds in the air,
- goggles with polycarbonate glass, resistant to mechanical damage and particles entering the lenses,
- building gloves to protect hands.
It often happens that the concrete windowsill is preserved in excellent condition and the hosts do not have the desire to replace it. Dismantling of old plastic windows or installing new double -glazed windows does not oblige to change the window sill, but in this case you need to know that plastic and concrete are poorly combined for the following reasons:
- Plastic products have greater heat capacity, they are much warmer, unlike concrete, which leads to the formation of condensate.
- The presence of an old window sill forms a gap between it and the installed plastic window. Despite the seal, microcracks will appear in the design over time.
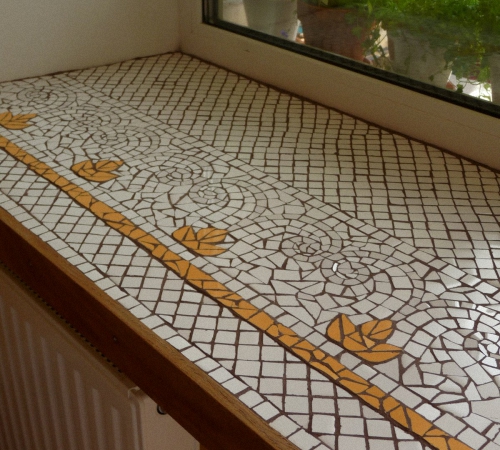
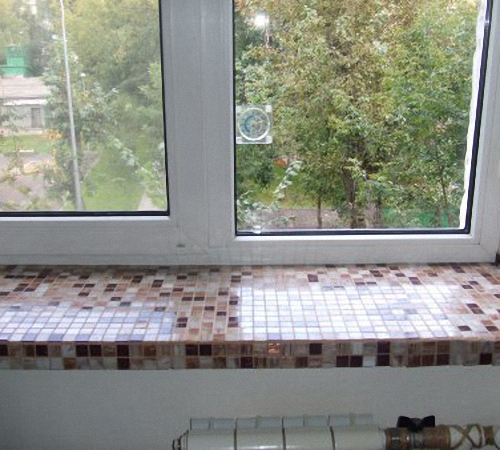
To solve this problem, concrete window sills are often covered with tiles. If there is a special desire to give a simple design art design, then the concrete surface is decorated with mosaic from ceramics, while often using mosaic of different shades. The use of glass will give the old windowsill a beautiful and artistic appearance, and the glare from the ingress of sunlight will bring additional comfort.
Finish work
Any construction work is characterized by the fact that a significant amount of construction waste is formed, especially if you use a grinder. Small particles of dust are able to tightly drive into the surface of furniture, so it is extremely desirable to carry out timely cleaning of construction waste after each action. Large particles and pieces of concrete swing with a broom, and construction foam requires complete removal by a boot knife and a chisel.
Next, the concrete or stone surface on which the frame was installed is thoroughly emphasized and cleaned from irregularities.
It is advisable to leave a protective film from dense construction polyethylene until the time, until a new one is installed in the place of the old plastic window.
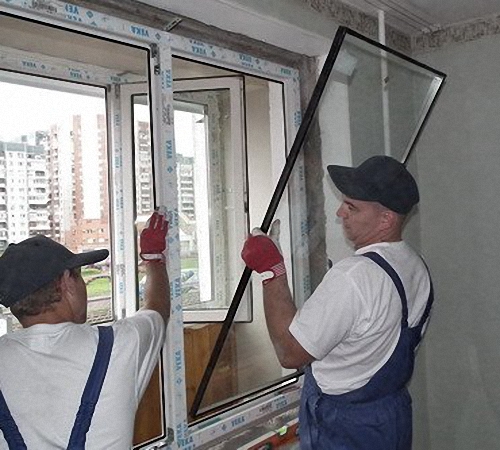
Removing a double -glazed window from window sashes
In the event of a situation with damage to the glass, it is not necessary to change the entire sash. Of course, sellers are not interested in the sale of one double -glazed window, but replacement is possible in itself. In addition, sometimes the need for replacement does not arise in the case of glass damage, but in the desire to establish a new double -glazed window with the best properties, or having more cameras.
In this case, the stages of work are conditionally divided into the following:
- First, graduates are removed from the window sash, inserting gaskets made of plastic or other improvised material into appearing cracks. It is important to know that the removal of graduates occurs in the following sequence: first, long side is removed, then the short lower and finally remove the upper one. Work must be carried out in this sequence in order to prevent the possibility of premature glass loss.
- Places of stacking stacks should be marked with a marker so that after installing a new double -glazed window, they can be returned to the same position.
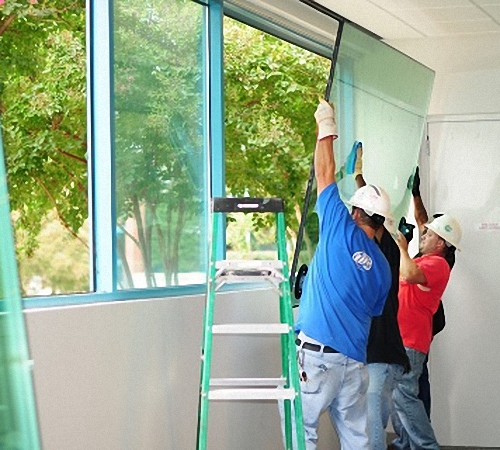
- Next, the double -glazed window is taken out of glass. It must be remembered that it has significant weight, so all the work is carried out with the assistant and gloves.
- The new double -glazed window is installed in the place of the old one, and the position is fixed.
- Skiks are installed in the reverse sequence, starting from the upper one, then the lower one is inserted, and after that the side. Staps provide good insulation, so further sealing is not required. It must be taken into account that graduates are clogged to the same place, using either a rubber hammer, or a flat chisel and a regular hammer. It is not required to attach significant force, so as not to damage the glazing or glass itself.
Specialists will take no more than 30 minutes to replace the old double -glazed window with a new one, so this work with proper accuracy will not become laborious. How to remove a plastic window, the video below will demonstrate clearly.
![]()
StrPort construction portal 2011-2018. Articles about repair, construction, building materials.
Copying information from the site is possible only with permission of the editorial office Or indicating a direct link to the source. Legal justification