To protect and decorate the concrete fence, color should be carried out. Painting...
|
|
The appearance of the courtyard and the private house tells a lot about its owners. Reflection ... |
As you know, any construction begins with the calculation and laying of the foundation. From that ... |
Installation of the stairs to the second floor with your own hands: phased construction. Different types of designs and methods for their installation
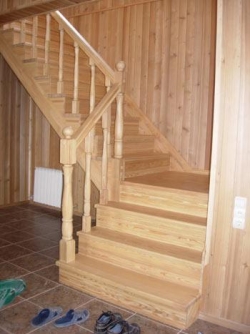
The inter -story staircase is an important part of a private house. It should be convenient for adults and children. In addition, it is necessary to provide for the possibility of lifting large objects along it. The most popular materials for the manufacture of stairs inside the house wood and metal. In the article, we will consider how to make a staircase to the second floor in a private house with your own hands.
Content:
- Requirements for inter -story stairs
- Wooden staircase. Features of the material
- Wooden staircase to the second floor with its eams
- Metal inter -story staircase
- Inter -story concrete staircase
Requirements for inter -story stairs
For a comfortable and safe operation of the stairs inside the house, it must meet a number of requirements:
- high -quality lighting of all spans;
- the width of the staircase should be at least 80 cm;
- a staircase having 3 or more steps is equipped with railings, the height of which is at least 90 cm;
- the slope of the stairs is also regulated, the degree of rise is 38-45. The rise to the attic or the attic is allowed to equip a staircase with a degree of inclination 65-74;
- for the convenience of lifting, the number of steps in the flight is desirable to make an odd number.
Tip: Before you make a staircase to the second floor in a wooden house, you need to calculate the supporting capabilities of the inter -story floors. Most often, light metal or completely wooden structures are installed.
Wooden staircase. Features of the material
The leader in popularity for the manufacture of inter -story stairs in country houses and multi -level apartments is wood. It has been used for many centuries. But in order for the product from it to get durable, it is important to observe a number of nuances.
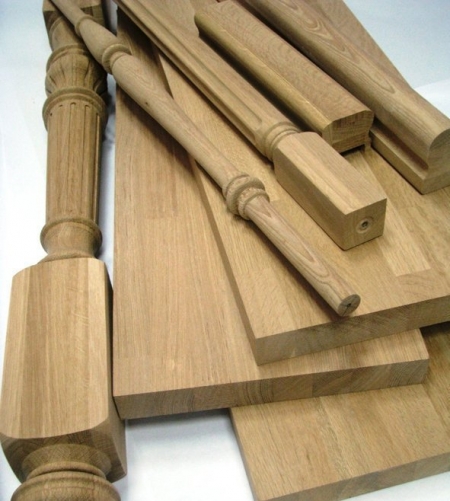
- The wood has a beautiful appearance and does not require expensive finish. Depending on the wood breed, it has a different pattern and natural shade. All this can be beaten and saved the material with transparent varnish. Thanks to the possibility of artistically process wood, real masterpieces are created from it in the form of carved balusters and other decorative elements. In addition, a wooden staircase creates additional coziness in the room and is indispensable for designer solutions in the style of country.
- A wooden inter -story staircase is especially preferable if the floor is made of lag. The low weight of the structure in this case is an important argument. In addition, in order to mount it does not need any equipment (crane, auto -my). But it is worth considering the specific gravity of different wood, so the oak design by weight is almost similar to a metallic similar size.
- It can be installed even if finishing repair in the stairs is completed. Since it is not supposed to be dirty, which are inevitable when welding a metal staircase or pouring concrete steps.
- A relatively low price compared to the rest. Wood is optimal with a combination of price-quality. The cheapest will be from pine, but it can distinguish the resin. Of the budget options, it is better to give preference to birch.
Choosing wood for the inter -story staircase
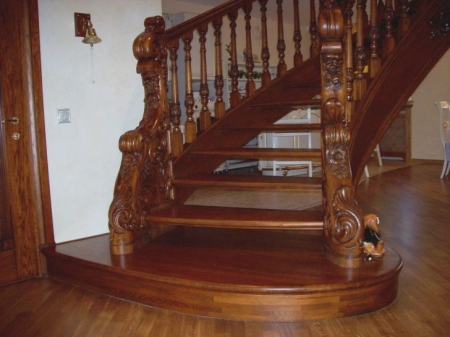
- Premium wooden stairs have a greater price. This is a staircase that becomes the central decorative elements of the house. For its manufacture, only expensive and especially beautiful wood is used, such as oak, ash or beech. They perform it in carved technology, supplying the design with a large number of decorative elements.
- In the ranking of beautiful and strong, the first place is divided by beech and oak. But in the beauty of the drawing they are superior to ash, while not inferior in density.
- In the cheaper price category are larch, birch and pine. They have lower strength characteristics. But the main argument when choosing them is a lower, and as a result, the affordable price of most home owners.
- Pine is the softest among wood, so it is more often used for temporary stairs. But beautiful balusters are made from it, which will decorate the design for many years. But to create steps and the frame, you should choose a birch.
Wooden staircase on the second floor with your own hands
Next, we consider how to make a staircase from wood with your own hands, how to correctly produce its calculations and what tools and material will be needed.
Materials and tools for a wooden staircase
- It is best to buy ready -made steps, but if there is no possibility, then a beam with a cross section of 40 mm is purchased for their manufacture;
- board 40 mm thick in an amount equal to the calculated project;
- beams 30 mm thick for treads;
- beams 25-30 mm for approaches;
- a bar for a bowstring and kosour 50x250 mm;
- balusters and handrails;
- wood screws;
- electrician;
- screwdriver;
- chisel, hammer;
- level, plumb line, square, roulette, pencil;
- a skin for grinding, brushes and material for finishing.
Calculation of the inter -story staircase
- First you need to decide on the angle of inclination. As written above, the preferred angle of inclination is about 40. But most often, the calculation has to be made from the existing sizes allocated for stairs and the height of the ceiling.
- The minimum width of the staircase march is 80 cm, but 125 -150 cm is considered convenient.
- Now there are many online calculators of calculating stairs. It is enough to score the desired height of the ceiling and the desired height of the steps (15-20 cm). And the program will issue a 3D model with all sizes.
Stairs design to the second floor made of wood photo
How to make a direct staircase to the second floor
Consider the example of the construction of a simple straight staircase without racing steps and sites.
- Installation of Kosouors. Take a beam, measure the total length and cut off. It is also necessary to immediately cut off the width of the drama (the thickness of the step itself, usually 4 cm). With the overall calculation, the width of the steps was not originally taken into account, and if in the future it does not play any role, then for the first stage this is an important point.
- Cutting openings for steps in Kosour. This is done with the help of a square. It mark the height of the riser and the width of the step. The marks are transferred to the bracket and cut out with a jigsaw. Sneces are grinded or milling, twisting the edges. Then the Kosuurs are put in a permanent place, fixing from below to the floor, and on top of the opening in the ceiling with the help of anchors. Well, if the staircase is attached to the wall along the entire length.
- Installation of the bowstring. A bowstring is measured along the length of the Kosuors. They are attached to the Kosurams and mark the places of fastening the steps. Under them, recesses are made in a titiv.
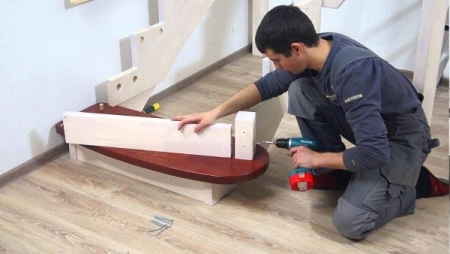
- The fastening is approached. They are made from the beam of the corresponding width. It is sawn into separate elements, clicked and attached to self -tapping screws. So that the fasteners are not noticeable, they need to tighten them a little deepening the hats in order to put it in the future.
- Installation of steps. Beams or boards are laid on the approaches, and after fastening they are polished. But there is a great risk that the tree will refer, which will lead to the appearance of cracks and creaks. Therefore, it is better to buy steps ready -made, made of glued wood.
- Railing fastening. Then, balusters or other railings to the steps are fixed on the studs. The handrails are laid and screwed on top.
Installation of the stairs to the second floor with your own hands video
Finishing a wooden staircase
Wood is full -fledged finishing material. Finishing work, often boils down only to emphasizing the picture and applying a protective layer.
If the material has damage, cracks or chips, they are putty to the color of wood. After covered with tinted varnish or stain, these defects become invisible.
Stages of work
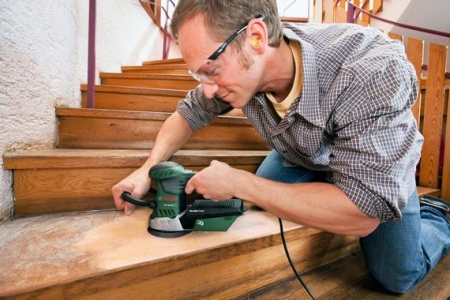
- At the end of the assembly of the stairs, all wooden elements will skin. Then wipe with a damp cloth to completely remove all dust.
- In the presence of defects, they are immediately putty and left for a day until the composition is completely hardened.
- Next, you can go in two ways: first tinted the stairs with a stain, and then apply a protective transparent varnish, or in the store ask to tint the varnish. The second option is preferable, since the work will pass faster, and the color will be the same on all elements.
- The varnish for treads is selected very wear -resistant sexual or deck. After applying 1 layer and its complete drying, the steps will necessarily skin with a small -minded skin. Then apply a second layer of varnish.
Tip: tinted varnish is evenly difficult to apply, even when using a brush with a very thin pile, traces of strokes will be noticeable. It is recommended to use a spray gun.
Metal inter -story staircase
To make a metal staircase you need to have welding skills. In addition, this design is more complex and expensive in execution. But it has a number of significant advantages over a wooden analogue:
- high strength and longer service life;
- technical characteristics provide resistance to large loads;
- reliability of the joints;
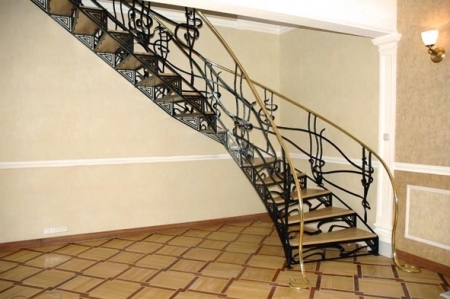
- the ability to create various designs;
- allows you to stretch the installation process. So, during repair work, so as not to pollute the steps, you can only rise by the frame. And after the final finish, install the steps;
- the metal frame of the stairs will become a guarantor that over time there will not be a creak.
Types of metal inter -story staircases
The appearance of the stairs depends only on the imagination and design of the interior, into which it should harmoniously fit. But its design depends on the features of the location.
- Place of installation. Inside the house, it is convenient to use the stairs year -round and it becomes a decorative element. The external location allows you to save living space, often they are placed for lifting from the balcony to the attic floor.
- Manufacturing methods. Most often make welded stairs. The easiest way to make them with your own hands right on the spot. Forged structures are more elegant, but made in workshops in advance.
- Finishing. In stairs without finishing it is provided that the frame will be visible, which means that it must be made very high quality from an aesthetic point of view. With the finish, stairwells are closed completely from all sides, it is not rarely arranged under it a room with a door for storing things or products.
- By type of assembly. Whole, they are sold ready -made sections and gather in place. In this case, its exact dimensions must be known at the stage of designing the house. The prefabricated consists of a large number of parts and connecting elements, which allows you to create the desired structure.
- The difference in design. Marsh, this is either a staircase with a site for turning, or with running steps. The screw stairs are the most compact, as the march is located around one central column.
Do -it -yourself metal
Before you assemble the stairs to the second floor, you need to prepare all the necessary tools and materials:
- welding machine;
- bulgarian, drill;
- square, level;
- electrodes, metal screws, cutting and cleaning wheels for a grinder;
- channel, metal pipe;
- metal corner;
- sheet metal.
Tip: the quantity and characteristics of the material depend on the type of staircase, on the number of steps and finish. So, the stone is much heavier than the wood and when it is finished with it, the frame of the stairs should be more durable than when facing wood.
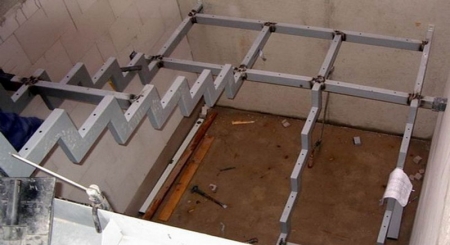
Theoretically, the staircase can be made in two ways: to cook in advance and already finished in the finished form or make in stages directly in the installation area. The second option is preferable, as it allows, if necessary, it makes its own adjustments.
Stages of work
- Initially determined with the type of frame. If there are book steps, then what will be their location (a turn of 90 or a turn of 180).
- Using the program and known sizes, a sketch is created. This stage is recommended to be entrusted to a professional designer.
- In accordance with the project, the desired amount of metal is bought, if necessary, it is immediately cleaned with a grinder of the scale and rust. Drawings of elements are transferred to it and saw it. At this stage, it is important to march all parts of the structure.
- If there is a platform, then at first its frame is made and installed in the staircase span. Further, from the floor to it, beams are mounted performing the role of Kosour.
- Next, the right amount of identical images are immediately produced, these are triangular elements, which will serve as a support for future steps. They are welded along the entire length of the Kosuor. It is very important to properly arrange them, so first it is enough to grab them pointwise in a pair of places, check the evenness of the square and only then make a high -quality seam. It is also allowed to weld them to the frame, or fix them with bolts. The work is carried out from the bottom up, installing the lower filly, put the board on them and stand on it, and so in stages move to the top.
- If you need to achieve greater stiffness of the steps, then a steel corner is welded between the filly, which also acts as a support for the step.
- Then the metal is processed. All seams are cleaned, after that they are treated with acetone, which protects against rust and primer. After that it is painted.
- Attach steps to the bolts from below. Then the railing and decorative elements are installed.
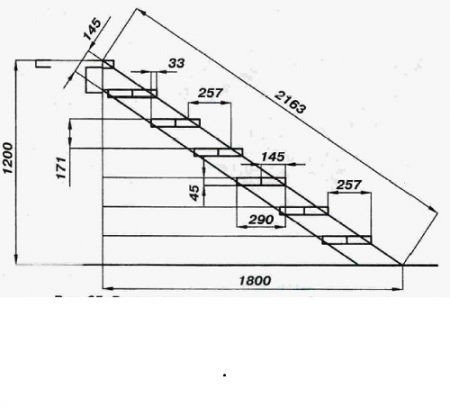
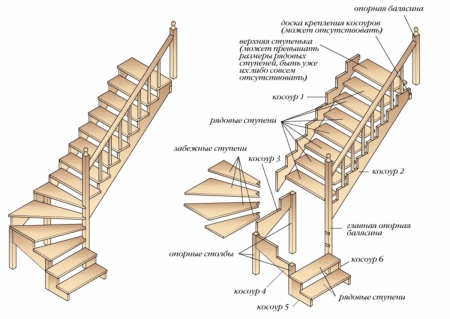
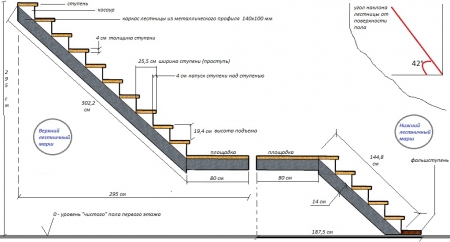
Staircase scheme to the second floor in private
Finishing a metal staircase
Metal staircase cladding with tiles:
- they begin to lay tiles from the bottom up. At first, it is attached to the riser between the floor and the first cloth. Then the tile is placed on the width of the entire first stage and only then the next attachment is attached. This method allows you to most rationally apply glue and achieve the absence of sawn edges of the tiles;
- since the metal staircase will vibrate when walking along it, glue for tiles should be special, high strength;
- in one stage, the entire cladding will not work. Since the edge will have to leave a place for walking until the tile glue is completely seized in the remaining areas.
Cladding of a metal staircase with wood:
- fastening a wooden downshole to the metal step from below will be the most optimal option, since the location will be imperceptibly. To do this, the metal step is pre -drilled in 8 places (4 on each side of the center, at a distance of 25 cm from each other). A wooden step is placed on top and attached it with self -tapping screws from below;
- if it is not possible to fasten from below, you will have to drill a wooden step from top to to metal. To do this, it should be firmly fixed to the metal site. To hide the hats of self -tapping screws, a depression of 5 mm with a drill of larger diameter is drilled on top. The tread is attached to metal screws, and the hat is plunged. Or use special wooden pads.
Inter -story concrete staircase

- Concrete stairs are very heavy and can only be built in houses with reinforced concrete floors.
- They are built immediately after the box is ready at home with a roof.
- As soon as the solution grabs, you can use it.
- Over time, concrete stairs will not begin to creak like wooden, and when the upcoming will not form vibrations like the iron ones.
- Thanks to their thoroughness, such stairs are considered safer, and if the cladding is damaged, it is easy to repair.
- But from concrete it will not be possible to make a staircase in a small -sized opening.
Step -by -step instructions on how to make an integrated staircase made of concrete
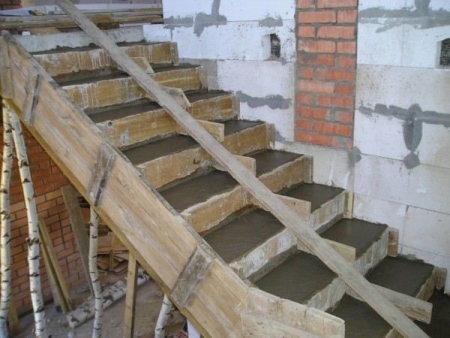
- When all the calculations are made, according to the project, the formwork of the entire staircase march is done. It is made from a board with a thickness of 20-30 mm.
- Reinforcement laids inside the future steps. It can be connected from a metal or fiberglass rod.
- First, the lower step is poured. While the solution is soft, it is pierced with a metal trowel to remove air bubbles and compact as much as possible.
- After that, the flooded step is covered with a film and put the board longer than the steps on top so that it rests on the formwork, and it could be stepped on it to fill the next step. Thus they erect the whole stairs.
Finishing concrete staircase
- After parsing the formwork, the staircase has a massive and untreated look. The finish will require thorough not only all the elements (steps, approximately approached), but also all places of adjacence to the walls.
- The choice of material depends on the configuration of the stairs. If it is straight, then there are no problems, but if there are busy and rotary steps, the facing material should be easily cut.
- Also, the coating of the tuning itself should be nonsense and resistant to mechanical loads.
- Recently, it has become popular to finish staircases with the same material that was used on the floors of both floors.
- The degree of noise is also important. If wooden steps or carpet covered with carpet almost completely absorb the noise of steps, then stone or trimmed tiles, on the contrary, can strengthen it.
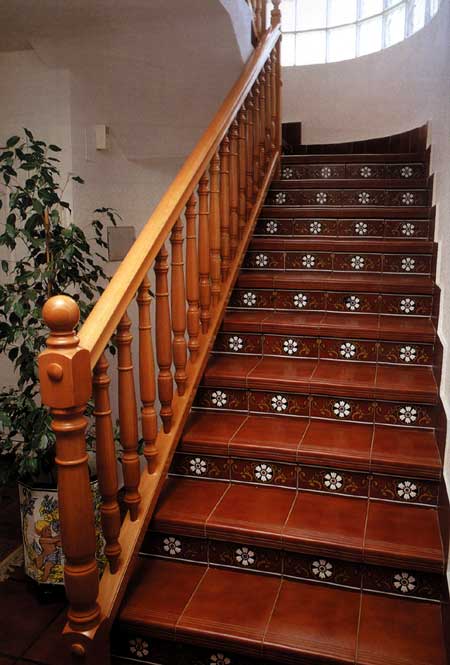
Using the roll material, it is worth it to glue it very carefully. Even if a small fragment retires, this can cause a fall. Most often, this is a carpet with a high degree of abrasion resistance (woolen carpets for stairs are not suitable). It is allowed to clad the steps with a cork coating, but not rolled, but with a larger thickness in mats.



The nonsense was written to the divitants
The nonsense was written to the divitants