An integral stage in the development of a house project is the choice of a method of its outer ...
|
|
From such an event as sealing seams in panel houses, in... |
Nowadays, the sphere of building materials develops very quickly and gives the world everything ... |
Warming of the loggia with a foam: Practical tips
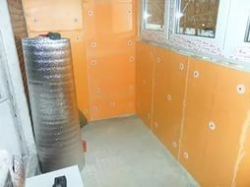
The loggia, turned into a cozy and warm continuation of the apartment, not only gives additional residential meters, but also creates a cozy atmosphere. A properly insulated room can be a wonderful place to relax with a winter garden or a secluded workplace. But in order to bring these dreams to life, you first need to properly insulate it and conduct heating. Everything is important here - from the wall of the walls and to double -glazed windows. The article will be given a step -by -step instruction for insulation of the loggia with a foamyplex with your own hands.
Content:
- What is a foam
- How to choose a foam for insulation of the loggia
- Technology insulation of loggia foam
- Insulation of the loggia foam from the outside
What is a foam
This is a modern thermal insulation material that replaced the foam. Due to the high waterproof qualities and good density, which ordinary polystyrene foam cannot boast, he quickly took a leading position in the Russian construction market. Foamplex is only the name of the brand producing extruded polystyrene foam. But since he was one of the first, over time he became a household name. Its use is universal and acceptable under any temperatures and weather conditions, which is especially appreciated in harsh climate.
Advantages of the foam over other insulation:
- it has low water permeability, does not absorb moisture and does not lose its properties even in a humid environment;
- small weight and high strength of even thin stove makes it extremely simple to work with it;
- durable in operation, does not crumble and the mice does not bite it (which can not be said about the foam);
- the high coefficient for compression allows it not to break even when the rounded surfaces are warming;
- environmentally friendly and not toxic;
- the producer has been announced for 50 years, but in fact it will be much longer;
- and the main advantage of the low thermal conductivity, which is achieved by a large number of uniformly located and isolated cells from each other with a diameter of up to 0.2 mm.
Separately, it is worth adding about water resistance, since when the loggia is insulated, this moment is extremely important. Especially if the work is done outside. You can conduct an experiment: in a bucket with water, lower a piece of the foam and crush with something so that it completely plunges into the water, and leave for 10 days. For all this period, no more than 0.5% of the liquid is absorbed, which means that it is negligible.
When working with extruded polystyrene foam, there are a number of materials that can destroy its structure. These are acetone and other solvents, oil paints, gasoline and complex polyester compounds. This list is not so large, therefore it will not be difficult to take it when warming the loggia with a foamyplex with your own hands.
But there are much more compositions with which he does not react, which means that they are completely harmless to him. These include water-dispersion paints, lime and alkaline solutions, cement and gypsum plaster, ammonia, butane.
The shortcomings of the foam
- Despite the apparent ideal of this thermal insulation material, it also has a number of disadvantages, which often become the reason for finding an alternative to him.
- The penumplex, although it does not support the fire, but smolder, melts and at the same time emits caustic and toxic smoke.
- It is destroyed from prolonged exposure to direct sunlight. Therefore, when warming, they are recommended to immediately close it with a facing coating.
- Like polystyrene, it has low indicators for soundproofing. He insulated with the loggia will skip all sounds from the street even with closed windows.
How to choose a foam for insulation of the loggia
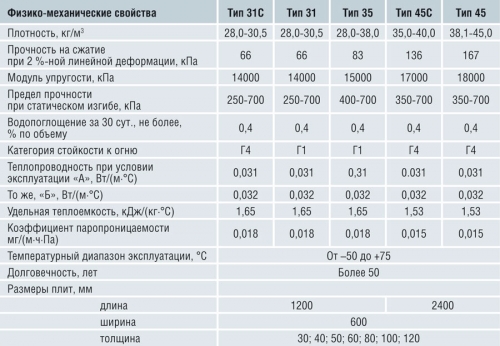
- It goes on sale in the form of plates with cut edges, so that a whole canvas is created during installation. Their thickness varies from 2 to 12 cm. The width is always standard 60 cm, and the length is 120-240 cm.
- If you insulate the loggia or the balcony is planned from the inside, then slabs 2-5 cm thick are quite suitable, since I want to leave the living space as much as possible. For external work, it is recommended to use a heater with a thickness of 10 cm.
- They cut them with a simple clerical knife. If you do not need an even slice, then it is allowed to cut it a little and break it.
To facilitate the choice of the necessary plates, the manufacturer has released a whole line of products with talking names. So, on sale you can meet:
- penoplex wall. Suitable for thermal insulation of walls both from the inside and outside. Its density is 25-33 kg/m3, which guarantees significant energy savings in heating;
- penoplex roof. It has a lower density than wall. Great for insulation of roof slopes or flat roofs. In the case of a loggia, it is suitable for thermal insulation of the ceiling;
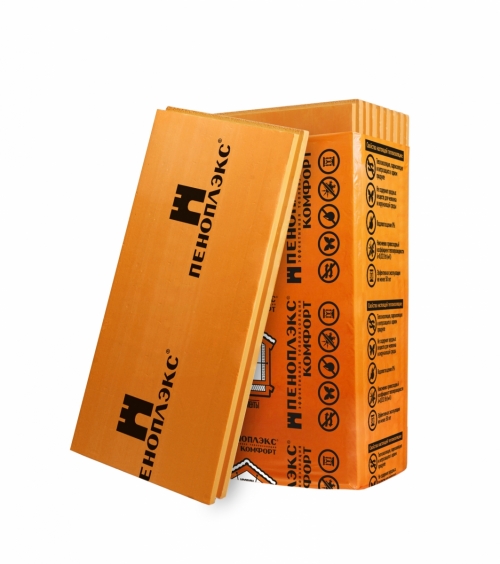
- penoplex comfort. It is he who is most often chosen for thermal insulation of apartments, balconies and loggias. Its density is 35 kg/m3;
- foamine Foundation. Thicker and more durable compared to wall. Sometimes a closed loggia is completed by apartment owners on the ground floor. In this case, this type of insulation will be appropriate for insulation of the foundation and basement;
- foamplex 45. This is the denser of existing species, but also the most expensive. It is so durable that it is used even in the construction of runways.
A foam is sold in packs, but the prices for it are set in cubes or sheets and depend on the thickness. On average, a sheet of extruded polystyrene foam 30 mm thick will cost 110 rubles, and 50 mm 160 rubles.
When buying it in the store, you need to pay attention to the integrity of the packaging and the plates themselves so that there are no chips and other defects. It is recommended to purchase it with a small marriage, in case of marriage during operation (for example, if a piece was cut off incorrectly).
What thickness to choose a foam for insulation of the loggia
First, you need to set the task for what purpose the insulation of the loggia or balcony is done.
- Sometimes it is enough to create a comfortable temperature only for storing products in the winter season or for drying linen. In addition, even insulation of the balcony with a thin layer of thermal insulation material will make it possible to make the room adjacent to it warmer. In this case, the window profiles are placed the cheapest single -chamber. For such purposes, the thinnest foam is enough 20-30 mm.
- But the loggia is becoming increasingly popular to make an additional living space intended for year -round use. The best choice will be 40-50 mm thick plates.
- The insulation of the floor and the ceiling directly depends on the lower or above loggias. If they are already insulated, it is quite possible to save and buy the thinnest of the presented options. But if the balcony does not have warm neighbors, then the material should not be thinner than the wall sheets.
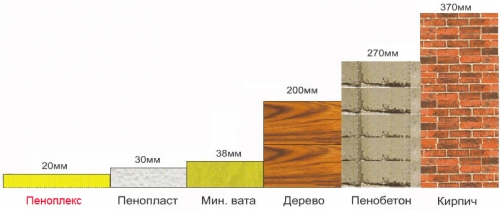
Tip: sometimes, in order to save, for insulation, the remains of different insulation are used. But it must be remembered that 3 cm of the foam in its thermal insulation characteristics correspond to 10 cm of foam.
Technology insulation of loggia foam
Preparatory work
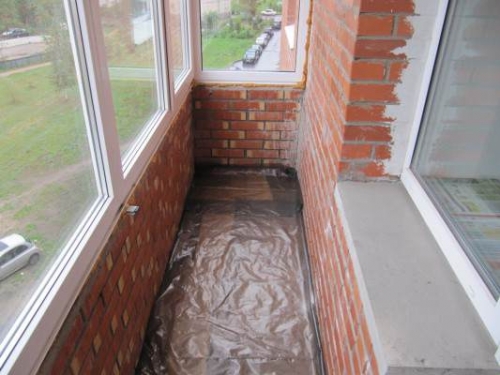
- During insulation and cladding from the loggia, all things and objects remove. It will not work to do this in stages, shifting them from one corner to another.
- All hangers or shelves are twisted from the walls and all sticking nails go.
- Then, if possible, the old coating is removed, which can fall off. For example, dumping plaster or exfoliating wallpaper.
- The windows should already be set. Preference is given to models with a double or triple double -glazed window, since the purpose of all the work is the thermal insulation of the premises of the loggia.
- Also, even before insulation, they make wiring and the necessary communications. All wires are necessarily placed in the corrugated slicer of the corresponding size.
- Since the loggia is subject to high humidity, it is advisable to treat all brick or token walls from the inside with special primers in antifungal additives. They dry no more than 5-6 hours in dry weather at room temperature.
- The process of insulation with a foamyx is quite simple and can handle it with it to any man who can handle the power tool. It consists in covering walls, floor and ceiling with extruded polystyrene, over which a decorative facing coating is mounted.
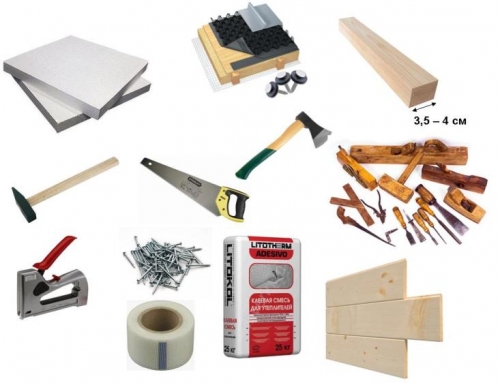
For work, you will need to prepare the following materials and tools:
- waterproofing material, it is best to use foamed polyethylene with a foil side. One of the most common species is foam;
- the right number of foam troops;
- mounting foam;
- glue for foams;
- fasteners are selected depending on the material of the walls. So, for a loggia from brickwork, a dowel-gvo is needed, and for wooden rails of the balcony, screws are suitable. But in both cases, they should have wide gear hats for better pressing the material;
- a primer with antifungal additives or any other impregnation;
- an aluminum profile or wooden rails is bought for the frame;
- reinforced adhesive tape;
- punch or screwdriver for the installation of the crate;
- stationery or construction knife for cutting a foam;
- level, stepladder and roulette.
Step -by -step instructions for insulation of the loggia foam
- When the loggia is fully prepared for insulation, all objects were made and the old cladding is removed, they begin to insulate the process.
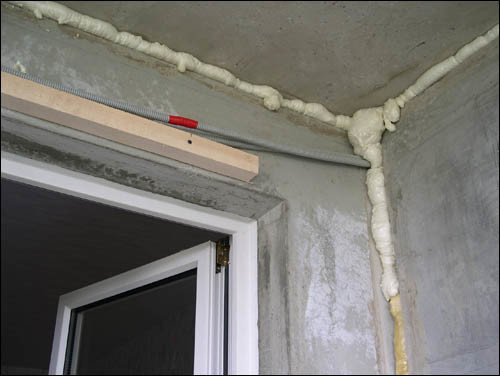
- First of all, all the cracks fill with foam. When it completely hardens (and this, as a rule, for at least a day), she is carefully cut off with a knife flush with a wall or floor.
- Paul is the first to be insulated. Regardless, work is carried out on the balcony or on the loggia, a concrete screed is always made on the floor. Over time, she could have become worthless, reinforcing or exposed. In order to not be deformed in the future, the foam plate, and the floor remained even, in such cases it is recommended to make a leveling layer of screed. If expanded clay, you will get additional insulation and foam sheets can be taken thinner.
Tip: when leveling the floor, it must be remembered that even with insulation and flooring, its level should be lower than in the apartment.
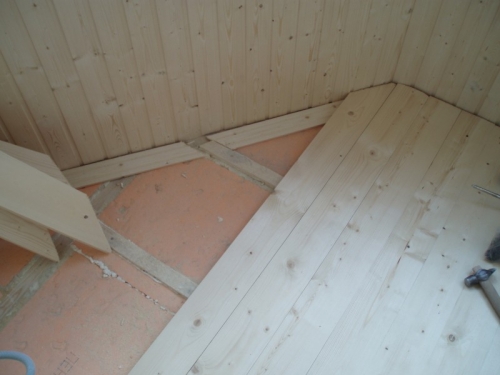
- It is not necessary to equip the crate on the floor under the foam. But with its presence it will be easier to fix the flooring, as wooden rails will perform as a lag. If you lower this step, then it is enough directly on the floor and fit the slabs to the desired dimensions and attach it to a special glue that resembles the tile. If the foam does not have a junction of the groove, then the joints between the sheets and the walls are installed with mounting foam. After grasping the solution and drying the foam, its excess is cut off exactly in level.
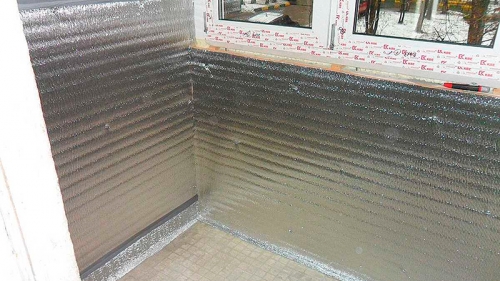
- The most effective insulation of the loggia with foam and foam in Sovokupa. This waterproofing material will provide vapor permeability and additional insulation. But it is laid on top of the foam with a foil side. If there are joints, then they are glued with reinforced tape.
- On this, the insulation of the floor of the loggia ends. Then there is a layer of the rough floor and flooring.
Tip: it is impossible to lay the laminate over the foam, as it is too soft and the laminate panels will quickly become unusable due to breaking locks.
- The next insulate the walls. All the cracks on them are also delighted. Then, the entire surface of the walls (including borders with an apartment) is treated with waterproofing material. It is most convenient to use a liquid and ready -made primer, it is applied with a simple brush.
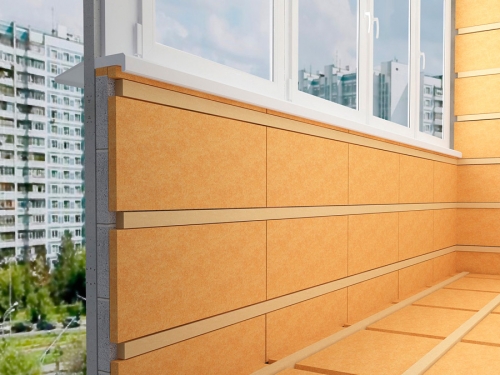
- One of the two options for insulation includes the device of the crate. Not fundamentally, it will be made of wood or metal, the main thing is that the rails are even and sufficient thickness. Due to the rigidity of the plates, it is enough to make only vertical guides with a distance of 60 cm, which is equal to the standard width of the foam.
DIY insulation with a foam with hands video video
Tip: When choosing a metal profile, it must be borne in mind that it does not have high thermal conductivity, which means that cold bridges are inevitably formed. For a room intended for year -round use, this is unacceptable.
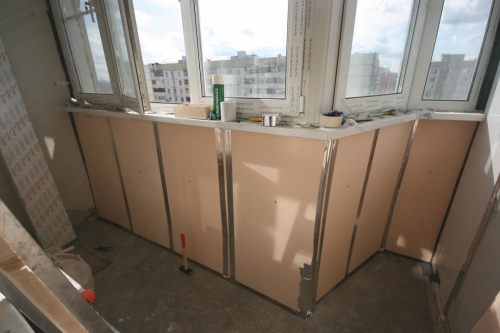
- When the frame is mounted, insulation plates are inserted into it. Neither should be located tightly in it. But it is impossible for them to stick out, the material should fit tightly against the wall with its entire surface. If the recesses formed due to the stepped edge, they are again filled with foam. This applies to all joints where the material does not fit well to each other. Thus, the foam is kept on the wall, additional fixation is no longer required. The crate frame is suitable for fastening facing material, for example, drywall.
Insulation of the loggia with a foam complex photo
- The second method consists in gluing a foam for glue without a crate. The composition is evenly applied with a gear spatula to the surface of the stove (and preferably on the wall) and it is attached to the base. Then it is tightly fixed for a minute. Glue can be replaced with nails with special gribly hats. They are fixed in 5 places, it is additionally recommended to fix the corner joints with them. Experienced builders recommend gluing the seams with reinforced tape, in addition to discusing.
- From the inside, the waterproofing layer is made of foam. The main rule in working with it is the absence of gaps or overflows. Particular attention is paid to the junction between the floor and walls.
- The final stage will insulate the ceiling of the loggia with a foam. As in the case of floor and walls, the ceiling is first prepared, including the location of possible cracks and processing with antifungal agents.
- If the loggia or balcony is located on the top floor, you need to take care of waterproofing separately. It is recommended to replace the liquid composition with a more reliable roll.
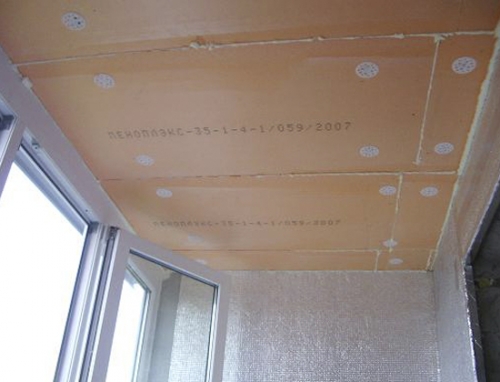
- Extruded polystyrene foam on the ceiling is most often attached to glue or special nails. In the future, this facilitates the task of finish putty and plastering. But if it is planned to sheathe the ceiling with drywall or other sheet or rack materials, then it is better to make a crate.
- When mounted on glue, you need to smear the entire surface of the sheet and the ceiling and only then tightly press the sheet. For reliability, you need to keep it in this position a little longer than it was done when the walls are insulated.
- When installing on nails, their hats should be slightly pressed into the thermal insulation material.
- Regardless of the selected method, when the gaps are formed, they are again filled with foam. It is recommended to buy universal, suitable for all -season work.
- When warming with a foam, it is important to equip vapor barrier from the side of the room. Therefore, the ceiling is closed with foam. To fix it, self -tapping screws are used, and joints are glued with tape. But in this case, it will not be possible to plug the ceiling directly over the insulation. It is necessary to make a crate attached to the dowel with nails. Therefore, fasteners should be sufficient length to go through the entire thickness of the insulation and firmly enter the concrete base. This is important, since GKL sheets weigh a lot, and several layers of putty mixture are still applied on top of them.
Insulation of the loggia with a foamyx video
- But in such a crate on top of the foam there is an advantage. A airspace forms between it and the casing, which allows you to hide the wiring.
Insulation of the loggia with a foam with plasterboard video
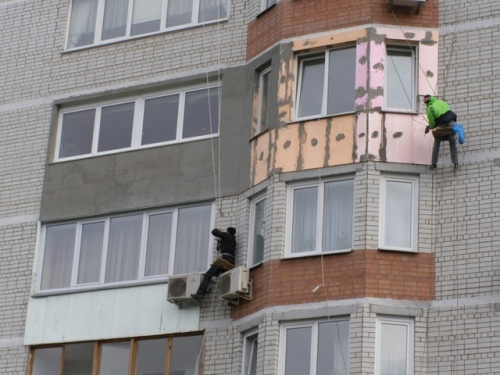
- As a result, the entire loggia should be like a box, which is monolithic on all surfaces closed by a foam with a foam. This will allow you to put heating devices there or put a warm floor that will create the same cozy atmosphere as in the apartment itself. But, of course, this method will take quite a lot of living space of the loggia, especially given its original small sizes. An alternative can be more complex, but no less effective insulation with a foamyplex from the outside. It is not recommended to do this yourself (the exception is balconies on the ground floor), since special high -rise equipment is required.
Insulation of the loggia foam from the outside
- From the side of the street, only walls can be insulated, the ceiling and floor will be insulated from the inside.
- If necessary, the external walls of the loggia are cleaned of the old coating. At a wooden balcony, you need to remove the entire wooden crate, leaving some steel rods.
- A primer for facades is applied to the surface. It is convenient to do this with a roller with a telescopic pen.
- The same roller (with a short pile) is smeared in two layers with a liquid waterproofing composition.
- To fasten the sheets of the foam, you can mount the crate, use glue or nails. All three methods are suitable for external work, it all depends on how convenient it will be to do this work in specific conditions.
- It will be difficult to make a preliminary fitting of the plates themselves here, so it is important to make measurements especially accurately and first calculate everything. The insulation is cut in advance according to the desired dimensions.
- Next, glue is applied and foam is tightly pressed against the wall. If the hands do not reach, you need to come up with the improvised device, for tight pressing the lower edge of the sheet. At the end of the work, everything is left until completely dry, for about a day or more. If installation was carried out on a crate or nails, they immediately proceed to the next stage.
- The resulting gaps on the seams are discouraged and, after hardening, cut off with plates.
- As already mentioned above, the ceiling and floor will be insulated from the inside according to the technology described above.
- If the insulation outside is covered with decorative plaster, then a reinforcing facade grid is attached to the sheets with the help of nails. On top without a primer, a starting cement putty is immediately applied.
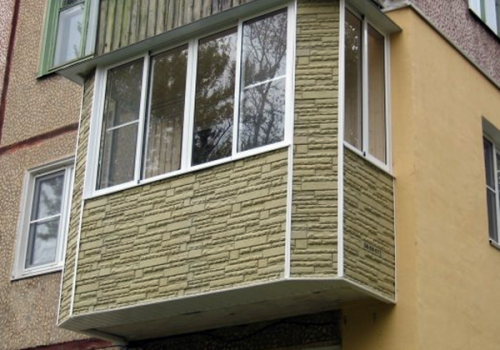
- But more often, balconies and loggias are finished with plastic panels. Although they look less aesthetically pleasing, they are quickly mounted, unpretentious to weather conditions, durable and cheap. Therefore, it is better to immediately lay the foaminglex during insulation in the crate, so as not to do it in addition after thermal insulation work.


It is impossible to warm EPPS from the outside.
It is impossible to warm EPPS from the outside. He has a vapor barrier close to 0. Because of this, the wall will get wet behind him.