Screw piles are becoming increasingly popular in the construction of various types ...
|
|
The long -awaited summer came, and many citizens hurry to summer cottages, gardens and sites to ... |
Each owner of a wooden house sooner or later is faced with the need to replace ... |
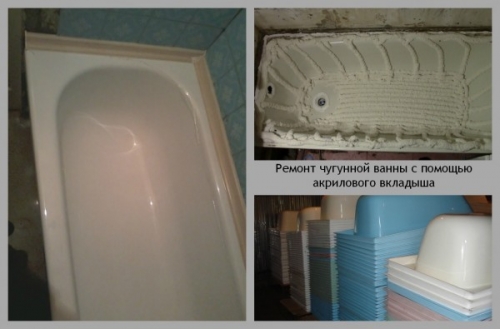
Restore the old bath with our own hands: step -by -step instructions

The unpresentability of old plumbing is not a reason to replace it. There are several effective and inexpensive enamel restoration methods. In order for the updated jacuzzi to serve for several more years, it is necessary to adhere to the recovery technology and follow the main recommendations for the care of the bath.
- Restoration of the old bath: choice of method
- The step -by -step guide for enameling of the bath
- How to update a bath using acrylic
- Installation of the liner is the fastest way to restore
- Correction of small bath defects
- Cleaning a bath without harm to coating
Restoration of the old bath: choice of method
The new snow -white bath over time loses the attractiveness of the surface becomes rough, gloss disappears, yellowness and smudges appear. There is a need to replace plumbing. However, a full -fledged repair and purchase of a new bath is a cost event. It is much easier to restore the coating of steel or cast iron on your own.
The most popular are three methods of repairing an old bathroom:
- processing with two -component enamel;
- Acrylic bulk bath;
- installation of the liner.
Each of the methods has its own characteristics.
Bath enameling Available version of restoration, effectively eliminating roughness, yellowness, rust and small scratches. The enamel is not suitable in the presence of large defects: peeling of the coating, the presence of chips and deep scratches.

Among the main advantages of covering the old bath enamel include:
- low cost;
- the enamel layer does not conceal the volume of the bath;
- to perform restoration, you do not need to dismantle the siphon and tiles on the sides of the bowl.
Disadvantages of the method:
- with low -quality application of enamel, traces of the brush may remain;
- duration of drying 3-4 days;
- does not mask major damage;
- the service life of the coating is up to 5 years.
Bulk acrylic It is applied to the walls without a brush by uniform draining. Using liquid acrylic has a number of advantages:
- the updated bathtub will not yellow over time;
- coating is resistant to household chemicals and corrosion;
- the material is suitable for the restoration of different baths;
- suppies are not formed on the surface;
- restoration does not require the dismantling of the old bath;
- acryl does not pass the air, so the coating is smooth without air bubbles;
- a long service life of about 15 years;
- acrylic coating is resistant to mechanical damage and chips;
- high thermal insulation of acrylic retains heat, and the water does not cool quickly.

Arguments against the bulk bath:
- before processing, it will be necessary to dismantle the drain;
- acryl repeats the factory irregularities of the bowl;
- the coating does not tolerate very high temperatures;
- a long period of drying 4 days.
Important! When using poor -quality stacril and non -compliance with the technology of decoration, bubbles can form, which will subsequently lead to deformation of the new coating.
Installation of an acrylic linerthe old -sample bath is the most expensive way to recover. As a rule, the insert is made by individual order for the parameters of plumbing. This method of restoration is not advisable to perform installation errors on their own reduce the life and ease of operation of the bath.
The advantages of the bath in the bath:
- fast installation;
- the ability to hide chips and other defects;
- the liner is characterized by all the positive characteristics of acrylic: smoothness of the coating, heat capacity, unpretentiousness in care.

Disadvantages of this recovery method:
- high cost of the liner;
- before restoring the old bath, you will need to remove the tile adjacent to plumbing;
- reduction in the useful volume of the bowl;
- the complexity of the work independently.
The step -by -step guide for enameling of the bath
High -quality enamel basis of the durability of the bath
Particular attention should be paid to the choice of enamel. Experts recommend using specially developed tools:
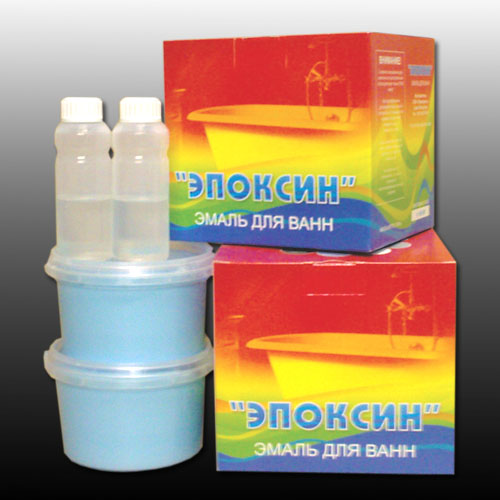
- Svetlana sets and fantasy from Random House contain: two -component enamel, hardener, a means for preparing the surface. Svetlana's set includes collars that allow the coating of any shade.
- Epoxin-51 and epoxin-51s-a two-component agent applied by a brush. Paint the stand to disinfectants. Epoxin -51 hardening period - 48 hours, epoxin -51s - 24 hours. The composition prevents the appearance of yellowness, seizes damage and small cracks.
- Tikkurila reaflex provides high adhesion of secondary enamel with the base of the bath. The material is liquid, therefore it is necessary to apply at least 4 layers. Only with this technology it will be possible to block yellowness. Each subsequent layer is applied after drying the previous one.
Advice. Experts recommend selecting enamel color in accordance with the original tone. It must be understood that it will turn out to repaint the white bath in almost any color, and it will not be possible to change the shade of the dark bath to light.
Necessary tools and materials
For restoration work, you should prepare:
- electric drill and nozzle (core) for cleaning the old coating;
- abrasive;
- oxalic acid;
- two -component enamel;
- a means for degreasing the surface;
- a brush for applying enamel with a width of 7 cm is better to choose the inventory of medium rigidity with natural bristles;
- respirator or gas mask;
- maslar tape, polyethylene;
- cleaning powder.
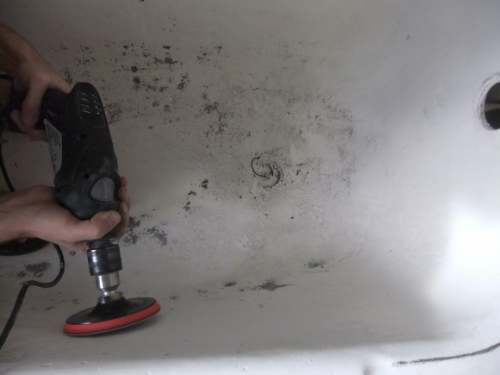
Surface preparation
Before restoring the old bath at home, you need to remove the old coating:
- Cover the adjacent tiles with polyethylene and glue with tape.
- Moisten and sprinkle with abrasive powder.
- Folden or grinder to clean the old coating.
- Rinse dust and soap foam.
- Treat the coating with oxalic acid. Neutralize with acid with acid.
- Dial hot water into the bath and leave for ten minutes.
- Drain the water and wipe the surface dry. To speed up the drying process, the bowl can be warmed up by a powerful hairdryer.
- Cutting chips and potholes with car putty. After drying the layer, grind the base with sandpaper.
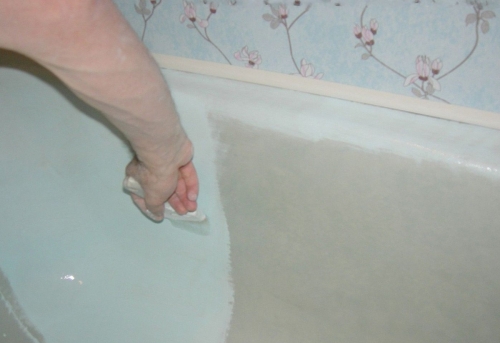
- Pour the surface, wipe the coating with a rag and degrease with a solvent.
- Remove the shower hose, cover the taps with a film.
- Perform the dismantling of a siphon and plum.
- Under the bath, in the place of drain, put the container into which the enamel will drain.

Bath processing procedure enamel
After degreasing the bath, you can proceed to apply enamel. Work can conditionally be divided into several stages.
- According to the instructions of the LKM, mix the hardener and the base until a homogeneous consistency is obtained.
- Before using the brush, it is necessary to check the quality of the fastening of the bristle, having spent on it, it should not crumble several times on it. It is advisable to withstand the brush 24 hours in water before applying the paint.
- The brush is wet into the enamel, immersing it by half the length of the pile.
- The procedure for staining in the direction from top to bottom.
- Apply evenly the first layer it acts as a primer, so it should be quite thin. First paint the bath in the horizontal direction, and then in the vertical. Subtens of paint stretch with a brush.
- A puddle should not form at the bottom of the plumbing - the enamel should be removed.
- Apply the second layer to wait for the first to dry.
- Carefully inspect the surface. There will be only half an hour to paint over missing areas. After that, the enamel to grab and correct the defects will not work.

As a rule, to achieve a persistent result, you will need to apply 3-4 layers. Installation of the strapping and operation of baths are possible after 4-5 days.
Important! It is advisable to restore in the warm dry season. For the period of drying the window, you need to open. There should not be children and pets indoors.
How to update a bath using acrylic
The technology of restoration of the bathroom with a glass is largely similar to the processing of enamel. The surface preparation occurs in the same way as in the previous method. Next, you will need to dilute liquid acrylic:
- Add the hardener to the container with acrylic and mix well.
- Leave the composition for 10 minutes and mix again.
After cleaning the bathtub and preparation, the restoration of plumbing is performed:
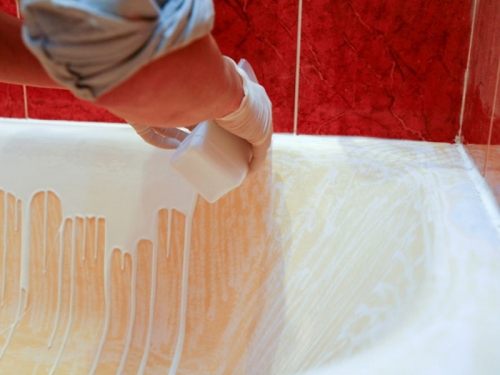
- From the common container, put part of the acrylic into a convenient glass.
- Start pour the mixture from the upper corner of the bowl. When acrylic reached the middle of the wall of the bath, it is necessary to slowly move the container. If necessary, add a glass of glass.
- When the entire bathtub is processed around the perimeter to repeat the procedure, starting to pour acrylic from the middle of the plumbing.
- Forming bubbles or influxes are filled with a rubber spatula or brush.

The drying time of the duckling depends on the composition of the material and the air temperature in the room.
Installation of the liner is the fastest way to restore
In the presence of significant damage, re -enameling or acrylic processing may not give the expected result. In order not to have to remove the old bath, the restoration will have to be performed using the insert.
To select a ready -made or order of the pallet, you must correctly remove five measures:
- full length distance between the edges of the sides of the bath;
- internal length maximum length inside the bowl;
- the width of the container near the drain;
- the width of the bath in the back of the back;
- the depth of the bath for calculating over the drain place the flat bar across the bowl and measure the distance to the bottom.

Installation procedure:
- Preparatory events:
- dismantle the side and tiles adjacent to the bathroom;
- remove the lower and upper water drain;
- clean the old enamel with sandpaper or a grinder with an abrasive nozzle;
- degrease the surface.
- Link marking:
- put the insert into the bath, mark the edges of the sides and places of fixation of the strapping;
- cut the liner around the perimeter;
- prepare technical holes.
- Acrylic liner installation:
- repeatedly degrease the surface of the old bath;
- around the overflow and drain opening, apply the mounting foam along the bottom the distance between the stripes of 4-5 cm, vertical stripes with gaps of about 10 cm;
- cover the side with the perimeter;
- mount the pallet and crush the liner;
- remove the excess foam that came out of the drain hole;
- install plums and fill the bath with water.

Important! Installation of plumbing strands must be performed very carefully. A tattered protracted bolt can provoke a crack in the liner, and the slope of the water between the coatings is a consequence of an insufficiently durable fastener.
When performing a comprehensive restoration of plumbing, it is advisable to replace the legs of the old bath. The finished kit can be purchased in a store or make support from metal profiles yourself.
Correction of small bath defects
Single defects of the bath can be locally disguised without resorting to complete restoration of plumbing. The recommendations of experts will help restore damaged areas in a short time.
Through holes. It will turn out to close such a crack with epoxy resin, and apply a reinforcing mixture on top. For the restoration of the bathtub, you need a special remote assembly.
Chips and scratches. The procedure for eliminating the defect:

- Process the plot with a rust converter, and then clean the surface with the powder.
- Degrease the surface with acetone.
- Make a chip with putty for a car and polish.
- Colorize a section of LKM.
Cleaning a bath without harm to coating
The careful attitude and regular cleaning of the coating of the bath will help maintain aesthetics and attractive appearance of plumbing. It is enough to be guided by simple tips:
- The enamel and acrylic coating are susceptible to abrasive substances, so you need to choose a soft cleaning agent. It is important to exclude detergents in which there are ammonia, powder, chlorine, acetone and other aggressive components.
- After cleaning, the surface must be washed with a large amount of water.
- In the bath, it is not advisable to bathe pets, sharp claws can leave visible scratches. You can not put metal basins and buckets in the bowl.
- The dangerous enemy of acrylic rust on the mixer and metal elements of plumbing. The acrylic surface absorbs yellowness, which is later very difficult to bring out. Therefore, the formation of lime plaque must not be allowed and often wipe the plumbing dry. From the tap, the water hole should not drip water quickly begin to rust.

A full -fledged restoration of the bath is quite a complex process that requires certain skills from the contractor. In the absence of experiments, there is a high probability of errors. It is better for novice masters to use for restoration the method of bulk acrylic.
![]()
StrPort construction portal 2011-2018. Articles about repair, construction, building materials.
Copying information from the site is possible only with permission of the editorial office Or indicating a direct link to the source. Legal justification