When planning their own home, many citizens prefer tension ...
|
How to dismantle a stretch ceiling. DIY STECTING CECRETION. Tool for dismantling the stretch ceiling
|
Construction of a cottage is always a comprehensive process, divided into several ... |
Building materials stores amaze with an abundance of assortment. Recently, many ... |
Hot rafter system: construction technology

The architecture of modern buildings involves a wide variety of aesthetic roof structures, which are both reliable and practical. The possibilities of choosing a roof, building materials and installation technologies today are actively developing, but everything returns to centuries of a proven design is a tetrahedral hip rafter system. The classic roof of this form traditionally exceeds other options in reliability, especially in difficult climatic conditions, where high gable roofs create sailing.
Table of contents:
- Design features of the classic holly roof
- We make drawings and preliminary calculations of the rafters of the hip roof
- How to calculate the angle of inclination of the hip roof?
- Basic rules on the installation technology of a four -sided roof
- We do Mauerlat
- Further design of a holm roof
Design features of the classic holly roof
When choosing a roof configuration, one should proceed not only from aesthetic preferences, but also to take into account the climatic conditions and functionality of the structure. As you know, too high and a steep roof with different compartments and attic windows is a fairly costly undertaking, although beautiful. But she also meets the great resistance of the air masses from the leeward side.
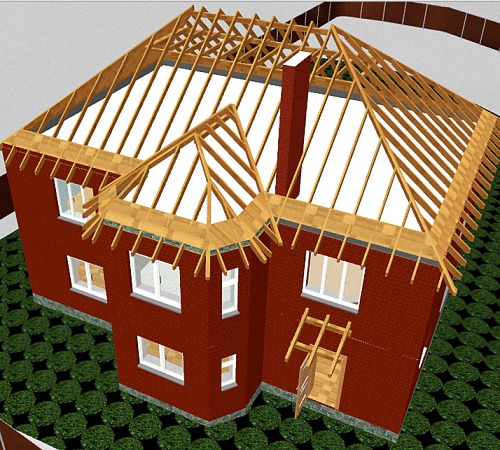
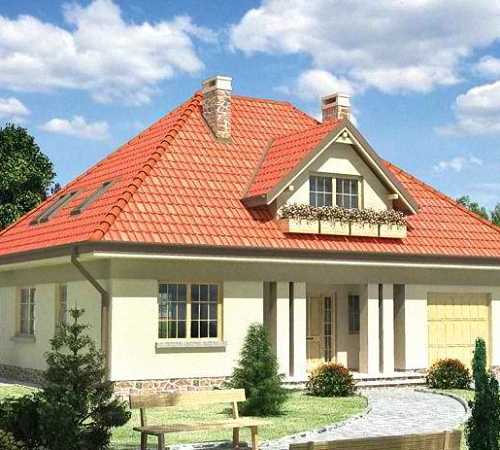
A gentle roof is more economical, but it holds a lot of precipitation, and a heavy hat of snow lying for many months creates its mass additional pressure on the entire structure. The best option for a holly roof. These are 2 trapezoidal slopes on the wide sides of the perimeter of the house and 2 triangular at the end. At the top, these trapezes under the horse are close the upper faces, closing the structure from opposite sides with triangular precautions examples:
A tetrahedral hip roof on a rafter system with a sufficient slope for all climatic zone for allocation. There are no doubts to the aesthetics of buildings with a tetrahedral completion, especially in the modern performance of the new generation roofing materials.
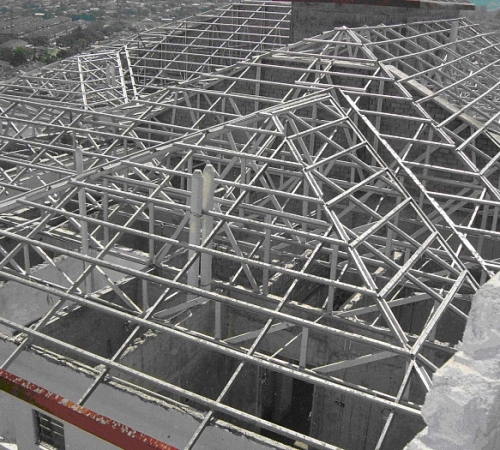
The classic rafter frame is based, which reliably holds such a design. Its durability and functionality of the rifle system depend on the correctness of the arrangement of the base and the supporting structure: photo: photo.
The hip roof is suitable for:
- typical development of cottages;
- individual construction;
- a separate country house on seven winds.
The trapezoidal shape of the roof with a roof is called from the German word denoting the tent, although the tent roof is a separate variety, but close in shape. This design confirmed its reliability in the area where heavy snowfalls and rains are frequent, and where ice on the roof is formed. It is applicable in the zone of seismic activity, as well as where, in addition to abundant precipitation, strong gusts of wind and tornado swirls are frequent. In such regions, high gable roofs break down under pressure or add up like a house of cards.
The main advantages are design:
- a minimum of the surface of the roof with the optimal slope for the precipitation;
- uniform distribution of the load load on the entire perimeter of the walls;
- excellent resistance to wind power and abnormal weather phenomena;
- increased stability of the roof;
- optimal drain of water with abundant rainfall and slipping of a snow cap when falling in excess of the norm;
- providing protection against temperature changes.
We make drawings and preliminary calculations of the rafters of the hip roof
You can not start doing such complex installation without preliminary sketches and calculations. If there is no experience, the calculation of the rafter system of the hip roof will help to make an architect or other specialist.
This will not only allow you to most accurately plan the costs of wood and roofing materials, but also to avoid other annoying errors.
Attention: installation of a classic tetrahedral roof begins with the performance of the sketch and drawings! They must definitely indicate the angles of the inclination of each slope, all the nuances, including the step between the beam.
With an independent drawing, if you have to do this for the first time, you can even build a reduced copy of the future hip roof from cardboard to visually evaluate its advantages and disadvantages.
At this stage, it is not too late to change the angle of inclination of the main and lateral slopes, increase or reduce its height, as well as optimize the upcoming expenses. Further, all adjustments are made to the preliminary drawing of the rafter system, a cleanliness used in installation is made.
Tip: Remember that the greater the slope, the higher the roof and the more consumption of roofing materials. But too sloping faces will hold a lot of precipitation.
Attention: For high -quality installation of a hip roof, only well -dried beam and logs are used, which is important to pre -soak with a special antiseptic.
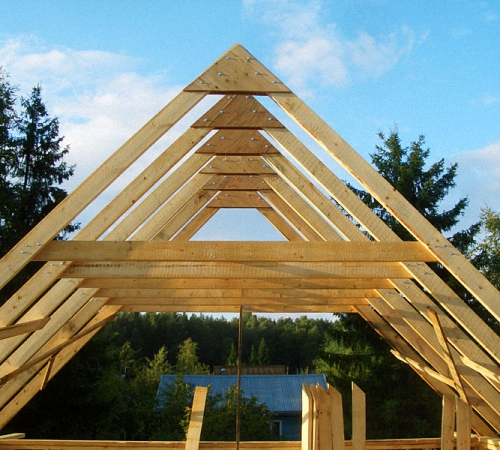
How to calculate the angle of inclination of the hip roof?
In the modern practice of the construction of holly roofs, the angle of slope of the faces hesitates greatly, depending on:
- climatic conditions of the terrain;
- the functionality of the attic (attic) of the room;
- general design or architectural project;
- personal preferences.
Each area has its own fashion for the roof shape. In the Carpathians, for example, they always made high sharp roofs that drop off the caps of snow, and in the Alps I do more gentle, in Denmark they make additional broken sections, etc. But, whatever the choice, it is important to remember the proportionality of the house and the general load of the structure. If the house is low, then disproportionately a large roof is able to visually press it into the ground and add the masses to the foundation.
The choice of the optimal slope affects:
- weather factors of the area;
- selection of roofing materials;
- design solution;
- consumable of building materials.
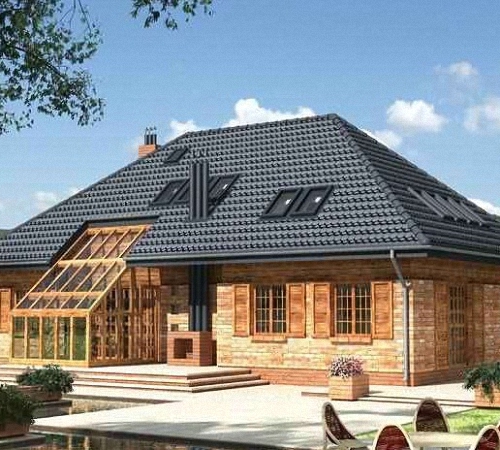
In regions with strong winds, a large roof creates sailing, so the slope of the hollow rafter system will be minimal. Here it may be necessary to strengthen the supporting structure and the choice of roofing materials may be limited. Abundant snowfalls and prolonged winters raise a slope so that the snow cap slids along the roof without excessive home load. In a area where most of the year is warm and sunny, you can limit yourself to a rather sloping or symmetrical roof with minimal heating materials.
Tip: it makes sense to install solar panels there for a reserve source of energy, but this is an additional weight, which is necessarily taken into account in the roof project.
The choice of the angle of slope depending on the roofing materials:
- piece materials (tiles, slate, slate) a bias of at least 22 degrees;
- rolled materials on the sloping side of the roof 5, and on the gable and hip roof from 15;
- corrugated board and metal tiles from 15;
- ondulin and soft roof from 11;
- membrane coatings from 2 to 5.
The optimal bias fluctuate in the range of 10 60, sometimes up to 75.
Today, it is believed that the installation of a hollow rafter system is the most time -consuming, relative to other types of roofs. But then it is more reliable and aesthetic than a simple gable shape of the roof.
Tip: On a sloping row roof of a large roof area, install an emergency drain for excessive storm load of water.
Basic rules on the installation technology of a four -sided roof
When assembling a holly roof, several types of rafters are used - diagonal (taccous), intermediate (angular and centr): drawing.
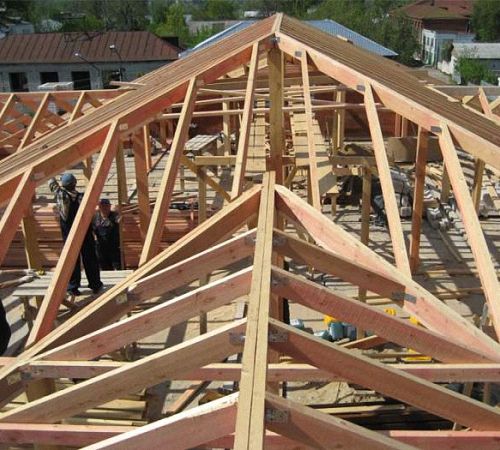
In this case, the beam under the diagonal rafters is selected equal in length, respectively, the overhang of the roof. If it is built in areas with frequent strong winds, then their length can be increased to 1m. And between roofing overhangs, the interval should be at least 50-60cm.
It is important with special care to docking the central rafters from the end side, skate beams and a bit (diagonal) rafters. Only after the installation of diagonal rafters can you move to the rest of the design details.
Tip: calculating the interval between the rafters, it is important to consider the parameters of the insulation, for example, laying plates for thermal insulation, so experts recommend a step about 55-60cm.
A four -sided rocket roof of the rafter system involves the name for each beam and a beam, depending on their location in the design: these are a head, runs and struts, crossbars and people, a bit of elements, etc. Scheme of the rafter system of a holly roof:
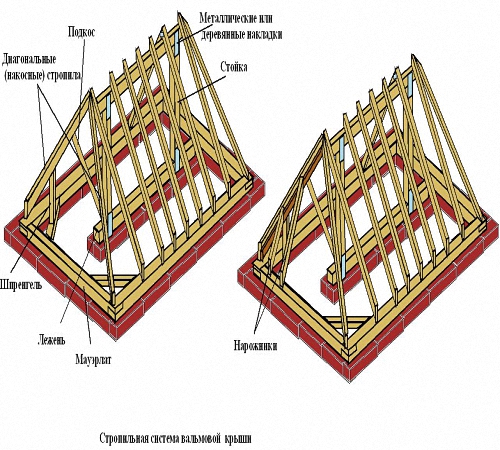
According to the method of installation, the rafter elements are divided into hinged and layered. The frame is attached to external or internal wall openings. The most economical type of the rafter system of the hollow roof, but it is not always possible. The purpose of the main elements:
1. The watering of the support of all the racks, and it is placed on the base of the ceiling or the inside of the perimeter wall, and the entire roof structure lies on the lower supports. They should not crash into them so as not to lose the strength of the hut structure. The lying is also fixed with the fitting of wood lining in the horizontal plane of the ceiling structure, which simplifies the installation of all supports and runs. However, you can do without a lying when installing a rafter system without struts, mounting a drawing drawing at the bottom of the strapping:
2. Racks and struts are used to reduce the linear dimensions of the rafter system, connecting almost without the help of spacers. All parts of the frame are displayed under the horse, and all elements seem to support each other, but sometimes spacers and crossbars are appropriate.
3. Contact or diagonal elements are attached at the hut frame from the lower support of the rafter structure or in the beam, which is its continuation. The opposite end of the tattoo rafters is attached to other grounds, and people are also relying there.
4. Penetrons side elements adjacent to the rafters, forming a bevel of a trapezoidal surface of the roof, and they are only in a hollow structure. These are shortened bars that are fixed directly to the same rafters, and the second end is mounted to the lower support.
5. The run is called a beam located relative to the lower supports in parallel, which gives additional strength of the entire rafter structure. This beam is placed under additional support. It is advisable to leave the interval no more than 4.5 m between the lower support and the runs. The need for runs in the frame diagram is welded by the features of the holly roof. They allow you to securely fix the run to the adjacent beam.
6. For additional strengthening of the rafter structure, sprenigs are mounted, taking into account the span.
7. Cooked rafters are well suited to support the design when the load is enhanced. They are located through the racks diagonally, closing through the Sprenhel.
The interval between logs and the beam in the device of the rafter system of the holm roof depends on:
- ease of installation;
- safety and reliability of the entire structure;
- effective insulation and waterproofing of the roof;
- the durability of the roof frame.
Competent marking involves taking into account the size of all elements of the rafter system and the distance between them. Marking is carried out as accurately as possible, noting the points of fixation of the rafters to the beams of the frame. Key points are noted from above, and on the lower binding of the structure along the Mauerlates, and along the bar of the skate, where the main rafters will be laid.
Additional supporting structures make it possible to increase the span using rafters of the layered type, which is relevant when installing roofs with a slope of up to 35-40. A beam with a cross section of about 50 mm is used for the rafter system, and it is able to withstand the load from all elements of the hip rafter system of the roof, as well as significant climatic loads.
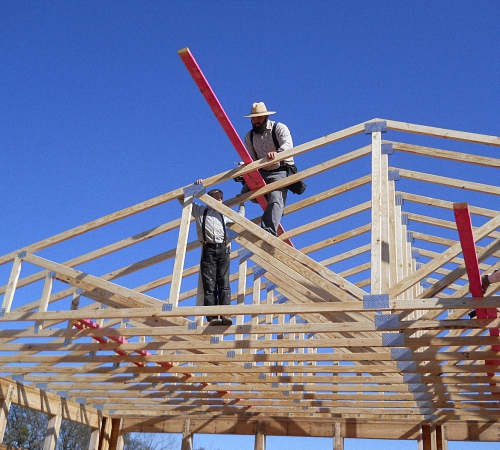
The process of the step-by-step structure we propose to familiarize yourself as a master class in the hill roofs of the raft system: the video located at the end of the article.
We do Mauerlat
Before starting the arrangement of the rafter system of the hip roof with their own hands, they begin with laying the support beams on the Mauerlat. Not only the frame should be based on the prepared base, but with it all other roofing elements.
1. Before installing Mauerlat, it is necessary to equip a reinforced belt designed to strengthen the bunch of walls and roof. A structure made of stone, shellout or brick involves the formwork at the top, where the frame should enter. It involves the release of the reinforcement for pouring concrete.
2. The hairpins are attached to the reinforcing cage so that their tops to about 5cm leave the beam to Mauerlat.
3. When the concrete grabs, it is treated with roofing material on bitumen to protect Mauerlat from destruction of moisture. At the same time, it is imperative to observe the total horizontal around the perimeter of the house.
4. The bars of the frame are planted on prepared studs, where there should be prepared holes that are pre -marked and drilled, and then everything is fixed with nuts. The central beam is sat on the finished Mauerlat, the horse will be located in parallel, and all the racks-stalls will converge to it.
Specialists' advice:
1. Using a rubbish and screws, they make fastening to the horse’s bar and Mauerlat, also additionally use crossbars and strapping.
2. A shortened beam (people) is connected by Mauerlat and rafters. The installation of rafters and people are recommended to be done strictly at a right angle, observing parallelism.
3. Avoid fastening ordinary rafters to those points where Mauerlat is fixed with hairpins.
4. It is important when additional mounting the roof to increase stability to climatic factors to use the fastening of anchors. The overall design can also be strengthened using struts under the rafters or an additional insert of the racks in the beams. The general strength of the roof is also guaranteed by strapping at the bottom of the slopes.
Attention: with any option of installing the lower support, it is important to provide a roll waterproofing and insulation in the beams at the initial stage of installation.
Further design of a holm roof
With independent installation, it is important that the roof is structurally both reliable and aesthetic, and this depends on the general proportionality. The rafter system can rely on the perimeter of the structure in different ways:
- in brick and stone buildings on the beams of supports;
- in a log house on the upper crowns;
- in buildings based on the frame directly on the strapping.
After completing the installation of the rafter system, they proceed to layer -laying waterproofing and roofing materials.

