Textile wallpaper is an excellent solution for wall decoration, while the joints between the canvases ...
|
|
The roof of any type is subjected to the destructive effect of rain and snow. When erecting ... |
Are you going to build a house, or did you start a large -scale repair? We decided to ennoble ... |
Polymer tiles: Installation instructions

The tile is one of the oldest roofing materials that are in particular demand in the construction market. However, the cost of natural ceramic tiles is quite high, and in order to reduce it, manufacturers resorted to a bold course, implying the use of synthetic polymer raw materials in the production of the roofing material. The polymer-sand tiles, resulting from these manipulations, are the material of the new generation for those who are looking for a compromise between an affordable price and high quality. Appearing in the building materials market relatively recently, polymer -old tiles won the close attention of consumers due to its unique characteristics that combines the durability of quartz sand, the aesthetic advantages of ceramic tiles and the durability of polymers. It is a reliable and light roofing, ideally suitable for decoration of roofs of both residential and industrial structures. Its advantageous combination with the surface of the walls of any materials, ranging from brick and ending with wood, only helps to strengthen it in the arena of the modern construction market. To verify this, we will consider the main advantages of polymer tiles and the features of its production and installation.
Content
- Polymer -old tiles: Historical information
- Features of the production of polymer -sand tiles
- Technical characteristics of polymer tiles
- Advantages of polymer tiles
- Disadvantages of polymer -sand tiles: what to look for?
- Polymer tile laying: installation features
Polymer -old tiles: Historical information
The progenitor of polymer tiles is ceramic (clinker) tiles, the popularity of which was due to the availability of raw materials (clay) used for its production. In this regard, its most widespread places were areas close to sandy and clay careers. The production of clinker tiles was carried out at brick factories, and its transportation was significantly complicated due to its large weight and relative fragility. Moreover, its production was quite costly, as it required large energy consumption for the firing of finished products. If you trace the changes that the tile production technology has undergone, you can notice that soon clay, which is the main component of production, was replaced by a cement-sand mortar with the addition of slag, which led to a slight reduction in the weight of finished products. In addition, the porosity of the products increased, as a result of which they became a favorite place for the spread of fungus and moss. Given the indicated deficiencies in the material, manufacturers came to the conclusion that it is necessary to develop a new generation material that will not only retain its aesthetic attractiveness, but also allow you to get rid of the existing shortcomings due to the characteristics of the raw material base. The idea arose that clay and cement must be replaced with polymer compounds acting as a binder, which was investigated at a molecular level and involved mixing the heated polymer mass with sand.
Features of the production of polymer -sand tiles
Production of polymer -sand tiles is a multicomponent technological process, which includes several stages:
- Preparation of a polymer composition, which is the main component of tiles;
- Production of polymer -sand tiles using specialized equipment;
Important!Due to the fact that working with polymeric materials is potentially harmful to human health, the installation of production equipment for the manufacture of polymer tiles should be carried out in a well -ventilated room.
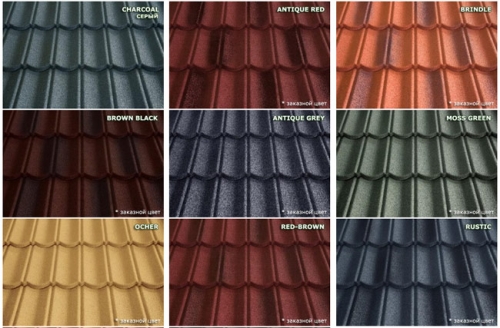
Raw materials for the manufacture of polymer tiles are quartz sand, plastics that have undergone secondary processing, and dyes, thanks to the extensive color scheme of which it is possible to get the roofing material of almost any shade. Moreover, in addition to decorative, the dye also plays a functional role, acting as a binder component for quartz sand and polymeric materials.
As for the secondly redesigned plastics, they include: they include:
- Agglomerate, The resulting by melting polyethylene, during which a certain amount of water, contributing to the formation of balls, is chopped into it. It is they who are the main component for the manufacture of polymer sand tiles;
- Hard polymer, whose function can be performed by polypropylene or polystyrene.
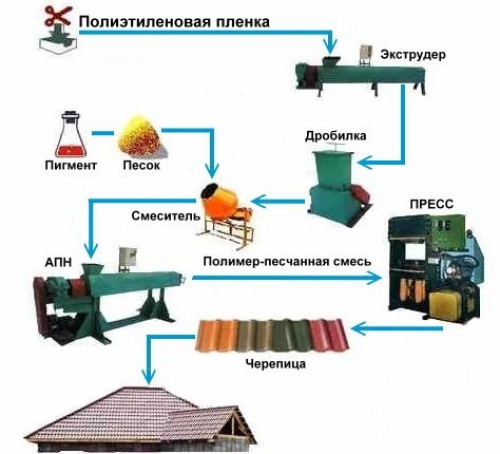
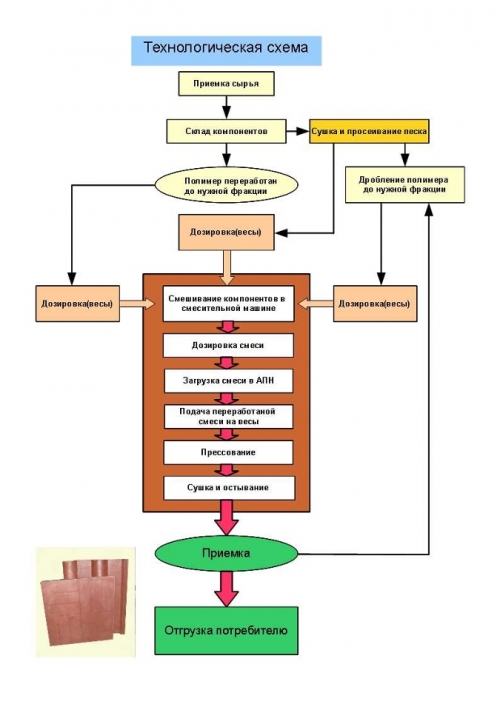
- The basic principle that must be adhere to at the initial stage of the manufacture of tiles is to comply with the correct proportions of the components in the process of preparing the working mixture. Thus, the initial stage of production involves grinding the agglomerate and mixing it with sand and dye on special equipment in proportions 24: 75: 1, that is, the working mixture is 75 % of sand, 24 % of polymers, and 1 % falls on the share of coloring pigments. Failure to comply with these proportions can lead to the manufacture of tiles of the worst quality with a lower operational period.
- The first link in the technological chain for the manufacture of tiles is to grind plastics for smaller particles using crushing equipment. The sand used at this stage should be dry, and therefore, special equipment is also needed to dry it.
- After thorough drying of sand and grinding polymers, the components are mixed with an extrusion machine, inside which they mix and melting with the formation of a viscous mass resembled yeast dough. A ball is formed from the resulting mixture, which is immersed in cold water, after it is allowed to cool at room temperature, which is necessary for all components to enter the reaction. After cooling the finished balls, they are immersed in a crushing machine for subsequent grinding and obtaining a mass intended for the manufacture of polymer -sand tiles. The resulting mass is immersed in a thermos mixing machine, where all the components are heated and mixed again. As a result, the sand is enveloped with warmed polymers and the release of the mixture from the unit in the form of small cakes, the mass of which does not exceed 2 kg. Then they are sent under the press, followed by the formation of polymer sand tiles using special press forms. In order for the surface of the finished tile to acquire a glossy surface, it must be cooled at an uneven temperature.
Technical characteristics of polymer tiles
- Despite the fact that polymer -sand tiles are an analogue of natural, it is a qualitatively new roofing material, which in its characteristics largely exceeds similar materials.
- Unlike natural tiles, polymer -sands are characterized by lighter weight and low cost;
- Unlike metal tiles, polymer tiles are not prone to corrosion and provides a higher level of heat and sound insulation;
- The roof, for the arrangement of which the polymer -sand tiles were used, is characterized by greater strength, unlike the bitumen roof, during the installation of which it is necessary to carefully prepare the leapland of the roof.
What are the technical characteristics of polymer -sand tiles?
- The specified material is characterized by resistance to sharp temperature differences and the effects of direct sunlight, which monitoring, having studied the results of laboratory tests carried out at temperatures from -65 to +100 degrees. Due to the fact that in natural conditions to decompose a polymer film will require more than one hundred years, the material retains its original appearance for many years;
- A distinctive feature of polymer -sand tiles is a low coefficient of moisture absorption, which is its natural protective mechanism from the appearance of mold, fungus, moss and acid rains, which have destructive aggressive effects;
- Maintaining the optimal temperature regime in space under the roof is facilitated by low thermal conductivity, which is another distinctive feature of polymer -sand tiles. It is thanks to this that it is one of the most popular materials in the arrangement of terraces and attic;
- The combination of two of the above characteristics of low thermal conductivity and low moisture absorption is a factor contributing to the creation of a reliable barrier from the formation of condensate, which contributes to the effective protection of roofing structures, especially made of wood;
- Polymer -sand tiles are characterized by effective sound absorption, and therefore, in the process of its installation, there is no need to use a sound -absorbing layer;
- The efficiency of laying the roof from polymer -sand tiles increases due to the impact resistance of the material, which does not hit in the process of laying and transportation;
- The material is made in accordance with the requirements for sanitary, epidemiological, fire and radiation safety.
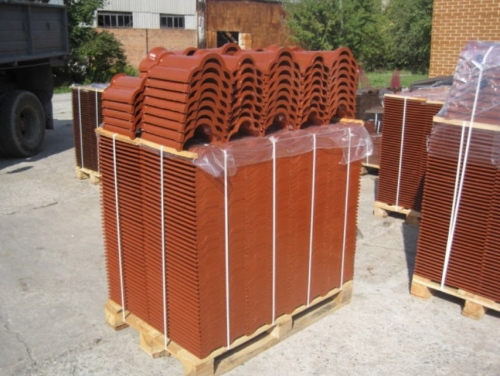
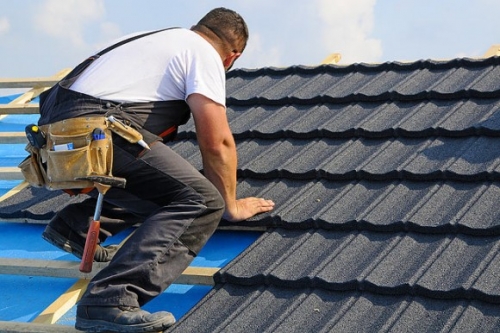
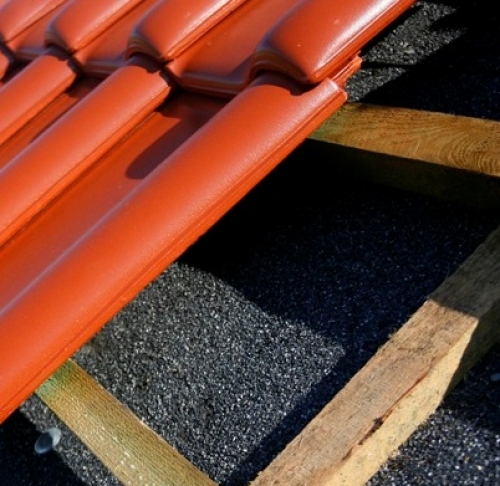
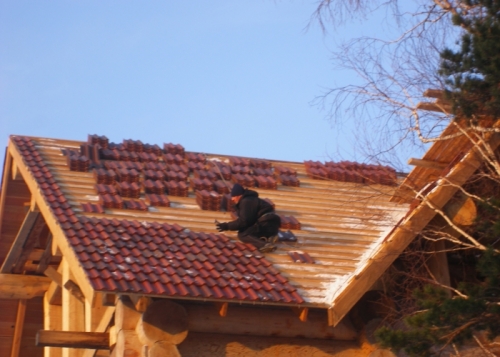
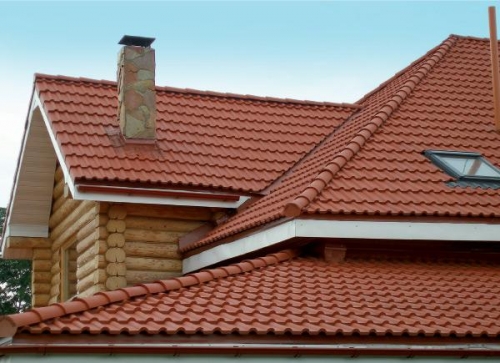
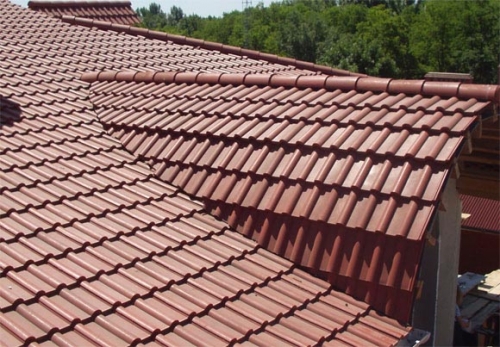
Polymer tile photo
Advantages of polymer tiles
Given the foregoing, we summarize what the advantages of polymer-sand tiles are.
- Resistance to sharp climatic fluctuations and high tolerance of frosts;
- Low cost of polymer -sand tiles, due to the low cost of raw materials used for its production;
- High heat and noise insulation characteristics, as well as complete inappropriateness of corrosion processes;
- High stability of polymer-sand tiles to burnout, due to the use of equipment with a UV stabilizer, not only on the surface, but also in the mass;
- Polymer -sand tiles are an effective dielectric, and therefore, there is no need to install lightning protection;
- High impact resistance of polymer -sand tiles, due to which the probability of obtaining a material with a marriage that arose in the production process, transportation or styling strives to zero;
Disadvantages of polymer -sand tiles: what to look for?
Despite the extensive list of previously marked advantages of the material, it must not be forgotten before buying it that certain shortcomings are characteristic of it. Consider what they are.
- Erosive destruction of the surface of the tile, due to the fact that after a certain time, the surface of the material is gradually thinning under the influence of ultraviolet radiation. However, according to experts, the indicated feature of the material is difficult to consider with a disadvantage, since the thickness of the polymer -sand tiles is rather rather large, and the erosion of the surface is a long process;
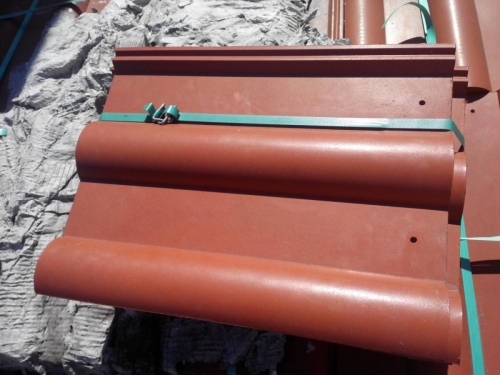
- Laying and transporting polymer tiles is significantly complicated due to the large weight of the material (the weight of each tile is at least 2 kg);
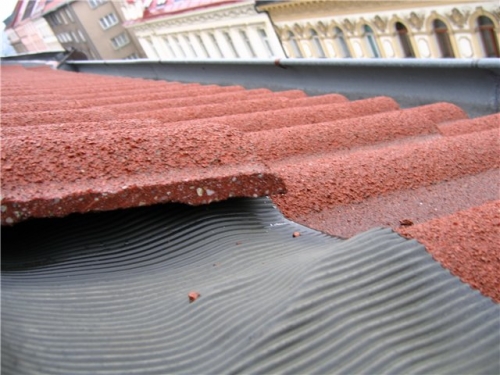
- Despite the proven stability of polymer tiles to sharp climatic changes, in the conditions of the temperature difference, linear deformation of the material occurs, which can cause the depressurization of locking joints and the subsequent flow of the roof. It is this drawback, according to experts in this area, that is the main thing.
- As for the flaws of the market as a whole, often, acquiring polymer -old tiles from unreliable suppliers who have not proven themselves in this area, you run the risk of encountering non -state products, the quality of which does not comply with existing standards. A bright representative among reliable materials that have proven themselves in the market and deserved the confidence of the consumer is the polymer tile of RuffPlast.
Polymer tile laying: installation features
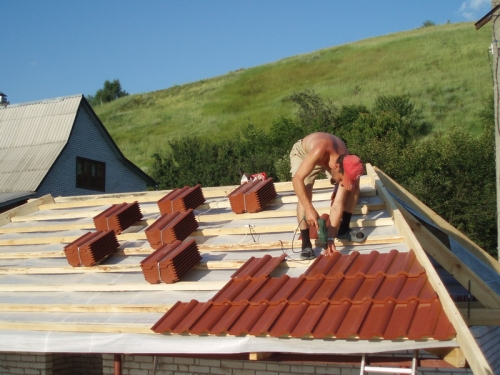
Even if you are not a specialist in the field of installation of roofing structures, but only at an amateur level you own the technique of a hammer and a nail, you can independently carry out the installation of polymer-sand tiles, during which you will get the opportunity to freely move around the roof, due to the impact resistance of the material used . Moreover, given the properties of polymer-sand tiles, you do not have to additionally spend money on the acquisition of heat and soundproofing materials.
The main preparatory measures before the installation of polymer tiles
Installation of a rafter structure
Among the townsfolk there is an opinion that the use of polymer-sand tiles is significantly limited by its large mass, not characteristic of metal tiles and other light roofing materials. In this regard, non -professionals are sure that this necessitates additional expenses for the purchase of lumber for the manufacture of a crate and arranging powerful rafters. However, in practice, this turned out to be a deep misconception by a myth that is not difficult to debunk. Experts calculated that in the calculated load on the roof, the share of its own weight of the polymer tile is not so large (if you compare it with the wind and snow load), and therefore, according to the results of the studies, it does not exceed that for metal tiles and other light roofing roofing materials. With this in mind, as well as axioms that the weight of 1 sq. m of the tiles does not exceed 22 kg, it can be concluded that there is no need to arrange an additional strengthening of the rafter structure, for the installation of which you can use a beam characterized by a cross section from 50x150mm to 60x180 mm. For the manufacture of rafters, dry wood should be used, the humidity of which does not exceed 15 %. In the classic option, the step between the rafters should not go beyond the distance from 600 to 1200 mm, while its width is directly proportional to the angle of the roof tilt.
Important! If the angle of inclination of the roof exceeds 45 degrees, the rafter step should be increased to 1000-1200 mm, if, on the contrary, the angle of inclination is small, the rafter step should be within 600-800 mm.
Arrangement of the waterproofing layer
In order to protect the underlying attic space from soot, dust, rain and snow moisture, as well as ensure proper ventilation of water vapor, experts recommend the use of subcutaneous films with micropercephorage. It is laid on the rafters, using a counter -attack that is laid along each rafter beam. The edges of the cornice begin to lay the waterproofing layer, gradually moving to the ridge and providing the output of the film of at least 20-40 mm. We must not forget that at the same time, it is necessary to perform a overlap of the film for at least 200-300 mm and lay an additional layer of film. To ensure the optimal level of insulation under the roof, a layer of film located on skates and clock ribs is not brought to the upper point by 30-40 mm. It is necessary to cut the film only at the end of the work.
Installation of the crate
For installation of the crate, it is recommended to use a beam not lower than the second grade with a cross section of 50x50 or 60x40. The step of the crate, which must be clearly kept when laying it, is 350 mm. If you do not neglect this rule, you can be firmly sure that when screwing the screws, you will get clearly into the wood. To mark the marking, use lacing, which must be pulled on extreme counterparts and at the same time measure the possible sag of each crate beam.
How to equip a crate in separate areas?
Installation of the crate on a roof with a remote cornice:
If you lay a polymer tile on a roof with such an assembly type, you must take into account the size of the step in the area of \u200b\u200bthe fracture of the slope, which should take into account the optimal attack of the upper row of the break on the lower. The upper beam of the crate of the remote cornice is stuffed close to the place of fracture of the rafters;
Napkit of the attic roof:
When calculating the step of the crate in the process of its installation for the attic roof, it is necessary to take into account not only the angle of inclination of the lower and upper half -scrains, but also the thickness of the crate. The main features of laying are as follows:
- The angle of inclination of the lower row of the polymer tiles of the lower slope should be the same as the angle of inclination of the upper row of the tiles this time the lower slope;
- The lower row of polymer tiles of the upper slope of the roof should be mounted in such a way that it provides a sufficient value of the ass over the upper row of the tiles of the lower slope;
- Before proceeding with the lifting of the tiles on the roof, it is necessary to complete the laying of the bar bars. To prevent an uneven load on the rafters, the tile is raised on the roof, while laying on all its slopes in small batches (5-6 pieces).
Tile installation: step -by -step guide
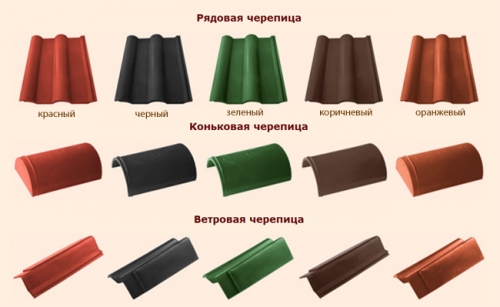
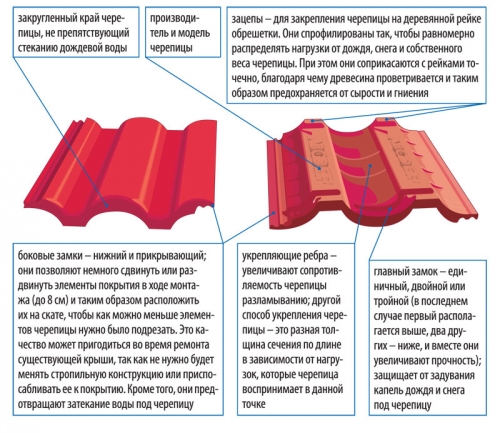
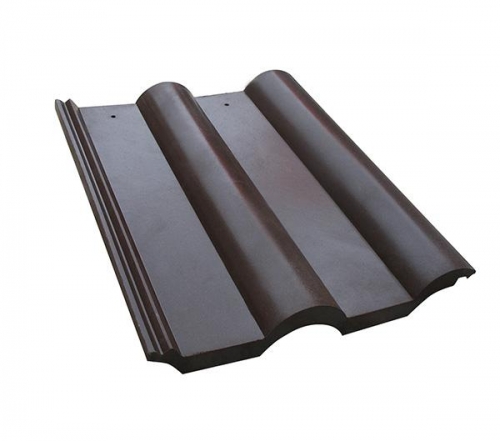
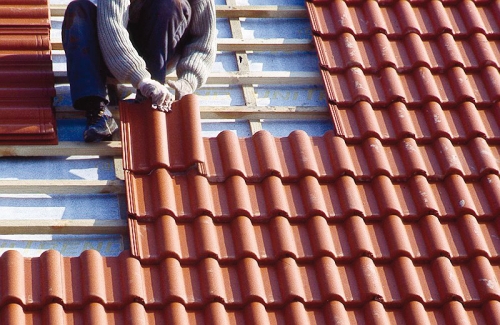
Without fixing, lay out the first and last rows of tiles. On the crate, mark the paint every 3-5 rows. Installation of tiles must be started from the lower row. To facilitate the fastening of the tiles, manufacturers provided a special ledge in the upper part of its back, with which it clings to the crate. In addition, thanks to the castle structures provided for, the tiles cling to one another, forming a continuous tiled carpet that prevents possible roof leaks.
The tiles are mounted to the crate through screws that are screwed into special technological holes provided in the upper part of the tile.
Important!To prevent the appearance of rust on the front side of the tiles, experts recommend using nails or anodized (stainless) screws. The fastening of each individual tile should not be hard, since it should be able to slight free movement (should have a backlash). The presence of this design feature of the roof will allow you to compensate for the natural expansion of the tiles that occur under the influence of temperature changes, and will also contribute to the adequate perception of the roof of the load caused by the shrinkage of the building, as well as wind and snow pressure, and prevent possible deformations and destruction of the roof.
After you have laid every third row, check the horizontal and vertical symmetry of the rows. To ensure uniform load on the building, the tiles are laying evenly on all slopes. If you need to cut the tiles at the joints, use a grinder or a hacksaw for metal for this. After you cut and drilled the tiles, moisten it with water. Even if the mounted roof is characterized by a complex configuration, the tile costs will be minimal.
Installation of skating tiles
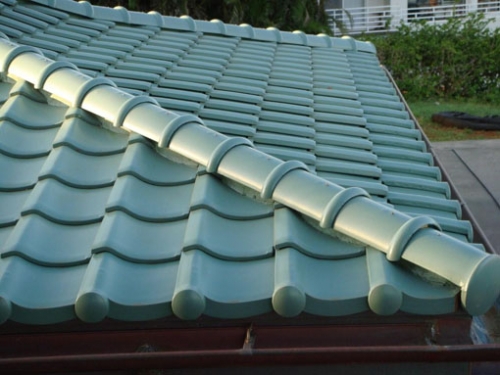
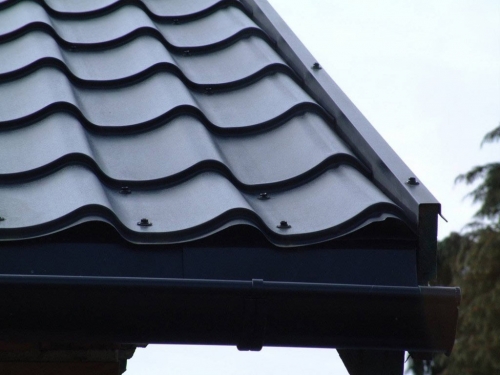
Skate tiles are attached using self -tapping screws to the ridge board. It is important to remember that it is necessary to provide an optimal gap between the skate board, the skate and the self -tapping screw (the so -called, small backlash), which will allow compensating for the temperature deformation of flexible polymer tiles. The length of the screws does not exceed 65 mm.
Installation of ridge tiles should be carried out so that it overlaps the screws that were used to fix above the lying row of tiles.
Arrangement system of the watering system of polymer -sand tiles
Features of the operational characteristics of polymer-sand and bitumen-polymer tiles, along with a qualitatively organized drainage, allow its use in the absence of effective sanitation, when the water drains from roof to Earth. This type of drainage is relevant only in small buildings characterized by a single -sloping roof, while the removal of the cornice should be at least 60 cm.
If you plan to operate a roof of polymer -sand tiles in an organized drainage conditions, you should know that in this case, the use of both traditional systems is allowed, for the manufacture of which galvanized iron or asbestos cement, and modern ones made from PVC and galvanized steel were used.
Polymer tile video

On the manufacturer’s website
On the site of the manufacturer of the Tetto polymer -sand tiles on the topic that is disclosed here, there is an interesting article "Attention - fakes appeared." I recommend that you familiarize yourself. Also there, the GARRAMS section answers many questions and doubts.
http://www.tetto.ru/polimerpeschanay-cherepitsa
Here are the main theses:
Poor Polymer -Seal Tumor - Reasons:
- the use of secondary/ non -suitable raw materials;
- lack of special additives as part of the material;
- absence in the production of STR;
- the use of sand with a high clay content.
How to identify a low -quality product:
- Strong smell;
- lack of documentation with the manufacturer;
- interspersed of unfulfilled particles and aluminum (metal) in the product.