In the process of insulation, a question arises very often between the choice of cheaper ...
|
|
Ceiling niche optimal solution of the cornice for curtains. The box allows ... |
Today you will not surprise anyone with the front metal door indicating ... |
DIY cellar: step -by -step instructions
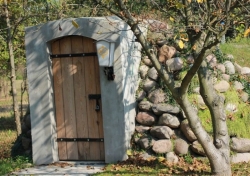
The cellar is an obligatory extension at the cottage or near a private house. In this room, the optimum temperature for saving vegetables, fruits, conservation and blanks is held all year round. It is quite possible to build a cellar yourself. To do this, it is necessary to evaluate the condition of the soil, determine the optimal type of structure, choose materials and adhere to the selected technology.
- Board arrangement requirements
- The choice of optimal design and materials
- How to make a cellar with your own hands: a deepened structure
- DIY ground cellar: step -by -step instructions
Board arrangement requirements
The optimal place for prepared conservation and grown harvest will be a cellar. In this room, natural conditions and temperature conditions of about +4C are supported. A favorable microclimate is necessary to preserve the product type and taste characteristics of fruits and vegetables.
Some confuse the concepts of a cellar and a basement. However, these are completely different structures. The basement is located in the basement of the building. The cellar is equipped separately separately in the personal plot. The design is made invisible, or vice versa, acts as a bright element of landscape design.
Practical use of a vegetable store is possible subject to certain conditions:
- the presence of a low temperature, the cellar is built under the ground or equipped in a basement in contact with the outer wall of the house;
- darkening in the design of the cellar excludes windows;
- constant filling with clean and fresh air due to natural and supply and exhaust ventilation;
- air humidity is about 80-90%.
The choice of optimal design and materials
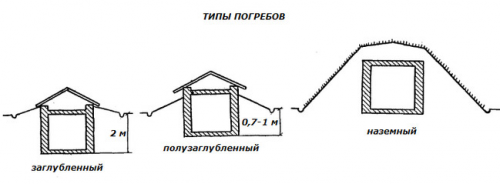
The following types of cellars are distinguished depending on the depth of the occurrence.
Ground structure It rises above the surface, the depth of the structure is not more than one meter. In fact, this is a small button for vegetables. Labaz can be erected anywhere, even in small lowlands.
The construction of the garden labase is the best solution for waterlogged areas and low -powered territories. A distinctive feature of a ground cellar lack of an overlap. As a rule, a gable roof of boards is equipped. Thanks to this, the terms and the final price of the construction of the vegetable stores are reduced. An additional plus of the ease of building such a cellar with your own hands.
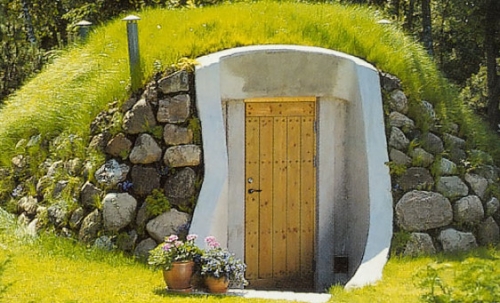
Outwardly, a more spacious ground cellar resembles a small house. Earth is poured on top of the floor, closing the overlap with a thick layer. The end side with the door remains unprotected. On top of the backfill, lawn grass is planted, which decorates the territory and holds the roots with the soil from sprinkling.
Half -haired cellar The most popular type of structure. The design is outwardly similar to a ground structure, but part of the room (about 1.5 m) is located under the ground. The entrance door to the bins is located below the surface of the soil, so it is necessary to provide a system for the removal of melt/rainwater. The door structure is thoroughly insulated.
Buried cellar Well suited for compact areas. However, its construction is possible only with low groundwater or when arranging thorough drainage and waterproofing. The entrance can be covered with a heat -insulating removable lid or formed with a special burial with a small house with a hatch in the ceiling. Torment can be used as a household for placing garden and sedimental inventory, various household items or vegetables.
The walls of the cellar are elevated from different materials: stone, brick, concrete or asbestos -cement sheets. It is not advisable to build construction from metal, as it is difficult to achieve a suitable temperature regime.
When using the Earth as the main material for walls from the inside, it is covered with wood. Reiki made of wood should be well dried, polished, treated with an antiseptic and dried again.
We make a cellar with our own hands: Video on the selection of materials
How to make a cellar with your own hands: a deepened structure
Assessment of the terrain and soil condition
The best location of the cellar of the hill, burns or hill. Groundwater in such cases pass far from the surface of the Earth. When placed on a hill, rainwater is reduced. In addition, it will be possible to save on waterproofing materials.
Many people prefer to build a cellar next to a residential building in order to get faster and take the necessary foods in the cold season, in the rain, etc.
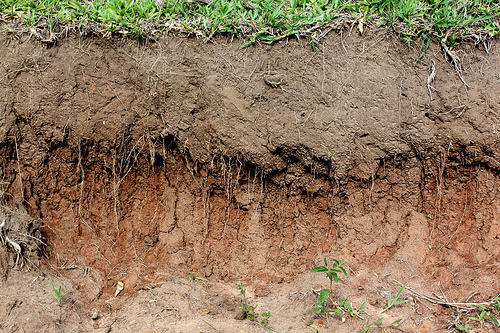
Before starting construction, you need to find out the type of soil and the possibility of building a buried/ half -and -long vegetable store. For this, a small test should be carried out:
- At the site of the construction of the bins, lay a piece of natural wool, and a raw egg on top.
- Cover the structure with a jar and leave for one night.
- Assess the result of the experiment:
- if the wool has a dew drops, then groundwater is located nearby;
- if the egg and the coat are dry, then the surroundings of the waters are deeply and safely possible to start work.
Before building a cellar with your own hands, it is advisable to evaluate the type of soil:
- Peat Optimal type for collapse. This soil minimizes the damage to products, which is especially relevant in the storage of root crops.
- Fluffy soil swimming, which is not suitable for the construction of an internal cellar. Such soil contains loam, sand and sandy loam. In order to build a vegetable storehouse, you will have to replace the soil and add sand.
- Sand soil is well suited for arranging the base. This natural material is often added to lower the enormousness and reduce moisture content.
Materials and tools
For the arrangement of the cellar in the country with your own hands, you will need:
- gravel and gravel;
- sand is rack;
- clay solution;
- rolls of the roofing material;
- brick;
- cement;
- boards for arranging the floor frame;
- concrete of the brand 100;
- molten bitumen;
- assistance for reinforcement.
From the tools you should prepare:
- concrete mixer;
- manual tamping;
- shovels;
- screws, screwdrivers, nails, hammers;
- welding machine;
- grinder;
- primer;
- brush;
- hacksaw.
Preparation of the pit
The construction of a buried storage begins with the digging of the pit. The work is performed in the following sequence:
- Peel the site from stones, sticks and vegetation.
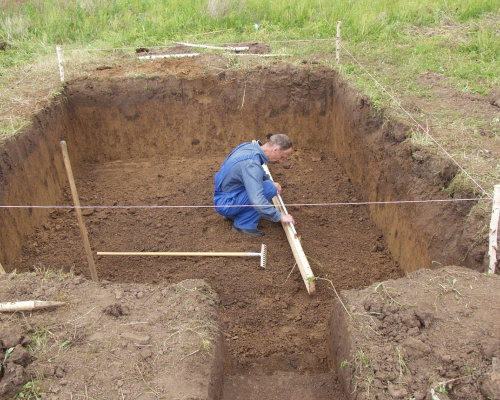
- Apply marking and dig a hole. Traditional dimensions of the cellar: length /width 2.5 m, depth of 2.3 m. For digging the foundation pit, it is better to use the services of an excavator.
- To align the walls of the pit with a shovel, scraping the excess of the earth and giving them an even surface.
- The depth of the pit depends on the type of the arranged cellar. When determining this value, it must be taken into account that the space will partially occupy a hatch or entrance, racks, a staircase. In view of this, the pit must be pulled out with a certain margin.
- Tamp the bottom of the pit, pour sand with gravel into the pit. The thickness of the sand pillow is 20 cm, gravel 10 cm.
Arranging the base of the floor
The floor screed is best performed with clay solution. To prepare it, it is necessary to combine clay and quartz sand in a proportion of 90%/10%. Dilute with water, bringing to a state of thick sour cream. Pour gravel with a prepared solution into a thickness of 3-4 cm.
To increase the strength characteristics of the base and ensure better isolation from the penetration of groundwater, it is recommended to fix it with concrete to be fixed. Procedure:
- Prepare a mass of rack sand and concrete in a ratio of 5: 1, respectively.
- Pour the clay base after drying with a concrete solution with a thickness of 5 cm.
- Leve the surface and leave until completely solidified.
Elections and waterproofing walls
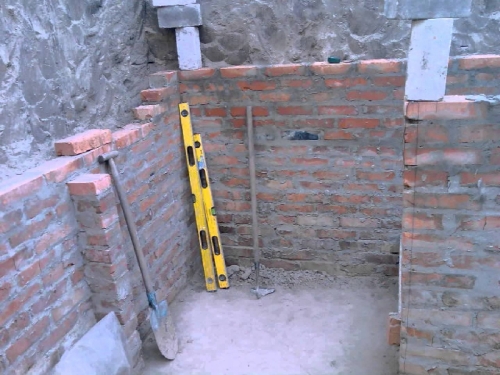
The technology for the construction of brick walls is as follows:
- Equip the foundation for masonry with a width of 1 brick, about 15 cm high.
- Leave the foundation for drying.
- Masonry is performed from the corner of the wall where the doorway is provided.
- Bricks are placed in a checkerboard pattern.
- By laying a brick, it must be tapped with a warden handle. This will help get rid of excess solution and improve the adhesion of materials.
- After the construction of each row, its evenness must be checked by the construction level.
- The working solution is prepared from sand and cement in a ratio of 4: 1, respectively.
- In parallel with masonry, pouring the cracks and the space between the brick and the earthen wall with a clay solution is performed. This technology provides additional waterproofing of the vegetable store.
- After the construction of all walls, leave the construction for 1 week before the solution is hardened.
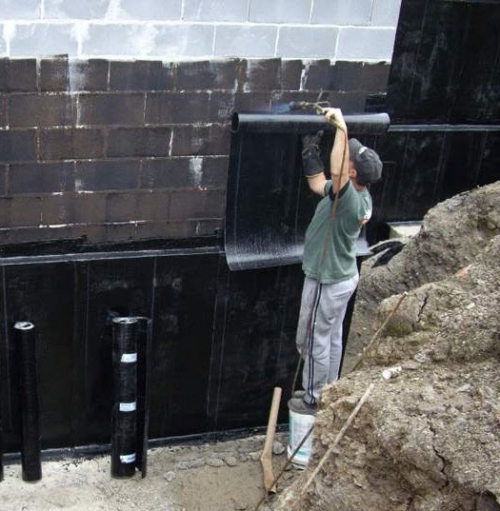
Brick walls need waterproofing. For this purpose, hydrostecloizol, roller insulators or bitumen mastic are usually used. The sequence of insulation work:
- Process all surfaces with a water -repellent composition.
- Attach sheets of roofing material on the walls by fixation of the material through a heated bitumen mastic. To ensure high-quality insulation, you will need 2-3 layers.
- The walls are plastered with cement.
Construction of the ceiling
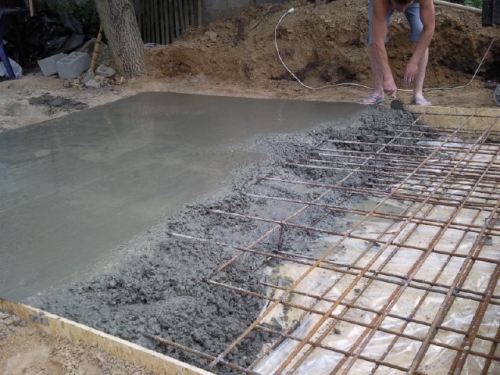
Establishment of the floor is a responsible event. The support constructs should withstand heavy loads. Often the overlap is made of a monolithic block made of concrete and a reinforcing frame. It is important that the roof of the cellar in the area exceeds the size of the room, since the walls will be supporting supports.
Work execution algorithm:
- Install the supports on which wooden formwork will subsequently rely.
- The formwork before pouring must be carefully seized so that the solution does not flow through the cracks.
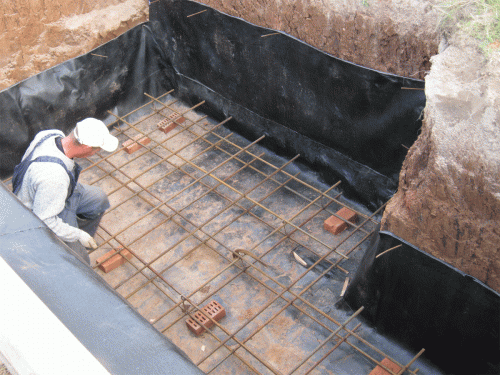
- After preparing the formwork, make the frame of a concrete slab from the reinforcement. The step of the reinforcing bars is about 25 cm, the height of the frame is up to 30 cm.
- With a large area of \u200b\u200bthe cellar, it is recommended to perform double reinforcement of the plate.
- The fittings mesh should protrude outside the wall of the cellar of 5-10 cm from different sides.
- The resulting frame is evenly pour in concrete solution.
After pouring the slab, you must wait 3-4 weeks. The overlap will completely harden and take the final look.
Ventilation system and electricity supply
Good air exchange is an important condition for the safety of products in the cellar. The absence of normal ventilation will lead to rotting of vegetables, and too fast circulation of air flows to the drying of root crops.
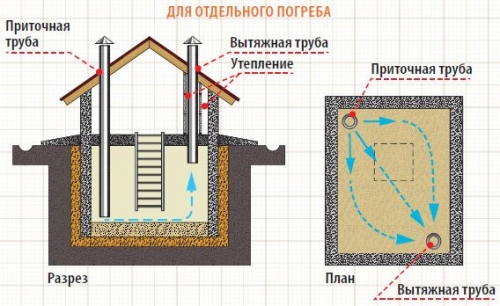
In the technical room, it is preferable to create natural ventilation it is less costly, and its correct organization will provide sufficient air exchange. For implementation, you will need to equip a supply and exhaust duct. The exhaust element is placed at the top of the ceiling, and the supply hole on the opposite wall at a distance of half a meter from the floor.
The procedure for creating natural ventilation in the cellar with your own hands:
- Choose an duct from the calculation per 1 square. m area of \u200b\u200bbins 26 sq. cm pipes.
- Installation of the pipe is performed from the corner of the room, and its lower end should be located under the ceiling. The duct passes through the entire room, roof, rising above the rafter system by half a meter.
- So that condensate is not going to the pipeline, it is necessary to thermal insulation of the exhaust pipe on the basis of the sandwich. One pipe is installed in another, and the space between them is filled with mineral wool.
- The open end of the air pipe is located at a distance of 50 cm from the lower floor level. An exhaust duct permeates the floor, ending in 80 cm above the base.
- Cover the external opening of the pipe with a net.
- It is advisable to put on the pipes that control the flow of air.
Electrification of the cellar is performed using a copper cable with double or triple insulation.
Internal design of the cellar
At the end of installation work, you can begin to improve the cellar. There are several design options:
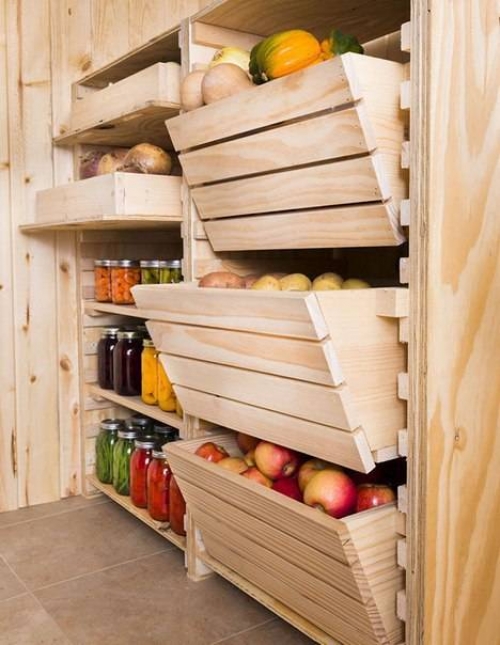
- make the walls with racks with spacious shelves;
- hang metal shelves;
- make prefabricated racks.
Important! All structures made of wood should be covered with composition against insects and protective impregnation from the effects of humidity.
DIY ground cellar: step -by -step instructions
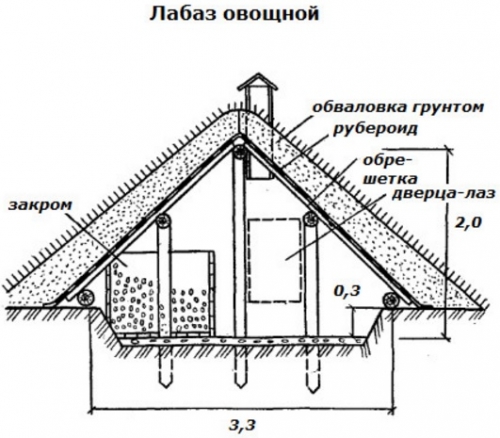
In the country, you can equip a simple cellar with your own hands with a high level of groundwater. Inside the bins, the air temperature is capable of 2-3C. We will analyze the example of building vegetable stores by type of labase with dimensions:
- height in the center of the structure 2 m;
- width 3.3 m, length 3 m;
- the width of the passage is 0.6 m.
Squeezed of work:
- Logs based on the soil coated with hot bitumen mastic.
- The overlap is made of boards, and the elements of the crate from the opposed horseman, the bothpol, clayoloma, pine tears from the sawmill.
- The overhangs of the roof should rely on the ground. Such an installation provides in the cold season additional thermal insulation in the form of snowdrifts. As a result, the structure is formed as a tent.
- On the one hand, the labase is sewn up by two rows of boards, between which the insulation is laid. Another end is placed in a warm door.
- From the outer part of the lobaz around the entire perimeter, digging a drainage trench that prevents the ingress of natural waters.
- Near the skate, make an hood a wooden box with an adjusting plate.
DIY cellar construction: video

This is not a cellar, but 1 room
This is not a cellar, but 1 room apartment for money and invested work.
Houses 2 cellars dug with a jug. One 50 years, the second 30. One minus is vertical.
And the cost is four overlapping pipes and created with a wall lid-Glina, half Glina.
All vegetables are in good condition. I live in Siberia+30-30.