Glasschold has a large number of advantages, and therefore is often used in ...
|
|
The facade of the building and the quality of its insulation is the main factor that determines the value ... |
For a decorative and protective coating of a wooden door, there is a large ... |
DIY wooden canopy

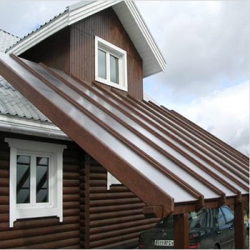
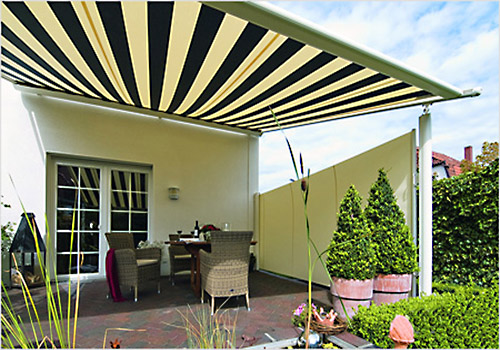
It is difficult to imagine a modern country house without a canopy. This architectural structure performs two important functions. Firstly, protects the structure from rain and sun. Secondly, it is an excellent means of decorating the facade of the house. The hardworking and inventive owners of summer cottages came up with a lot of ways to arrange an additional roof over the head, which can be made from improvised materials and have a wide variety of forms.
Content:
- Varieties of awnings
- DIY wooden canopy
- Important nuances of work
- Wooden canopy: photo
- Wooden canopy: video
Varieties of awnings
The classification of awnings is extensive. Depending on the design features, they are:
- inclined (gable or single -sloping);
- straight;
- multifaceted (in the form of bent arches, domes, pyramids, polygons, arcs).
Depending on the location of the canopies, they are divided into:
- separately standing, erected away from the main building (car awnings, landscape canopies);
- attached. They are being erected above the entrance to the house or above the open veranda;
- built -in. Are an integral part of the architectural ensemble. Most often built in the barbecue area or in the existing building;
- decorative. Serve as a decoration of a garden composition.
If we talk about materials, then the canopies are stone, wooden, from polycarbonate, combined.

A wooden canopy is the most popular variety, because it is easy to perform and does not require special costs when arranging. Everyone can build such a design if there is a desire.
DIY wooden canopy
You puzzle over the problem of how to build a wooden canopy and do not know where to start construction work? The first step towards the implementation of the cherished goal is the development of the project.
Project development
Projects of wooden canopies are designed to analyze existing conditions. Especially if the design is attached to the already finished building. Information about the foundation and the facade wall of the house is extremely important, as well as climatic conditions (wind load, snow thickness in winter, the cardinal side in the place chosen for construction).

In addition, it will not be superfluous to think about decor elements, types of roofing materials preferred in one case or another, to select the shape and size of the canopy. The more your project will be, the easier it will be to put it into practice. Exact numbers will help correctly calculate the number of necessary consumables. The easiest way is to make a wooden canopy above the porch, which will be reliable and stable.
When developing the project, the working sizes of roofing materials should be taken into account. Lay out the sheets of slate overlair on the ground across and along the waves. Only after receiving the exact dimensions of a clean roof can you start business.
Installing racks
The design of a wooden canopy can be made of any wood, but the pine into it will best cope with the duties assigned to it. It is beautiful, durable, has a low weight and is able to organically fit into any exterior.
The tree can be just sawed, the main thing is that there is no bark on the bars. Recommended section of at least 75x75 mm. Part of the timber installed on the ground is processed before installation with bitumen mastic, which protects against the negative effects of moisture. Pillars are installed at a distance of a meter from each other so that the roof is hanging on the front of at least 200 mm, on the sides (along the waves) by 50-100 mm.

With manual drill or shovel, we prepare wells, located in one line, 500 mm deep. Do not forget to check the diagonals of the canopy, they should be the same. Using a plumb line or construction level, set the slats. Strictly vertical. For fixation, we use auxiliary bars, which then can be removed without problems.
Free space is filled with concrete or gravel. The second option is more profitable. Crushed stone costs nothing, does not require complex kneades, and he keeps just wonderful. After installing the pillars, they must be cut along the height with a bevel corresponding to the slope of the plane so that the rafters lie on the upper ends of the beam. Using a beaten cord or hydraulic level, we get a horizontal line.
The height of the racks at the bottom of the slope should not be below 1800 mm. However, if you plan a rack or table in this part, then this indicator is allowed to make less.
Installation of rafters
Further, the device of a wooden canopy passes into a simple, but requiring utmost attentiveness, stage installation of a rafter system. The rafters are a bars with a cross section of 150x50 mm. Such strength will be quite enough to block a 6-meter span. Subject to the slope and estimated weight, of course.

The distance between the rafters is about 1 meter. One side is attached to the wall or reference board mounted in advance, and the other lies on the racks, passing the line at the site of the planned overhang is strictly perpendicular. To connect the components of the rafter system, wood or steel screws are used. For a mineral base, for example, a brick wall, the mount is carried out by means of corners, consoles, dowels or metal anchors.
We perform a crate
A crate is performed on top of the rafters (perpendicularly). It is better to use a torn board with a width of 160 mm, with a thickness of 30 mm. The boards are distributed along the axes at a distance of 900 mm.
The boards should fall under the joints and the middle of slate sheets (size 900x1800 mm). The last and first lines should be along the edges of the slope. It is necessary to screw with the help of screws.
We lay the slate
A wooden canopy for a summer residence is almost built. You can proceed to the flooring of the roofing. The slate is screwed at the top of the wave with galvanized screws equipped with a head with a gut. I advise experts to put special pucks from plastic under the heads. The sheet requires an average of 11 screws. If there is no washer, then they can be replaced with Ranilov self -tapping screws or a fastener with a press -shaped.

Shifer manufacturers often equip the goods with trapezoidal or round gaskets, allowing to reliably fix self -tapping screws without violating the wave shape. The slate sheets are mounted from the bottom up. The ranks enter each other by 100 mm. Front and side overhangs for reliability are best done minimal (50-100 mm). If necessary, the slate is cut by an ordinary grinder with a diamond circle.
Important nuances of work
Wooden elements involve the processing of compositions that protect against atmospheric precipitation, mold, fungus and create an attractive decorative effect for the eye. The impregnation can be either colorless or tinting.
Now you know how to make a wooden canopy. There are only a few points that require immediate consideration. Pay due attention to the floor. A simple dumping of large crushed stone, flooring, sandstone lining, concrete screed. The choice of the method of creating the soil remains with you.

Watch out the presence of light and pairs of sockets under a canopy. The functionality of the finished design will be added by a barbecue, a hob, a barbecue. The variations of the decor will depend only on your preferences can be aged wood, decorated with curly plants, wooden regiments, and handmade vases. Think, try and implement the dream of a corner of comfort and comfort in the bosom of nature.
Wooden canopy: photo


For light and fast
For light and quick manufacture of foundations for wooden pillars for canopies, arbors, verandas and other structures, we offer ready -made foundation reinforced blocks with a beam mount. Reinforced blocks have a special conical expansion and an enlarged supporting part, as well as the basement of the ground located above the ground to protect the bottom of the pillar from weather influences. All information on the site articrete.ru.