Bitumen cheap waterproofing and adhesive material, which is often used in ...
|
|
The modern market of building materials offers a huge assortment of various kinds ... |
In the process of building a house from a brick, the main issue is the type of foundation, ... |
DIY ceiling repair

At the entrance to the room in the field of view of any person, the ceiling is one of the first. It is on the ceiling, its type and condition that the impression of the interior as a whole will depend. Therefore, it is so important to maintain the ceiling in good condition, to monitor its purity and integrity. Whether we want it or not, but for the interior to look great, sometimes we have to perform a full or partial repair of the ceilings. To do this, you can hire masters, or you can do everything yourself, especially since the ceiling with your own hands can do everyone who knows how to handle the tool.
- Types of ceilings
- Cleaning the ceiling
- Plot of the ceiling
- Putty and plaster
- Painting the ceiling
- Pressing the ceiling
- Playing the ceiling
I would like to immediately note that if you are not confident in your abilities, it is still better to turn to professionals. Prices depends on the repair of ceilings primarily on the complexity of the work. So the cheapest are the primer work and the creation of isolation. About 1 cu may request for their implementation. per 1 m2. The most expensive are work on putty, plaster and applying liquid wallpaper. The price of these types of work ranges in the range from 7 to 10 cu. per 1 m2. All other ceiling repair work usually costs from 3 to 6 cu per 1 m2.
Types of ceilings
The variety of interior styles, building materials and creative design ideas was reflected on the ceiling. Today in the rooms you can see various types of ceilings, from the simplest to complex multi -tiered with many lighting devices. Among the most common types of ceilings are as follows:
- stained ceiling;
- ceiling with whitewashing;
- glued ceiling;
- suspended ceiling;
- stretch ceiling.
Each of these types of ceilings has its advantages and disadvantages, design features that affect the cost of repairing the ceiling and labor costs. It should also be noted that it is possible to carry out partial or full -fledged repair of any type of ceiling. The volume of work performed will depend on what repair will have to be done.
As with any other construction work, the ceiling repair begins with preparation. At this stage, it is necessary to clean the ceiling from the old coating, loading and leveing \u200b\u200bthe surface, as well as repair joints and seams on the ceiling. The thoroughness of the preparation depends on which type of ceiling is planned to be done. For example, the surface of the ceiling for whitewashing or wallpaper must be made as smooth as possible, at the same time for suspended or suspended ceilings, such an even surface is not critical.
Cleaning the ceiling
If the repair is carried out in a new room immediately after the builders, then you can skip such a stage of work as removing the old coating, and immediately proceed to the repair of joints and priming. Otherwise, we begin with cleaning the surface of the ceiling.
Most often ceilings belili, plastered with lime solution or simply glued with wallpaper. Cleaning the ceiling from these finishing materials will not be difficult. To do this, you need to take an ordinary painting roller and bar for it. The roller must be moistened with warm water and slightly squeeze it so that water does not drip from it, and it remains quite wet. After that, we roll part of the ceiling, at first we do not press the roller very much, but with each new rental we intensify. As soon as they noticed that the roller is almost dry, we plunge it into the water again and repeat the entire procedure on the new area of \u200b\u200bthe ceiling. After a part of the ceiling is soaked in the size of a couple of meters of square, we take a spatula and begin to clean the whitewashing, wallpaper or plaster to a concrete base or putty.
Important! Having discovered a layer of old putty under the finish, we check it for strength with a spatula. If it holds it firmly on the surface of the ceiling, then leave in place. If the putty begins to crumble and exfoliate, then we remove it and apply a new one in the future.
Sometimes ceilings oil was paintedor water -based paint. Removal of paint is a very laborious process. This can be done in two ways: mechanical and chemical. The first option involves cleaning from paint using a spatula or sandpaper. This is very long and dusty. For the second removal option, you will need a special wash, which can be purchased in the store. After impregnation, washing the paint is easily separated from the surface, the process of softening of the paint can take up to 12 hours.
If any decorative elements or polystyrene tiles, then they can be removed with a spatula with a hard metal blade. It may be that part of the glue will remain on the ceiling. To remove it, you will have to make some efforts, but as a result, a clean surface should remain.
When performing the overhaul of the ceiling with any suspension or stretch structure, you will have to completely disassemble it and remove it to get to the floor. There are no special recommendations here, except to be extremely careful and make maximum efforts so as not to damage the elements of a suspended or stretch ceiling.
Plot of the ceiling
After cleaning the ceiling from the finish coating and decorative elements, we proceed to the priming of the surface. It begins with checking joints and seams on the ceiling. They should be filled with plaster or gypsum solution, which is firmly and reliably held there. If the solution in the joints is partially scattered or falls off from a light blow to it, then we clean the joints and re -fill them with a solution based on gypsum and cement or a solution of special dry building mixtures with the addition of fiber. Having filled out the seams, we compare the protruding solution with the ceiling plane and let it dry completely, only after that we proceed to the soil of the ceiling for further work. We apply a deep penetration to the surface to achieve better adhesion and strengthen the base. To apply a primer, you can use a roller or brush and worry about protecting your hands and eyes from a primer. After drying the primer, we move on to further work.
Putty and plaster
The implementation of these works is a strict necessity, since the surface of the concrete base is far from perfectly flat. This is especially critical if the ceilings are repaired with wallpaper or it is planned to paint or whitewash. Which of these two methods of leveling the surface to choose depends on personal preferences and skills of the master. But there are a number of features that can persuade the scales in one direction or another. So plaster reduces the useful height of the room by 2 3 cm and has a rather large mass. And the putty gives a fairly large shrinkage and requires the application of several layers, which is reflected in the time and difficulty of performing this type of work. The advantage of the ceiling plaster is the simplicity of work and ease of leveling the surface. At the same time, putty allows you to achieve a perfectly flat surface with a minimum layer thickness and small mass.
Plaster
If you decide to make the ceiling plaster, then this will require: a primer concrete contact, special dry building mixtures, for example, Rothband and plastering beacons with mounting. The tool will require: 1.5 m rule, drill or punch and level. The work itself is performed after cleaning the surface of the ceiling as follows:
- having retreated from the wall 15,100 cm, put a mark for the guide, put the second mark for the guide with the same indent at the other end of the room. Using a painting thread, we plan a line between these two marks;
- from the first line we retreat 1.25 m and repeat the marking algorithm for the guide;
- когда разметка нанесена, засверливаем отверстия для крепежа;
- we fasten the guides to the ceiling with self -tapping screws. Using the level, we make sure that the guides are strictly horizon and in one plane. If necessary, unscrew or screw the screws, thereby adjusting the height;
- as soon as the guides were set, we fix them with a thick solution of the plaster mix and let them dry completely;
- it remains to fill in the gaps between the guides of the plaster mixture and level them along the guides using a metal rule.
The process of plaster in the ceiling itself is very similar to the plaster of the walls, the only difficulty is that the surface is non -valuable and is above the head. After completely drying, a flat surface is obtained, on which you can put their putty and finish coating.
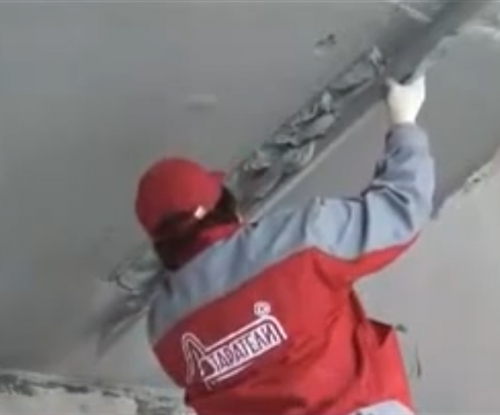
Ceilings repair: video lesson of ceiling plaster
Putty
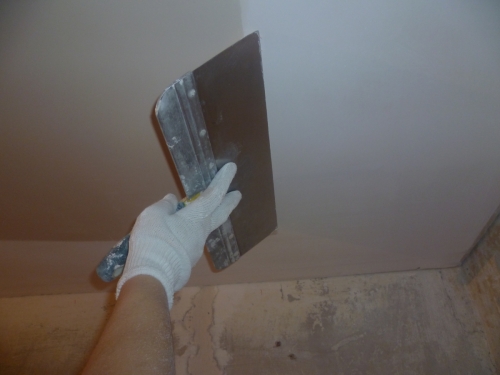
Falling the ceiling also allows you to level its surface, but this can take a slightly longer than plaster. In addition, it is quite difficult to do work themselves if there is no dexterity in handling the tool. The following materials will be required to work: gross I isohypsum putty and finish Satengips, concrete contact primer, painting mesh. From the tools you will need: wide and narrow spatulas, a container for kneading. The putty of the ceiling is as follows:
- if after cleaning and priming the surface there are large potholes or changes, then we first apply several layers of rough putty. It has the smallest shrinkage, and the thickness of its layer can reach 5 cm. To level the ceiling plane and remove excess putty, we use a wide spatula or rule;
- on top of even raw rough putty we lay a painting grid. Such simple reinforcement will give the ceiling strength. We carry out a wide spatula along the grid with a little pressure so that it is pressed into a layer of putty;
- if the surface of the ceiling is relatively flat, then you can immediately use the final putty of Satengips. It is applied to the surface of the ceiling with a wide spatula, and excess is removed to it. For reliability, you can reinforce a painting grid;
- after the base layer of putty is completely dry, you can proceed to the finish putty and bringing to the ideal.
To get a perfectly smooth surface, we use special graters with sandpaper. As soon as they achieved a flat surface, you can proceed to apply the finish finishing coating of the ceiling.
Ceiling repair: video lesson putty ceiling
Another option for creating a flat surface of the ceiling is the repair of the ceiling with drywall panels. The entire surface can simply be sheathed with them, and then finally leveled with putty. Such a thorough level of the surface of the ceiling is required for its further painting, whitewashing or pasting with various materials.
Painting the ceiling
This option is perhaps the easiest due to the availability of materials and the simplicity of their use. In addition, the ceiling painted with paint in the kitchen or bathroom is much more practical than all other methods of finishing the ceiling in these rooms. As previously noted, a significant feature of painting the ceiling is the quality preparation of the surface. It should be perfectly flat, otherwise the appearance of the ceiling will be spoiled.
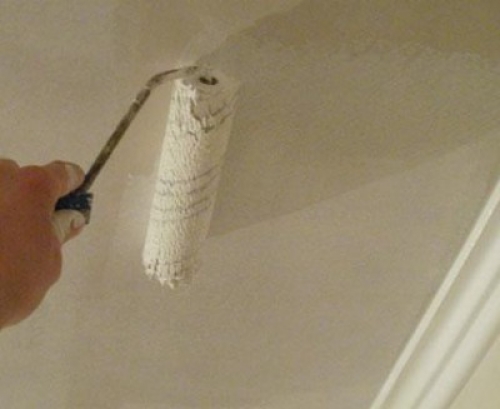
Painting ceilings: photo example
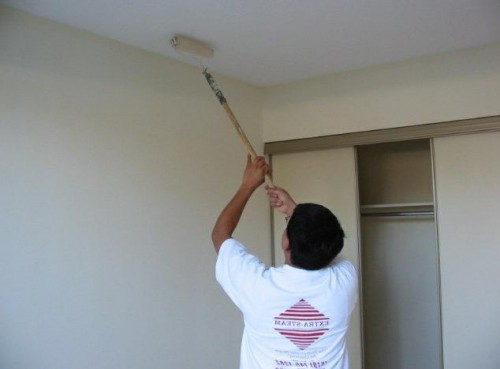
For painting, oil paints or water emulsion are usually used. The preparation of the paint is reduced to thorough mixing and bringing it to optimal density. Then you can start painting. From the tool you will need a roller on a long rod and a brush. The coloring process itself is quite simple. We begin to paint from the edges that we paint with a brush. The rest of the area is painted with a roller.
Sometimes they perform cosmetic or partial repair of the painted ceiling. First, the surface is examined for exfolved or swollen paint, if there are such places, they are cleaned with a spatula. Then they are painted again, but this option is only a half -length and in the future will require a full repairs. If the paint is kept firmly everywhere, then a new layer of paint is applied to the entire surface and left to dry.
Pressing the ceiling
The whitewashing of the ceiling is considered one of the most common. The whitewashed ceiling is suitable for almost any interior of the premises, but compared to painting, whitewashing the ceiling is somewhat more difficult. The material for whitewashing is the negative lime, which is diluted with water, filtered through a sieve and then applied to the ceiling. To do this, use a roller, brush, spray gun or vacuum cleaner. If you use a roller and a brush, the application of lime will not be uniform enough, and with the help of technology you can achieve better results. Unfortunately, the whitewashed ceiling is not as durable as painted. It is required to renew the whitewashing once a year or completely cleanse and whiten again. As well as for painting, it is necessary to prepare the surface with particular thoroughness. An indisputable advantage of whitewashing is its price and availability of material.
Playing the ceiling
Not so long ago, the ceiling glued by wallpaper was at the top of popularity. Later, in addition to the wallpaper, a special ceiling tile appeared. And today, repair of the ceiling from polystyrene tiles is one of the most popular decoration options. As well as for painting and whitewashing, the base of the ceiling for wallpaper and slabs must be made perfectly even.
Playing the ceiling with wallpaper
Playing the ceiling with wallpaper A somewhat complex process, since it will be necessary to coordinate the actions of at least two people. Yes, and keeping the wallpaper above your head is not easy. We will need wallpaper glue and wallpaper for the entire area of \u200b\u200bthe ceilings. From the tool: wallpaper knife, roller, containers for glue and rags. The wallpaper is glued as follows:
- having completed all the work on the preparation of the surface, we prepare glue according to the instructions;
- we cut off a few paintings of the desired length from the total roll, while we make sure that the pattern coincides on the neighboring canvases;
- by decomposing the canvases on the floor with a pattern down, we spread the glue on them with a brush and let it soak a little;
- while the wallpaper absorbs glue, we spread the glue on the ceiling along the entire length of the gluing of the canvas;
- now we put the canvas in the accordion and, gradually laying down, glue it to the ceiling;
- we level the canvas with a roller, make sure that there are no air bubbles under the canvas. We remove excess glue with a slightly damp cloth.
We glue the rest of the canvases according to the above algorithm, while we make sure that the picture coincides at the joints. Let us dry in a closed room for a week.
Playing the ceiling with tiles
Unlike wallpaper the process of gluing tiles Much easier, and one person can cope with this. The work will require: tiles, special acrylic glue. From the tool you will need: mounting gun, spatula, knife for cutting, painting thread. We carry out all the work as follows:
- after preparing the surface, we find the center of the room. To do this, you can draw two diagonals from the corners, after which through the center we draw two crossed line from the wall to the wall crossed at right angles;
- we begin to glue the tile from the center of the room. On the tile itself, it is dashed at the edges and a little in the center apply glue and glue it to the ceiling. We place the tiles with one angle strictly along the lines in the center;
- repeating the algorithm, glue the rest of the tile. If the tiles do not fit at the edges, cut it with a knife;
- the final stroke will be gluing skirting boards and borders in the corners of the room.
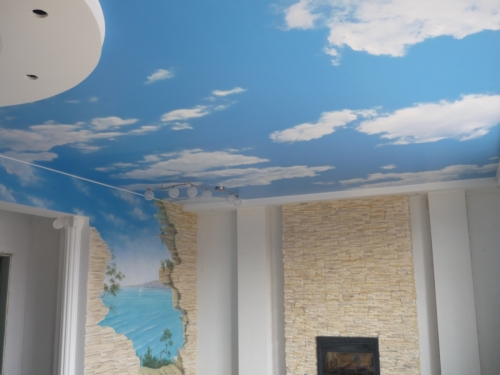
Enough repair repair: photo example
Within the framework of this article, we examined the simplest options for repairing ceilings. Repair of more complex designs of suspended and suspended ceilings is quite an extensive and complex topic that requires writing a separate article.





I understand this ceilings
I understand this ceiling just class