The procedure for arranging the roof is not only the manufacture of the structure ...
|
|
The most original solution for creating a non -repeated atmosphere in your house is ... |
The tradition of covering the living room with carpets seems to have gone the past, because it appeared ... |
Combination of drywall and stretch ceiling
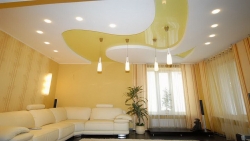
Combined ceilings represented by the tandem of stretch paintings and drywall sheets continue to gain popularity. Such designs conceal the boundless possibilities of design, and various unusual compositions are really delighted.
- The combination of drywall and stretch ceiling is a win -win version of the interior design
- Gypsum cardboard under a stretch ceiling: design features
- Options for designing a combined ceiling
- Combined ceilings: drywall and stretch. Choosing a color palette.
- Stretch ceilings with drywall elements: installation technology
- Hypsum plasterboard ceilings: photo in the interior
The combination of drywall and stretch ceiling is a win -win version of the interior design
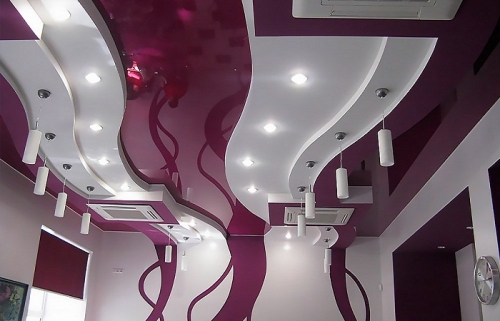
Combined ceiling structures always look fresh, modern and exclusive. This coating favorably emphasizes the individuality of the room and gives the interior of originality. The main highlight of the ceiling is a diverse combination of the matte surface of the drywall and the glossy stretch fabric. The combination of textures makes it possible to interestingly use light scenarios.
Gypsum -plated suspended ceilings with stretch inserts are very popular today. Many designers take a similar technique, trying to create unusual optical effects. A professional with the help of drywall and the French ceiling is easy to turn an ordinary bedroom into an enchanting, exquisite boudoir. Two -level suspended gypsum plasters look very luxurious and dressed in the lobby or living room.
The installation of such ceiling structures is best entrusted to experienced craftsmen who will help with the choice of the best option of combining materials, make an accurate calculation, draw up a project and perform qualified installation. Extensive experience, knowledge, honed skill will allow you to realize a design idea and create a reliable, beautiful ceiling.
Gypsum cardboard under a stretch ceiling: design features
Among the undeniable advantages of combined ceilings can be attributed:
- Zoning the room. By competently combining various textures, forms and color solutions will be visually distinguished by the space. An important stage of zoning of lighting design. Toutful lamps and LED ribbons are able to divide the room into a recreation area and a workplace.
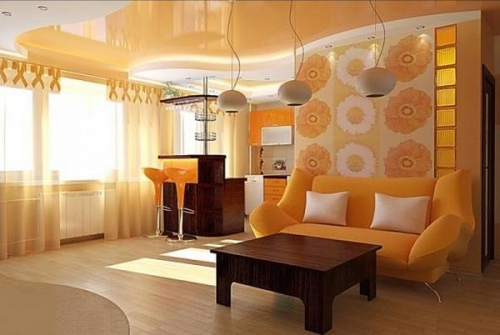
- High technical and operational qualities of stretch ceilings with drywall. Designs of this type are characterized by resistance to UV radiation, mechanical damage and wear resistance. The ceiling is easy to maintain.
- The possibility of installing different lighting devices.
- Convenience in placing communications in the niche of drywall will be able to hide the wiring or Internet cable.
- Long life without repair work.
- Providing additional heat and sound insulation.
- The high decorative properties of combined ceilings remain out of competition. The use of unusual forms, color combinations and a unique design is a great opportunity to emphasize the individuality and style of the room. The combination of drywall and the stretch fabric gives endless design capabilities.
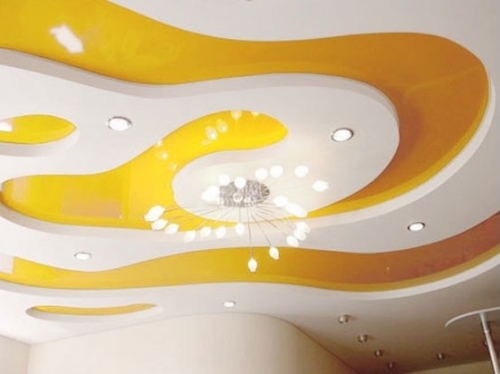
- Installation is possible in rooms of any area. However, it is important not to overload the room with details. The pile of designer elements often look tasteless. Multi -tier designs are undesirable to use in small rooms.
In the implementation of the project, you can face some difficulties:
1. The installation will not be able to save. Without the experience of installation work, one should not take on such tricks. With non -compliance with technology, the material can lead or it will crack over time.
2. A well -developed project is required. This is exactly the case when the verbal description of the blue square in the center is not suitable. Therefore, additional time and money for visualization of the project and the development of a detailed drawing will be required.
3. The stretch ceiling cannot be installed in non -heated rooms.
Options for designing a combined ceiling
The combination of suspension structures made of drywall and stretch paintings on the ceiling is most often performed in the following variations.
- A gypsum plastic box located around the perimeter of the room. The fixation of the stretch fabric occurs inside the box. The size of the crate from GKL varies depending on the dimensions of the room. If you need to raise the structure and emphasize the beauty of the stretch ceiling, then the side plasterboard panels are made of thin sheets. An interesting visual effect is achieved when the hidden backlight is placed inside the box.
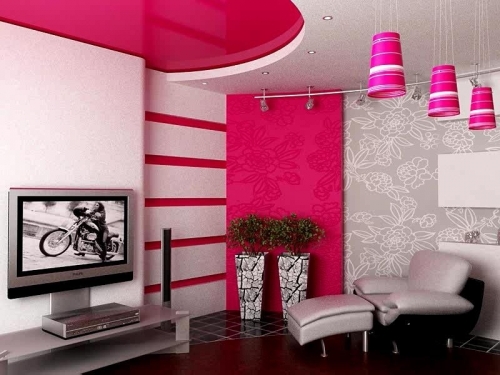
- The base in the form of a circle/oval with the installation of a stretch ceiling in the center. Such a composition is used by designers to create a starry sky or simulate the sky on a sunny day. This option has a lack of corners are closed with drywall, so the room seems smaller.
- Tablet - in the center of the ceiling, a gypsum cardboard in the shape of a tablet is equipped. Usually a chandelier is installed here. The remaining space on the ceiling is overlapped by a stretch fabric. A similar circle shape in a circle allows you to create a voluminous expressive ceiling structure.
- Various bends and unusual forms of drywall base. Installation of the stretch fabric in complex forms is quite difficult and here you can not do without accurate measurements. To calculate the wrong figures, complex technologies are used.
Combined ceilings: drywall and stretch. Choosing a color palette.
Particular attention should be paid to the selection of the color scheme and the compatibility of various tones. Here are some recommendations that will help make the right choice:
- A monochrome combination is suitable for creating a calm atmosphere that does not distract attention. Pastel shades are used for these purposes. The visual effect is achieved through a variety of forms, installation of several levels and hidden backlight. Monochrome and light colors are optimal for arranging small rooms.
- A combination of contrasting shades is relevant for a children's room or living room. In order not to overdo it, you need to mix colors carefully and follow the advice of the designer.
- Each kner causes certain associations and inspires a certain mood. Each room requires an individual approach:
- The kitchen should be cozy and have communication. The use of a glossy ceiling surface will be very useful, such a texture visually expands the space of the room.
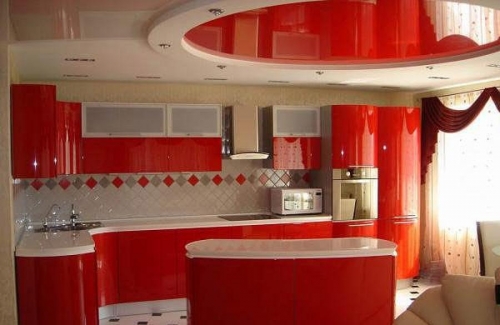
- The hallway creates the first impression of the owners of the house. This room is recommended to be made bright. It is advisable to select 3-4 tones lighter than the coloring of furniture and wallpaper.
- For the children's room, psychologists recommend using beige, light blue, orange and green. Images of cartoon heroes are suitable for small children. Pupils will no longer be interesting for schoolchildren, children quickly grow up and change their interests. Therefore, choosing photo printing must be taken into account that in a couple of years the ceiling will have to be redone.
- The bedroom is not advisable to make a room intended for a relaxing vacation gloomy and dark. The arrangement of muffled blue starry sky, calm shades of lilac, beige or peach color will be appropriate here. The white box around the perimeter of the room will become a spectacular framing of the stretch fabric.
- Living room. The color of the ceiling largely depends on the style of the room. High-tech living room is suitable for cold tones, a premises in the style of Provence and Country light yellow, pale purple or olive, a white, beige or noble gray classic interior. If the dimensions of the living room allow, then an excellent solution would be to install a multi -level ceiling with a combination of contrasting colors.
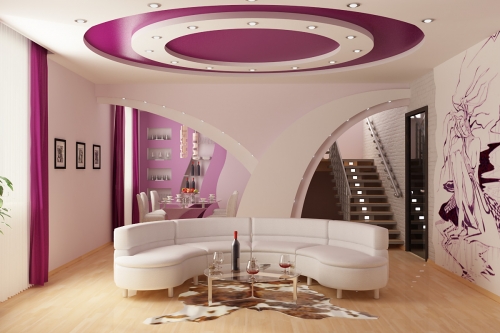
- Bathroom. To muffle the striking contrasts of steel gray products and ceramic plumbing for decorating the ceiling, it is better to choose a muffled radiance of beige or gray.
- The kitchen should be cozy and have communication. The use of a glossy ceiling surface will be very useful, such a texture visually expands the space of the room.
A well -selected color scheme will help create a favorable environment and a harmonious atmosphere.
Stretch ceilings with drywall elements: installation technology
If the issue of choice is drywall or suspended ceilings? Not solved in favor of one of the options, you can try to combine both designs together. The easiest way to arrange a gkl box around the perimeter of the room.
Preparatory events
Before starting work, you will need to free the room from furniture, remove paintings and curtains. It is necessary to remove lighting devices from the ceiling, while the ends of the wires must be insulated. It is advisable to cover the floor in the room with newspapers or polyethylene.
Preparation of the base for the installation of a combined ceiling is performed in the same way as for installing drywall or stretch ceiling:
- Remove the old painting, whitewashing and plaster. Remove the wallpaper.
- Encourage the irregularities and visible cracks with putty on a cement basis.
- Generate the surface will increase the steam and waterproofing properties of the ceiling and reduce the appearance of dust in the room.
Preparatory measures include the purchase of the necessary materials:
- To install the plasterboard structure, you will need: a guide (start) UD profile, which carries a (ceiling) CD profile, a single -level connector, broken dowels and screws.
- Sheets of drywall with a thickness of 9 mm. An ordinary GKL is suitable for living rooms, and to arrange a ceiling in a room with high humidity, you need to choose a moisture -resistant drywall (GKLV). Such material contains antifungal additives and silicone granules.
- For the installation of the French ceiling, it is necessary to prepare: a baguette (it is advisable to choose aluminum, since it bends), self -tapping screws and a special shoulder blade for refueling the canvas.
- A heat gun for pulling the vinyl canvas. For a single use, it is more profitable to rent, not buy it.
- The panel is tissue or film. The first option is not afraid of temperature fluctuations, and the second is completely moisture resistant and presented on the market with a wider range of textures and colors.
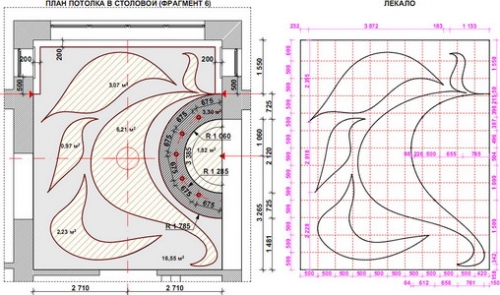
Development of a drawing
Installation work must be performed according to the scheme. The indicative drawing is compiled in the following sequence:
- Measure the height of all angles, wall length and the location of the center of the ceiling.
- Mark the height of the first level of the box on the drawing, as well as the distance between the stretch fabric and the base of the ceiling.
- Draw the contours of the boundaries of two levels.
- Apply on the line of fastening the bearing and guide profile with a step of 40 cm across and 60 cm along.
- Mark the way of laying communications and the place of fastening the suspension on the drawing.
Transfer the guidelines from the drawing to the ceiling. In the marked areas, it will be easier to install the design, and this will be displayed at the quality and speed of work. To transfer the marks, you can use a breakdown painting cord, roulette, water or laser level. If the boundaries of drywall are implied in the shape of a circle, then they will be able to transfer them using a screwed screw with a tied thread and a pencil. To display the crooked lines, it is necessary to create a pattern of dense cardboard. Apply the resulting template to the ceiling and circle the contour.
Installation of the crate
Before installing the guide profile, it is necessary to check that it has holes for fasteners. The optimal step is 0.3-0.4 m. If such holes are not provided, then they should independently drill a drill.
Step -by -step installation of the frame:
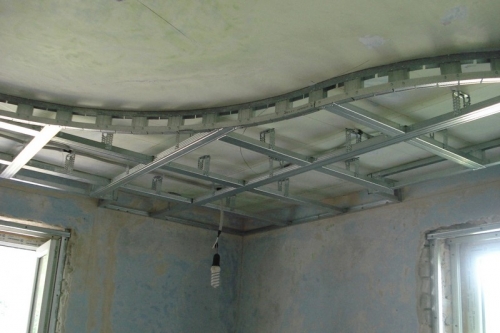
- UD (starting) profiles for dowel-gvo 6/40 mm are attached along the drawn lines. The first and last nails are placed at a distance of 10 cm from the edge, subsequent every 40 cm.
- CDs (main) guides are installed in the starting profile, fixed using metal screws. If the bend is required, then cuts are made on the opposite side of the guide and the profile is bent in the right direction. The number of incisions depends on the corner, the cooler it is, the more there should be.
- The horizontal structure is controlled by a stretched construction nylon cord.
- To give the design of additional stiffness and strength between the guide profiles, it is necessary to install the transverse profiles at a distance from each other 40 cm. The metal profile is cut off with scissors and fixed with meters to CD guide crushing joints.
- In the places of adjacent to the stretch fabric, an additional embedded profile is mounted to drywall.
After the installation of the crate, it is necessary to lay communications. All supply wires are placed in corrugated pipe and fixed to the basic coating. In places of installation of lighting devices, conclusions are drawn.
Important! All electrical work is carried out after de -energizing the premises.
Drywall sheathing
The drywall sheets before installation should adapt to the temperature regime and humidity in the room for some time. The material must be laid out on the floor and leave to lay down for a couple of days.
Hypsum cardboard sheathing is performed in the following order:
- The first sheet is fixed with self -tapping screws in the corner of the room. If the size of the sheet exceeds the area of \u200b\u200bthe installed frame, then it is necessary to transfer the contours of the structure to drywall and cut the desired part. When attaching the hat with self -tapping screws, it is necessary to gently deepen into the material.
- At the rest of the profile, attach the second sheet. A small gap of about 0.5 cm should remain between the wall and the GCL. The screws are screwed every 30 cm.
- Suture the entire area in the described way.
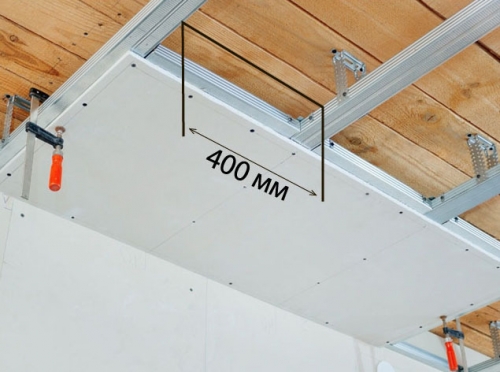
- Sew the vertical parts of the box with a plasterboard. For installation in curved areas, the GKL canvas must be bent, making shallow cuts on the back. As an option, the sheet can be a little moisturized and walk along it with a needle roller. Before installation, the curved element must be dried, fixing in the right position.
- The joints of drywall with the wall and between the canvases are pushed with a ribbon-serpan.
- Places of fasteners and gaps to sparkle using a small spatula.
- Mark the location of lighting devices and cut holes with a drill with a crown.
- Pour the vertical and horizontal part of the drywall with fiberglass and treat with the finish layer of putty. The permissible thickness of the putty layer is a maximum of 1.5 cm.
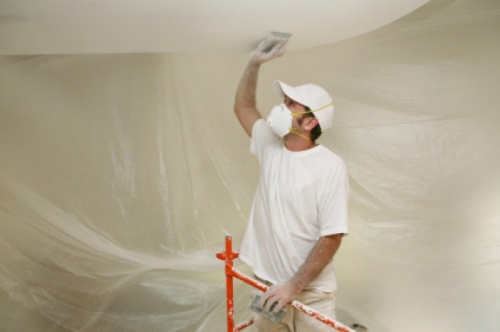
- Wipe the dried putty with fine -grained grinding paper.
- Remove dust from the surface.
- For additional protection and improvement of adhesion, it is advisable to primer the coating.
- Perform the finish of the drywall box. Traditionally, the design is painted with an acrylic composition.
Fasten of the stretch fabric
Important! This stage is started only after the dyed parts of drywall are completely dried.
To install the PVC-laid, a heat-cognrator is required. When choosing a stretch film, it is better to give preference to materials with a harpoon type of fastening, it is considered the most reliable. An additional plus of the possibility of re -installation.
The film canvas is fixed in the following sequence:
- On the vertical part of the box, apply the level of placement of the canvas.
- Attach the baguette along the marked line. The fixation step is 7 cm. When arranging a curved structure, you need to make cuts on the profile, polish them with a file/sandpaper and bend in the right position.
- Warm the room with a heat gun up to + 40C and expand the material. When working with a glossy canvas, it is advisable to work in gloves, this will prevent the appearance of traces. It is impossible to bring the heating ventilator close to the stretch canvas, otherwise dark spots can form.
- When the temperature in the room rises almost to + 60C the harpoon of the base corner is refueled in the baguette. Then the opposite angle of the canvas and two side are fixed.
- After fixing the corners, you can tighten the harpoon into the baguette around the perimeter of the box.
Advice. The folds that arose on the canvas will be filled, re -heating the site with a heat curtain.
The procedure for fixing the fabric canvas is somewhat different from the previous installation technology:
- Along the perimeter of the box, the profile used for clip fixing of the fabric is fixed.
- The textile canvas is fixed in the center of each side.
- Pull the fabric from the center to the edges and fix it in the baguette.
- Fix the material in the corners.
- Cut the formed rest of the panels (if any).
- The appeared wrinkled places warm up with a construction hairdryer and smooth out. The permissible distance between the hairdryer and the ceiling is 20 cm.

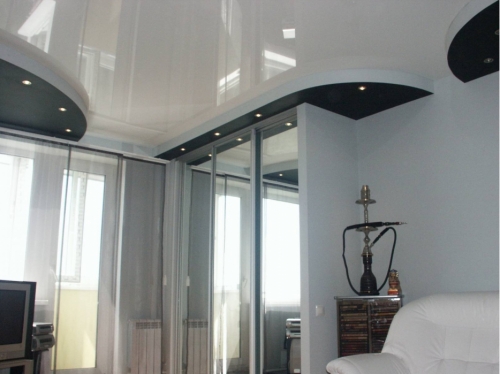
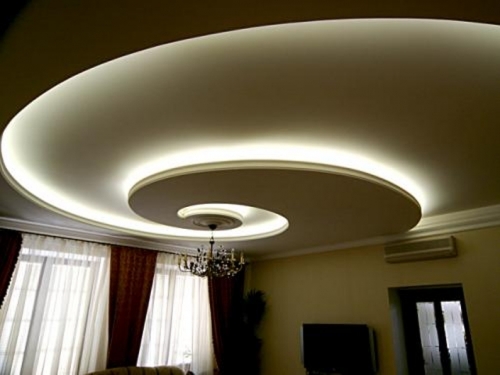
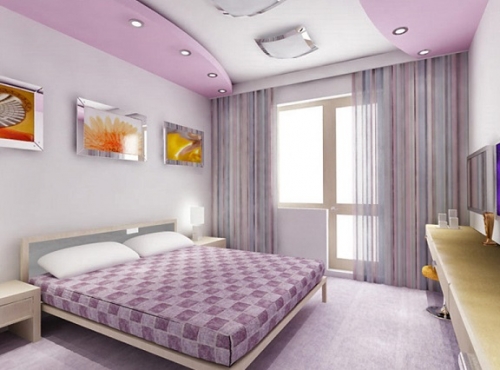
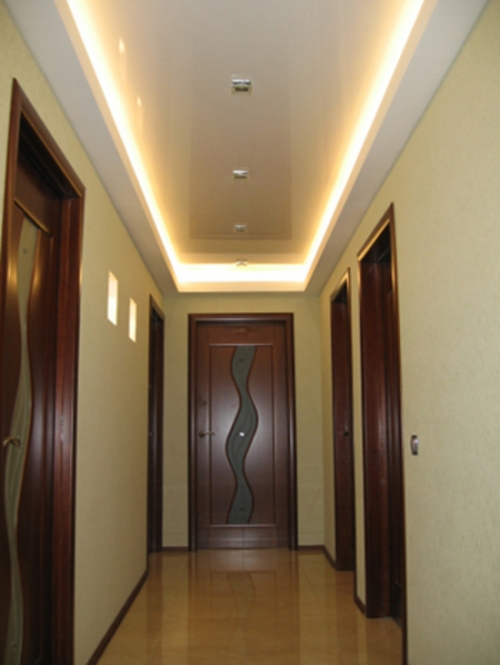
when repairing in an apartment
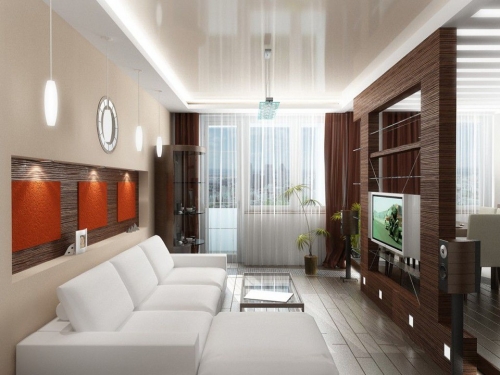
during the repair in the apartment, they stopped just at the combination of a stretch ceiling and drywall. So, as for me, the ceiling looks more solid. We ordered their stretch ceilings to the leader of the ceiling http://www.liderpotolok.ru. We have no complex figures on the ceiling made of drywall. Just around the perimeter, they made a gypsum cardboard box, spotlights were inserted into them. Throughout the apartment, they made ceilings with a combination, only in the children's just a stretch ceiling with a pattern. I am satisfied with the result. It turned out beautifully, modern and quite concise.
Stretch ceiling with
A stretch ceiling with drywall for a complex ceiling on two floors, or even more used constantly. I work and my husband also works. On weekends, we lie on the couch, then we carry out cleaning and cook for a week. The idea to install the ceiling on our own was born for a very long time, but it never came to business. Turned to the most popular company RumExpert. Prices there are quite and give a guarantee for themselves, but for private traders, if something happens, you will not wait for a response or greetings.