There are many options for mounting the flooring, but laminate laying ...
|
|
Quite a lot of time has passed since architects and designers turned their ... |
In the process of insulation, a question arises very often between the choice of cheaper ... |
Yourself

Setting the floor A mandatory stage in the course of repair and finishing work, followed by the installation of flooring. Why mandatory? The fact is that the floors over time lose their original form in them, gastles, cracks and cracks are formed.
If you want to update the appearance of the room and lay, for example, a laminate or carpet, this not so noticeable defect becomes a serious obstacle to the embodiment of the cherished goal. The only way out of this situation is the leveling that can be carried out independently.
Table of contents:
- Floor alignment mixtures
- Ways to align the floor
- Aligning the wooden floor
- Alignment of the wooden floor: video
Floor alignment mixtures
Aligning mixtures form a screed that has many advantages. First of all, it is:
- the possibility of installing any floor coverings (linoleum, tiles, parquet board, etc.);
- impeccable adhesion with a substrate;
- high strength;
- environmental friendliness;
- low abrasion;
- simplicity of laying;
- lack of shrinkage;
- unpretentiousness in subsequent care (there is no need for daily watering);
- a set of fortresses for several days.
Classification of mixtures
The mixtures for alignment are divided into aligning and self -leveling. The first must be leveled manually. High viscosity indicators allow you to get a thick screed and equip slopes. The second due to high fluidity create an even horizontal surface with almost without any active participation of a person. By the way, they can be called in different ways: aparts, self-confinurations, bulk floors, self-enforcing solutions, the fantasy of the townsfolk does not know obstacles.

Distinguish between self -leveling mixtures for primary and finish application. The difference is in the size of the fractions. The solutions for the primary application consist of large particles, which means that there is no need to talk about the smooth surface. Finish mixtures include small fractions and provide the opportunity to get a flat horizontal screed.
The conditions necessary for applying
Not everyone knows that when working with leveling mixtures, several important rules should be observed, on which the quality of the coating depends. First of all, it is necessary to close the windows and doors. Air movements during work and within the next 24 hours should not be felt above the surface of the floor.
The base temperature, as well as the temperature in the room, should vary in the range from +5 to +25 degrees. No more. As for relative humidity, the maximum permissible mark is 90%.
Rules for breeding
He pours warm water into the prepared container. Not hot otherwise the mixture is quickly grasped and it will not work to achieve a smooth surface. Add a dry mixture in small portions, stir a drill with a special nozzle operating at low speeds.
There should be as much water as indicated on the packaging. The initiative is fraught and leads to foaming, poor hardening, streaming of the screed. It is only possible to proceed with breeding after the final preparation of the base. Please note that the active participation of the assistant is mandatory. While you apply the solution, your assistant prepares a new portion.

Ways to align the floor
There are several types of alignment, the choice of one or another method depends on the terms allotted to work, the floor levels, the features of the soundproofing device. So, consider the most popular leveling options.
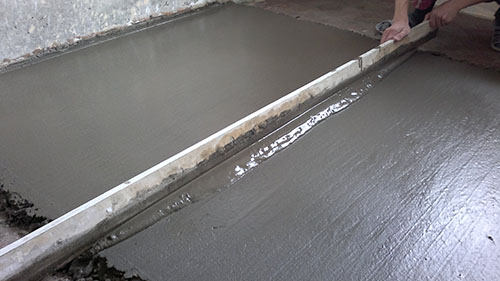
- cement-sand screed The easiest way to prepare a draft floor. If the budget is limited, then it is worth giving preference to a polymer -based screed (cement, sand, PVA). The screed is made according to the beacons, after its solidification, a thin layer of glue or self -leveling mixture is applied from above;

- dry screed Recently has become a more popular method of floor preparation. The basis is far from a new bulk principle. The dry floor screed has many advantages, among which it is first necessary to highlight the speed of styling, high thermal insulation properties, the ability to lay cable, film heaters and low weight.
The technology of laying difficulties does not represent, the only condition to observe the sequence.
1. The flooring of steam and moisture insulator (polyethylene film or parcham). It is necessary to lay overlapping (20 cm), the material rises by about 5-6 cm at the edges. To ensure sound insulation, the gaps (10 mm) should be left around the perimeter of the walls, which are glued with a special ribbon.
2. We lay out the bulk component (expanded clay, sand, fine -grained slags). The thickness of the backfill layer is about 4 cm, with significant bumps up to 6 cm.

3. We align the backfill. Then we spread on a compacted surface of chipboard, GVL, waterproof plywood. The sheets are attached with glue and self -tapping screws.
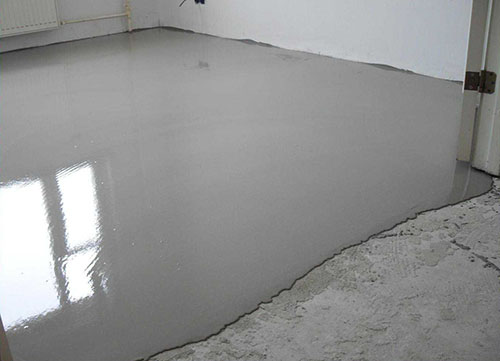
- self-leveling floors The optimal solution to the problem of preparing a rough surface. They are durable, simple in execution and will become a real salvation for those who decided to align the floor under the laminate or linoleum with their own hands. So, the features of the technology.
1. Clean the floor and degrease it with a cleaning agent, dismantle skirting boards, close the cracks with bars.
2. Fill the potholes with a construction solution, smooth out.
3. In accordance with the length of the room, in accordance with the length of the rule, draw the lines and screw the screws with a step of 30 cm along these marks.
4. Using the laser level, determine on the basis the highest point, add the thickness of the bulk floor to it and screw the screws perpendicularly made. For lighthouses near each screw, put the alabaster.
5. According to the instructions, mix the mixture of water and, after the test for uniformity, feel free to pour the solution into an area of \u200b\u200bnot more than 2 m2.
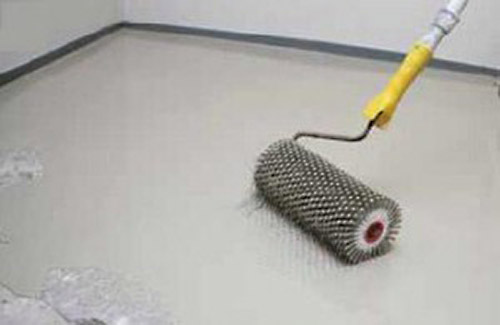
6. The rule is the mixture by the lighthouses. Walk on the surface with a needle roller.

Aligning the wooden floor
The wooden floor quickly surrenders of the crushing power of the time bends and loses its original shape. But even in the most severe case, when the floor is drying right before our eyes, you can find the right method of alignment. Consider options for eliminating defects in more detail.
1. Cycles A laborious, but effective way to equalize the plank floor. It is appropriate if it is planned only varnishes, without flooring flooring. Cycle is carried out manually or mechanically. In fairness, it is worth noting that the manual method is less effective, so it is better to arm yourself with a cycle -up installation.

- prepare the room cover the furniture with a film, remove the curtains, carry out unnecessary interior items;
- we examine the surface for the detection of nails, carpet buttons and other fasteners. When they are either the removal, or we dump the hats below the floor level;
- we put on protective clothes (remember the mittens and headphones) and start work;
- we begin to cycle from the corner, moving around the room with a snake. After the top layer is removed, we cover the holes with putty and take a break, we are waiting for its complete polymerization;
- inaccessible areas are treated with a manual cyclist;
- after completing the work, remove dust and sawdust by an industrial vacuum cleaner. It remains to wipe the gender with a lack ofrsium matter moistened in the White Spiret, and apply varnish.
2. alignment of self -leveling mixtures It becomes necessary if the old floor is required to lay the coating.
- again, prepare the surface (we recyclable the hats, fix the springy boards with screws). Grind the floor. If the voids are detected, we fill them with putty based on acrylic;
- we apply a moisture -proof primer, which will provide the necessary adhesion of wood and construction solution;
- we clean the walls around the perimeter with insulating material. Do not forget about the creation of a deformation seam from polystyrene foam;
- we determine the level of the future bulk floor with a water level. In the doorway we install a wooden beam;
- we fasten a reinforced mesh with a vessel of 6 cm to the floor;
- according to the instructions, prepare the mixture, let it stand, mix. Pour the solution onto the mesh, remove the bubbles with a rubber roller and level the surface (with a rule, rubber spatula or mop);
- drying time depends on the composition of the mixture. Information about this can be found on the package.

The alignment of the wooden floor with a self -leveling mixture leads to an increase in the level of the floor. This fact should be taken into account during construction measures.
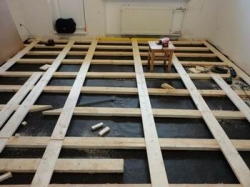
3. The alignment of the wooden floor with plywoodguarantees an even black floor. The method is most justified if it is necessary to lay the laminate. Plywood is purchased 12 mm thick, class 4/4 and higher.
- install beacons (screws). Then we begin to lay the lags 30 cm wide, we cover the voids with bars of plywood. We fasten them with glue or self -tapping screws;

- cooking sheets of plywood divide the standard sheet into 4 parts. It should not be cut off by gently and chips should not be;
- we lay the plywood with a displacement to avoid the intersection of the joints at one point. We cut the sheets, paying due attention to the shape of the floor in the places of arches and protrusions;
- we fasten the plywood with self -tapping screws with a hidden hat and zenku the places of fasteners.

Ready. If it was planned to align the wooden floor under the laminate, then you can proceed to the arrangement of the substrate, if under linoleum to grinding and varnishing.
Alignment of the wooden floor: video
