Properly made backlight can favorably emphasize the strengths ...
|
|
A neat well -groomed ceiling is the key to a pleasant external appearance of any room. Choice... |
The bathhouse or sauna has already been built, and the heat consumption is too large? ... |
DIY floor insulation with your own hands

The loggia in the apartment can allow to realize a long-standing dream of their own winter garden, or a terrace with a rocking chair, or even a small sports hall. All these ideas can easily become a reality, it is enough only to qualitatively carry out insulation work. It makes sense to insulate all the surfaces of the loggia, however, it is necessary to start work with the floor, since in the end its surface will rise by several centimeters, and in the future you will have to build on the resulting level. In the article, we consider the most popular ways of warming the floor of the loggia with your own hands, and about which thermal insulation materials are best suited for this task.
Continence:
- Preparatory work before floor insulation on the loggia
- The choice of material
- Warming the floor of the loggia with your own hands. Step-by-step instruction
Preparatory work before floor insulation on the loggia
The first step, of course, should be preparatory work, which includes primarily the creation of a closed space. Most loggias are open, that is, they are not protected from wind and atmospheric precipitation, which is not compatible with the idea of \u200b\u200bcreating a comfortable space for life.
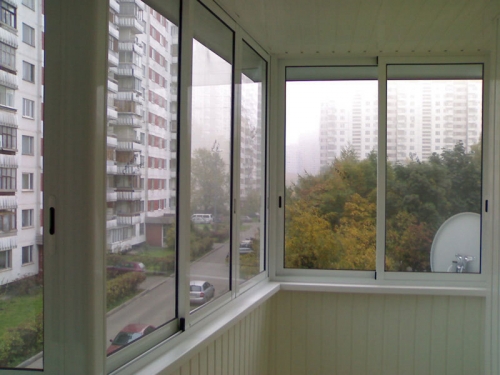
- First, the loggia must be glazed. It is best to stop your choice on two- or three-chamber double-glazed windows, since they provide the best thermal insulation. Other types of glazing, such as sliding frames or wooden with one layer of glass, keep warm poorly.
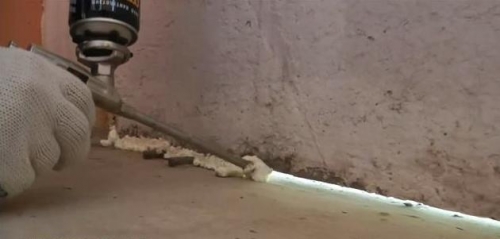
- After glazing work, a thorough cleaning of the room is carried out, all dust and dirt are removed. Then all the cracks are eliminated, the small ones are sealed with mounting foam.
- It is better to lay large cracks or technical holes with crushed stone or broken brick involved in cement mortar.
- At the preparation stage, it is also necessary to think over electrical outlets (especially if it is planned to install an electric warm floor) and the lighting system. Do not forget that when warming, the floor will rise by about 5-7 cm, so all engineering networks need to be placed accordingly.
- If the useful area of \u200b\u200bthe room or kitchen increases due to the loggia, then the installation of electric heaters should be installed on it. The use of central heating for heating the loggia is prohibited by SNIP.
The choice of material
Before approaching the direct selection of material, it is necessary to determine what the finishing floor will be (ceramic tiles, plywood sheets, wood sheathing) and whether an electric warm floor is needed. Recommendations for the choice of insulation will depend on this.
The most popular materials for insulation of the loggia are:
- styrofoam;
- foam;
- mineral wool;
- keramzit.
Foam polystyrene
Foam is very popular on the market thermal insulation material, due to its low price and ease of use. It consists of many balls, which, in turn, are built of thousands of cells filled with air.
Advantages of the material:
- low price;
- small weight;
- good thermal insulation.
Flaws:
- low mechanical strength;
- low level of hygroscopicity.
Foam
This modern thermal insulation material resembles polystyrene in structure, however, in contrast to it, it is more durable and functional due to its more durable structure, consisting of small equal particles.
The main advantages are:
- mechanical strength;
- durability;
- frost resistance, steam resistance, high level of thermal insulation;
- chemical resistance to aggressive external factors;
- small weight;
- simplicity of installation.
Of the shortcomings, it is important to note:
- g-1 fueling class, the material is burning;
- quite high price;
- place of use (not used in places of ultraviolet rays).
Assessing the quality of the material when buying it yourself is quite simple. To do this, it is necessary to cut off a small piece, while it should cut it difficult, and small homogeneous cells should be visible at the site of the cut. If the material is cut easily, and large heterogeneous cells are clearly visible material of inadequate quality.
Keramzit
Ceramzit Fandy thermal insulation material made of clay when firing at high temperatures. The final product has an oval shape and a porous structure. Pretty fragile and requires careless work. When using this type of insulation, it is important to remember that the technology of laying it involves a minimum layer of 150 mm, that is, the floor on the loggia will be raised to a fairly high level.
Advantages:
- small weight;
- simplicity of installation;
- low price;
- high chemical resistance to external factors;
- fire resistance.
Flaws:
- a large number of crumbs and dust during operation, fragile;
- absorbs moisture;
- it requires a large layer for effective thermal insulation.
Mineral wool
Stone cotton wool to date, this is the best thermal insulation material both in terms of technical characteristics and in operational. It is made of natural stone (diabase and gabbro), the internal structure consists of fibers of different orientations, which determine the magnificent heat -insulating qualities of the material.
Main advantages:
- durability;
- non -combustibility (in high -quality stone cotton wool, the combustibility class does not burn, the highest);
- vapor permeability;
- the presence of an additional coating (fiberglass, foil);
- simplicity of installation (for stone wool slabs).
The main disadvantage of stone wool is poor moisture resistance.
In order to be confident as the acquired stone wool, it is better to trust well -known manufacturers, such a material will have a high combustibility class and an acidity index, which determines the degree of moisture resistance.
Warming the floor of the loggia with your own hands. Step-by-step instruction
So, there is a loggia completely closed along the contour, without cracks or openings. You can proceed directly to the work on the thermal insulation of the floor.
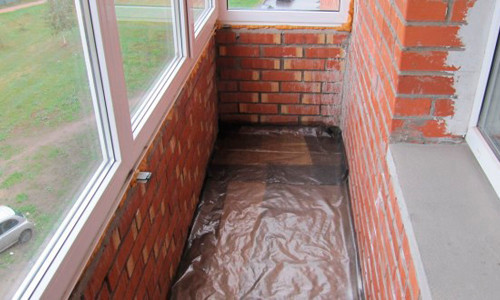
It is recommended to lay waterproofing with the first layer. It is especially important if the loggia is located on the ground floor, or close to the ground, where there is a risk of flooding from the outside. In other cases, the loggia is understood as a room closed on all sides, i.e. External impact is minimized. Therefore, when warming it with polystyrene, you can not make a waterproofing layer.
Insulation of the loggia by polystyrene foam, foam and mineral wool
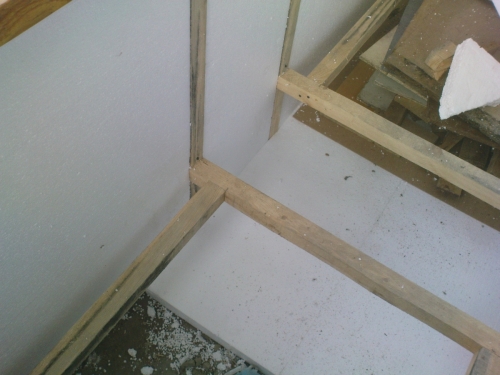
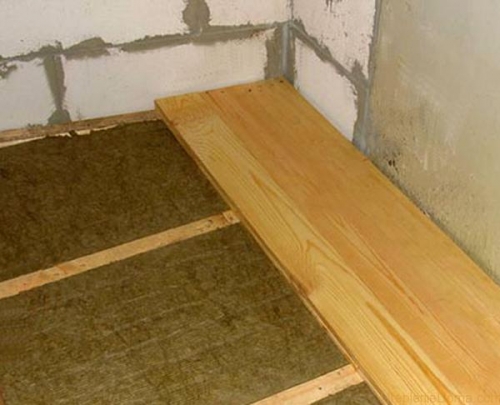
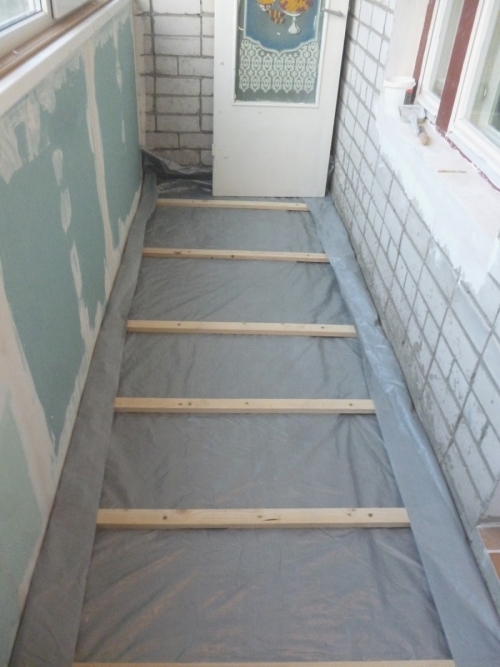
- Production and laying of transverse wooden bars or lag (crate).
- For effective thermal insulation of the floor, a layer of these materials should be at least 5 cm, so the bars are made by a section of 45x50 or 50x50 mm. Their length should be equal to the width of the loggia. The number and distance of bars from each other are determined by the size of the plates of the insulation used.
Tip: No matter what a strong coating is chosen, it has a limit of mechanical hardness, in the case of severe pressure on the material, it can deform and, accordingly, lose its thermal insulation properties. Therefore, any material is recommended to be placed in a crate.
- Lags are exposed exactly in a horizontal plane. They are attached with dowels directly to the concrete floor.
- The styling of the insulation. The plates of thermal insulation material are laid tightly to each other and to wooden bars. It is important to note here that they should be located, but not to compress or squeeze it to worsen their properties. For the best thermal insulation, it is necessary to lay the material in two layers with a displacement of seams according to the principle of brickwork. Firstly, this will ensure the elimination of the so-called cold bridges, and secondly, according to technology, the insulation should be laid to the edges of the lag.
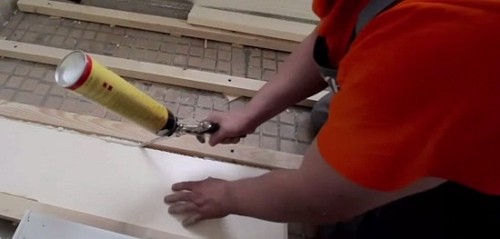
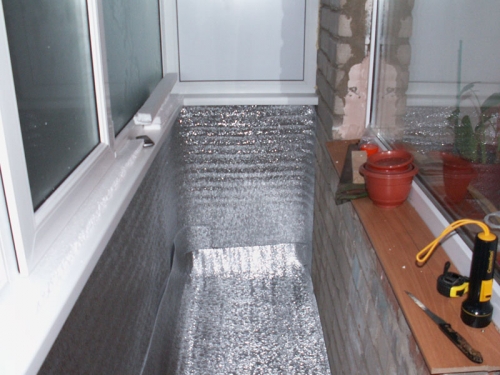
- Laying vapor barrier. The next layer is laid by vapor barrier, it can be both the simplest film of about 200 microns and foamed foil polyethylene, which, in addition to the direct function of moisture protection, reflects heat and has good sound insulation.
- The layer is attached with small nails or a stapler to wooden lags. The joints between the sheets are glued with metallized tape.
- . Laying waterproofing. Now the stage of waterproofing, the choice of material is affected by the financial side and its operational properties. In the case of a loggia, a sufficiently foil polyethylene, it will reliably protect the thermal insulation layer from the possible penetration of moisture from above.
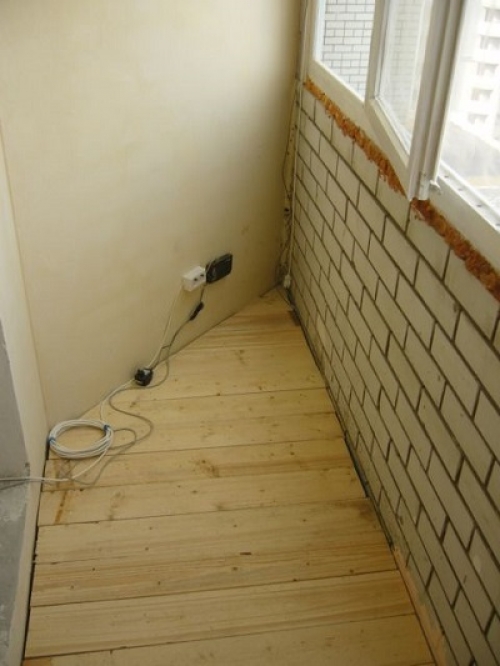
- The finish layer. On the resulting design, you can already lay a coating of boards or plywood. The tree is the best material for the floor of the loggia, since it is warm in itself.
Insulation of the floor of the loggia using expanded clay
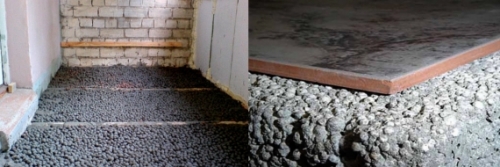
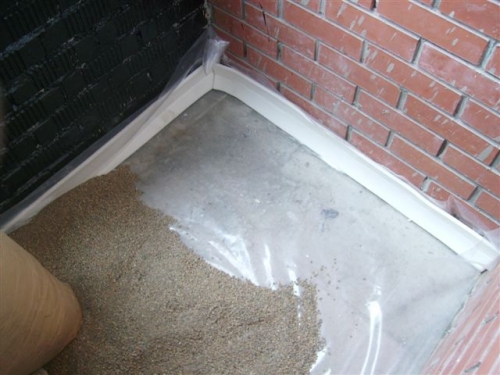
- To start work, it is necessary to spread the substrate around the perimeter of the loggia, be sure to let 10-15 cm on the walls, and fix it with tape. The substrate can be an ordinary film.
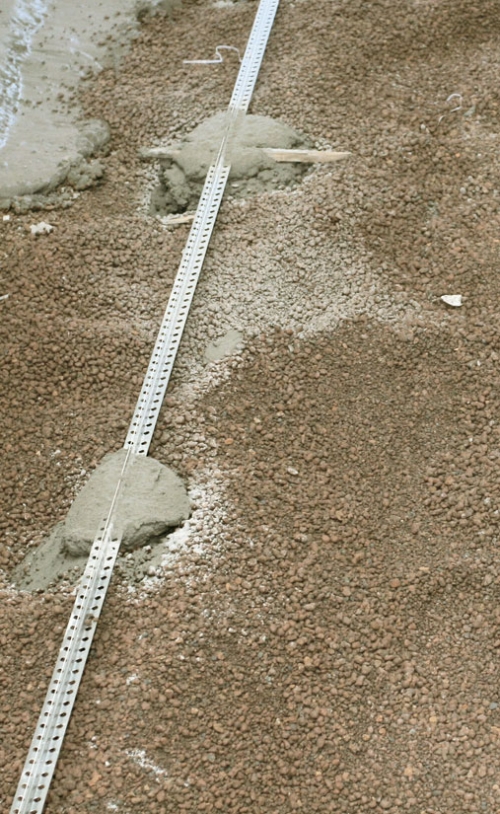
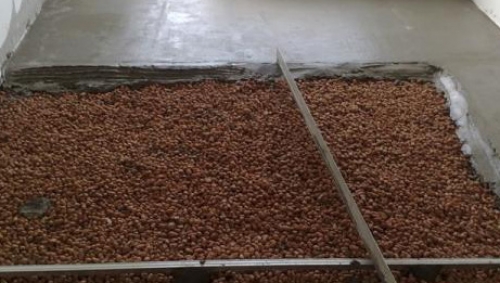
- Exhibitioning beacons. Lighthouses are exhibited strictly horizontally using the building level. They are laid along the floor, to the height of the required layer of backfill of expanded clay, attached to a concrete solution. 2-3 lighthouses are enough for the loggia, since they should be located at a distance of equal width of the rule.
- Filling the material and leveling it with the rule. It is also recommended to compact it so that in the future it does not give a strong shrinkage.
- In order for expanded clay to grasp and does not part at the stage of concrete filling, it is spilled with a very liquid cement mortar.
- Laying a reinforcing grid.
- Fill the finish cement screed. A cement screed with a thickness of at least 3 cm is applied to the reinforcing mesh, leveled by the rule according to the previously made beacons. It will be possible to walk on the resulting coating in a week, the mixture will completely dry out in 1 month.
- Any type of flooring is laid on such a cement screed: boards, chipboard, laminate, ceramic tiles.
- If there is no desire to make a cement screed, you can simply nail the black floor in the form of sheets of plywood or OSP to the lags, and on top of them to lay a floating floor, such as a laminate.
Details about the insulation of the floor of the loggia shown in the video presented below.
Laying an electric warm floor on the loggia
Separately, it is worth opening the topic of creating a warm floor on the loggia using heating elements.
There are two main types and options for installing an electric warm floor:
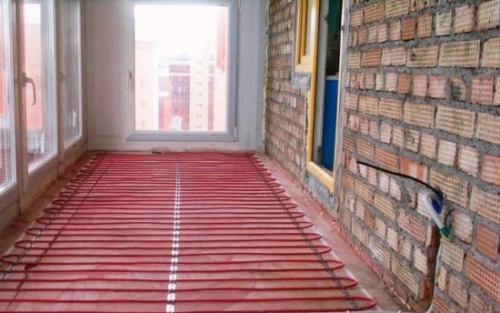
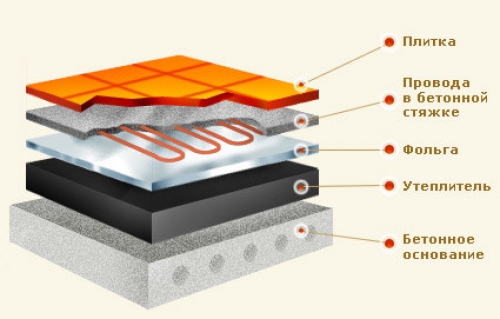
- Cable with a reinforcing net. It is installed in a concrete screed.
- Film (infrared), is installed under the flooring, without a concrete screed, therefore it is not suitable for ceramic tiles.
What is required for installation:
- the warm floor itself;
- wires for connection;
- fasteners;
- temperature regulator;
- RCD.
Before starting direct laying work, it is necessary to make a simple scheme for the location of the future sex on paper. If massive furniture is planned on the loggia, then there should not be heating elements under it, otherwise they will fail.
- At the beginning of the work, a convenient place for a temperature regulator is noted on the wall, a gap is made from it to the floor under the connecting cable. A direct connection of the warm floor to the outlet is prohibited, it will be necessary to install an RCD.
- The warm floor on the loggia is placed on a layer of thermal insulation. Preferred materials are polystyrene foam or stone cotton wool (detailed installation instructions are written above), a reinforced mesh is placed on it and a thin black layer of screed is made, about 1 cm.
- The next layer is reflecting, foil.
- Then the warm floor is directly spread. Before laying the wire, its resistance is checked, it should not exceed 10% of the declared in the passport.
- The connecting clips of the heating element and the nutrition wires are located at a distance of 10-15 cm from the strobe for the thermostat, so that later they are drowned into the screed.
- A corrugated pipe is placed in the stroob, along which a cable is laid to the thermostat, and a thermal attribute is also stacked, the end of which is placed between the two closest heating elements. The sensor should easily get through the pipe so that it can be replaced in case of breakdown.
- After all the elements are placed and connected, the floor is checked, if there are no problems, the next stage begins.
- A screed 2-5 cm high is poured on top, the floor is aligned. After the screed dries, how the warm floor system works, if there are no problems, then the upper coating is laid.
- When working with a film infrared floor, it is enough to put foil reflective material on a layer of insulation. This type of floor is attached either to special ears or tape.
- A layer of vapor barrier is laid on a rolled warm floor, and then the finish coating itself.
To turn your own loggia from a warehouse of useful non -components into a cozy comfortable room for life is quite possible for everyone. The main thing is to choose the most convenient way of insulation and follow the manufacturer’s instructions, as well as general recommendations for working with thermal insulation materials.

