They resort to the installation of a stretch ceiling when you want quickly and without special ...
|
|
In order to make the balcony aesthetically attractive, you need to perform it ... |
Did you know that the wallpaper was invented by the ancient Assyrians. Of course they are very strong ... |
Concrete floor device in the garage
Before all other types of sex in the garage at the concrete surface there are undeniable advantages in the form of practicality and strength. Of course, it will cost much more than a compacted earthen floor, but in terms of reliability and convenience it will give him an impressive head start. The main thing is that with the creation of a concrete foundation in the garage you can handle it on your own, thereby saving well. The article will talk about how to make a concrete floor in a garage with your own hands.
Content:
- The basics of the concrete flooring in the garage
- Whether or not to make an observation pit in the garage
- With your own hands, concrete floor in the garage
The basics of the concrete flooring in the garage
The earthen floor, as a rule, is made as a temporary solution, but before proceeding with the interior decoration of the garage, it is usually changed to a strong concrete base.
The process is not bustling and labor -cost, especially since it will be necessary to build an observation hole. Without this element, the garage will be less functional. With this in mind, the process of installing the concrete floor will be divided into the following stages:
- creation of a pit;
- marking the level of base and preparation of soil;
- laying the pillow of crushed stone and sand;
- waterproofing;
- reinforcement;
- directly filling.
Now you can start phased advancement towards the dream of a solid field in the garage.
Whether or not to make an observation pit in the garage
Of course, the observation pit is needed only by those who like to repair cars on their own and know all the subtleties of the process. On the other hand, there is no guarantee that over time, a motorist from the category of users will not have to retrain into the category of maintenance personnel. Therefore, the stage of creating a pit is better not to miss, if time allows.
First you need to decide on the location of the pit. In small garages, it is digging in the center of the room. The happy owners are more impressive in size to real estate more lucky, they can dig it a little away from the entrance to the garage.
Calculation of parameters
- The length is laid from the calculation of a similar size of the car with an increase in waterproofing and pouring with concrete. It is also necessary to take into account that from under the car driven into the pit, you will have to get both in front and behind. Therefore, when marking to the length of the vehicle, 1.5 m is added.
- The width of 75 or 80 cm is enough. To fill with concrete or create brick walls, you need to add 15 cm on each side.
- The height is calculated based on the growth of the owner of the garage with an increase of 30 cm.
- The walls of the observation pit can be poured with a concrete mixture for this you need to build an internal formwork around the perimeter of the pit and collect a reinforcing mesh. Some masters prefer a brick laying of the walls of the pit.
- According to the marked boundaries, taking into account all the additions, you need to dig a pit. The main thing is to try so that the walls are as smooth as possible, but it is not required to fully compare them in level. When the soil is taken to the desired depth, the bottom should be tamped. To seal the floor, a small layer of clay is poured on it and the base is re -compacted.
- The waterproofing of the floor in the pit can be made from the roofing material on the most budget option or waterproof. The latter belongs to the melted roll materials, has improved characteristics and costs a little more. The edges of the waterproofing layer should overlap on the walls. The next step is poured with a base of concrete mixture to a height of 7 to 10 cm. The flooded base is leveled and left to grasp, it is not required to cover it with a film.
Bill in the observation pit
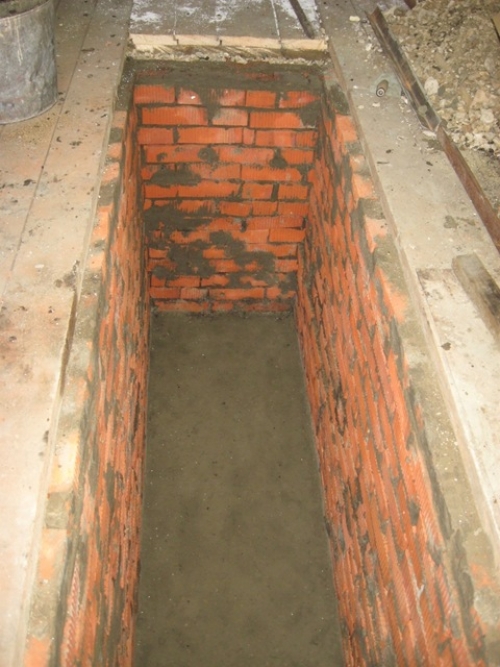
- When the floor hardens, it's time to start laying the walls. As an option, they can be brick. For walls, you should take a burned red brick. If there is a desire, it can be replaced by aerated concrete blocks. The masonry is performed around the perimeter of the entire pit at the same time, be sure to check with the level and retreat from the edge of the pit of about 15 cm. Subsequently, this period will be required to waterproof the masonry, and the excess distance will be covered with soil.
- The excess solution is best removed immediately so as not to knock down the frozen mixture from the bricks. Masonry is carried out by brick on the rib. This allows you to create a fairly strong wall of a small height and significantly save space in the pit. The shift of each subsequent row is standard in shelter.
- Approximately every 2-3 rows, the evenness of the masonry must be checked by the level, the maximum height, increased at a time not more than 6 rows. The same requirement is observed when pouring walls with concrete. You can not fill the voids in three or four approaches.
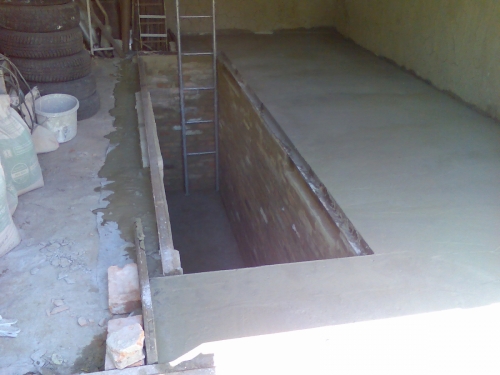
- The last row should be below the threshold level (by 6 or 7 cm), because subsequently the wall around the perimeter will overlap the metal profile. He, in turn, should also not be on a par with a concrete base, because the hole, while it is not needed, is covered with boards. The level of the floor will just coincide with the flooded floor.
Wall waterproofing
- The waterproofing of the walls from the outside begins two to three days after the final row of bricks is laid out.
- Using a dense roller, the entire surface of the masonry should be treated with a primer (primer). In order to act more convenient, the roller needs to be built, attached to a long thin cuttings.
- The bitumen mastic is heated to the desired temperature indicated in the instructions. Also, with the help of a roller, it must be applied with a dense layer over a dried primer.
- After the mastic is solidified, the void between the brick masonry and the earthen walls of the pit can be filled with soil. The procedure cannot be carried out in one call. It is carried out gradually and alternates with a thorough tamping of the newly fried layer.
- If you hurry, then uncleaned soil over time will pass under its own weight, and the concrete base along the perimeter of the pit will crack.
With your own hands, concrete floor in the garage
To mark the level of the future concrete floor, it is more convenient to use the laser level, in this case the task will be completed in a short time in a minute. With a water level, you will have to work a little longer. Some masters first advise making a black marking at a height of a meter from the base, and then evenly lower the line to the desired mark. The marking line can be beaten off with a cord, and we can assume that the zero level is determined.
Preparation of the base
It was time for all masters of the preparatory stage, which precedes the pouring of the concrete floor in the garage.
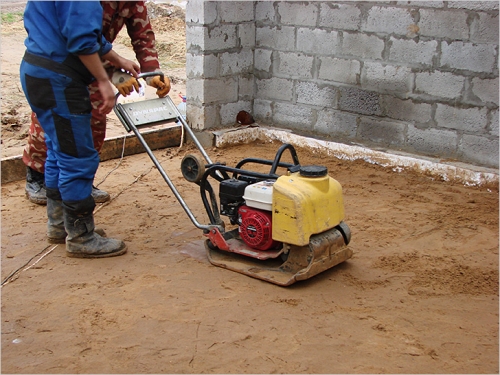
- It is possible that from the moment of arranging the observation pit on the floor there has remained garbage or excess soil. All this needs to be removed and the floor is deepened for another 30 cm. Absolute evenness should not be achieved, but visible irregularities and tubercles should be cheated. Now the soil is compacted with tamping.
- Next, a small layer of clay and sand is poured about 3-5 cm, moisten it abundantly and carefully compact it. At this stage, it is better to linger thoroughly, because high -quality black floor is primarily dense and hard.
- The gravel-sand mixture is poured with an uniform layer of 10 cm. This requirement is difficult to observe if the garage is impressive. In this case, you need to drive pegs into the floor, which would appear at the desired height. Focusing on them, you can create an even pillow even on a very large area. The main thing is that the marks are delivered quite often, and are located evenly over the entire area of \u200b\u200bthe floor.
- After scattering, gravel, it is also tamped, then the pegs are removed, and the same gravel is laid in the resulting voids. In small garages, it is enough to install noticeable beacons in each corner and approximately in the center of all walls.
- Sand can be of any fraction, even an admixture of clay is allowed, only without extraneous interspersed, litter and large comments. It is convenient to pour sand in small heaps on the floor, to level it with a long even rail, moving back. The sandy layer is also moistened with water and tightly tapped. Using a level or the same long river, you need to check the pillow for the lack of irregularities and differences.
- A layer of gravel should not exceed 5 cm in height. It is leveled, compacted and again a little sprinkled with a layer of sand. Then the entire area of \u200b\u200bthe future sex again needs to be passed with the tamping. On top you can lay a reinforcing mesh.
- To crown this layer cake will be a layer of skinny concrete. Its strength abilities are very low, but it will play the role of the leveling layer. For this, you need to shift: the parts of the sand (previously sifted); 1 part of the cement; 6 parts of the gravel of a small fraction.
- All ingredients are mixed dry, and then diluted with water. The resulting mass is poured into the gravel and leveled with a rule or a long rail with even edges. The thickness of a layer of skinny concrete should be about 3 cm. It is left to dry.
Waterproofing of the concrete floor in the garage
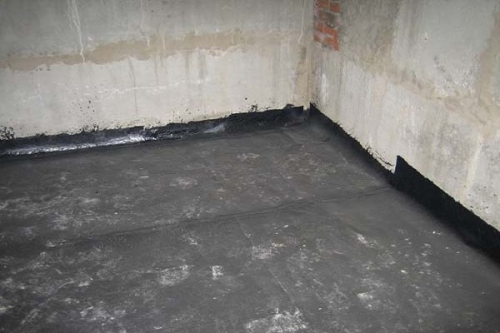
- A layer of frozen skinny concrete must be treated with a primer. When the soil dries, you can do waterproofing. It is allowed to use any floating materials, bitumen mastic, polyethylene film or liquid rubber.
- Any waterproofing, which is created from paintings, should be covered from them over 10 cm. The roofing material is very well adhered with hot mastic, creating a magnificent coating with hydrophobic properties.
How to assemble a concrete floor frame?
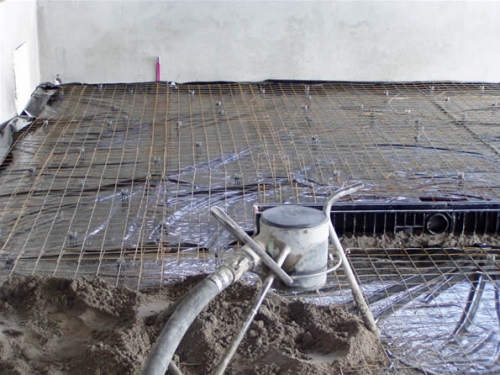
- The reinforcing mesh never fits directly to the surface. It is lifted above the floor by a couple of centimeters. You can use the stands sold in the store, but small cement cakes, the fragments of bricks also cope well with the task.
- The grid with cells of 15 15 or 10 10 can be welded from the reinforcement yourself. The thickness of the rods of 5 mm is enough. But ready -made reinforcing canvases are sold in construction markets, and there are inexpensively good option for those who are in a hurry to finish work and do not know how to work with welding.
- You do not need to press the grid close to the wall. A gap of centimeters 5 should remain along the perimeter between the reinforcing canvas and the walls of the garage. Similarly, laying the floor around the observation pit.
How to install lighthouses for a concrete floor
- The cement screed is always performed according to beacons. They are a guarantee of an even floor. Lighthouses are installed at a distance of 1.2 or 1.5 m to heaps of solution. Metal profile or corners are one of the frequently used materials. If the pipes of a small dimeter (2.5 cm) are selected as guides, then it is recommended to lubricate them with machine oil.
- Lighthouses must be laid on cement heaps built in a row with an interval of 150 mm. Their even position relative to the horizontal is checked in level. If required, the solution is reported or the pipe is pressed into it. After all the longitudinal guides are exhibited, you can control your work: put several horizontal beacons and evaluate them in level.
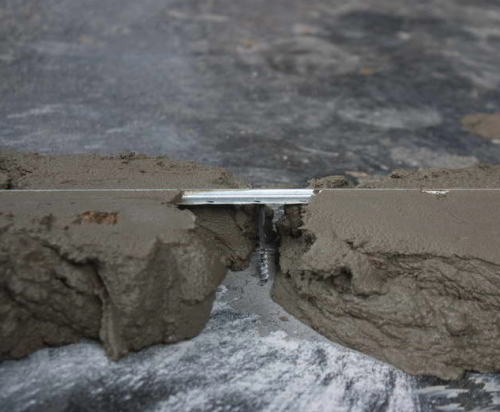
- On the perimeter of the garage, it is necessary to stick a damper tape. It fills the interval of one or a couple of centimeters between the walls and the screed. The purpose of the tape compensate for the pressure of the concrete floor if it plays over time. The cement screed will not suffer and will last a long time.
- At the same stage, a frame of metal corners is cooked on a observation pit. A corner 50 50 is cut into 4 blanks in size and welded to a rectangle. The frame is primed, dried and stained if desired. The finished part is laid on the walls of the pit and just in case, several temporary spacers are installed inside its perimeter.
How to fill a concrete floor in a garage
- It often happens that the solution is not enough, or excess forms in large quantities. To save funds, you can make a preliminary calculation. The volume of the solution is calculated as follows: the estimated thickness of the concrete floor in the garage of 5 cm is multiplied by the required area. If the base is 20 m, then you should count on 2 m solutions.
- It is better not to save on the strength of the floor, so the cement should be bought by brands M 500 or m 400, and the ratio of sand is made 1 to 3. That is, for three parts of the sifted sand or wems, you need to take 1 measure of cement.
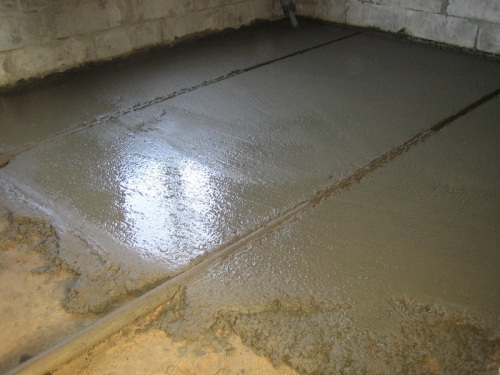
- Density and homogeneity The main indicators of the mixture. It is poured into the intervals between the beacons and leveled with the help of the rule. The mixture should hide the guides, but do not lie on top of them with a thick layer. Driving along the lighthouses, the excess solution should be driven further. During such an operation, the main thing is evenly pressing the rules evenly on both ends and at the same time move it towards yourself. This not only lends the screed, but also compacts it.
Final work
- After a couple of days, the guides must be removed, gently pulling the ends. It is for this that the pipes were abundantly lubricated with oil. The furrows from the lighthouses are sealed with a cement mixture composed in the same proportions. While the screed will dry, it must be moistened so that it is dry evenly and does not crack.
- Some masters pour a layer of sawdust and spray water on them. After two weeks, the floor is released and left to dry without additional manipulations. Full hardening time is about a month.
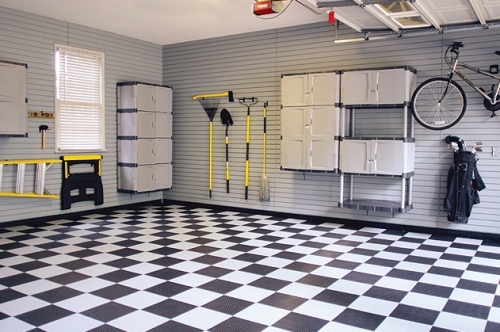
- A ceramic tile or rubber panels can act as a concrete flooring in the garage. But even without additional decoration, the concrete floor in the garage will perform all the functions: it will be a strong and durable base, which is not afraid of the fall of tools and stains from technical fluids.
Thus, if you make a concrete floor in the garage with your own hands, its price will be exactly half as much as if it were ordered in a construction organization.

