A wide variety of putty mixtures for repair work is presented on sale ....
|
|
The owners often face the problem of uneven sexes not only in the buildings of the old ... |
Fiberglass wallpaper differ in many advantages, among which, first of all ... |
With your own hands
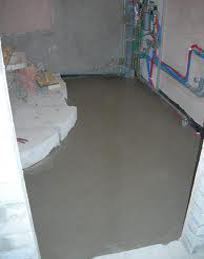
Repair in the bathroom without exaggeration can be attributed to the most difficult procedures from all the repair work carried out in the house. And not every owner dares to repair this room on his own. But if you well understand all the subtleties and nuances, it turns out that there is nothing complicated here. The article will talk about how to make a floor screed in the bathroom with your own hands.
Content:
- Floor screed in the bathroom
- Varieties of screeds for the floor in the bathroom
- Floor screed in the bathroom
Floor screed in the bathroom
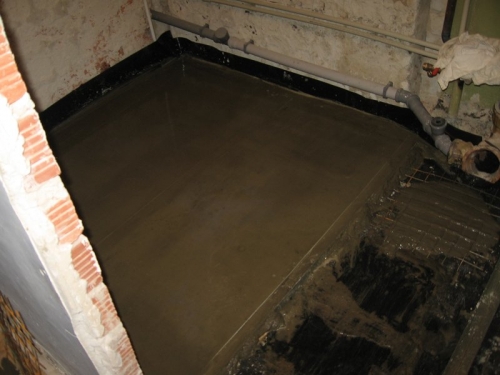
The largest and most important part of the work is the performance of the floor screed in the bathroom. After all, it should be taken into account the fact that the bathroom is a room with high humidity. And we are talking not only about the possibility of water entering the floor, but also about high humidity, as well as the accumulation of hot water vapor. In addition, a number of communication pipes are also held on the floor in the bathroom, which need to be hidden from the external gaze and at the same time do not finalize completely, leaving an easy access to them. All these points should be taken into account, preparing for the upcoming repair and choosing materials.
- The screeds are necessary in order to give the surface the proper strength and the required rigidity, as well as to level the plane of the floor or increase the noise -absorbing and heat -insulating properties. They can act as a finish coating or serve as the basis for its flooring.
Floor screed in the bathroom photo
- The main design of the bathroom floor is practically no different from gender in other rooms. The main difference will be in the finish coating and in the addition of waterproofing materials.
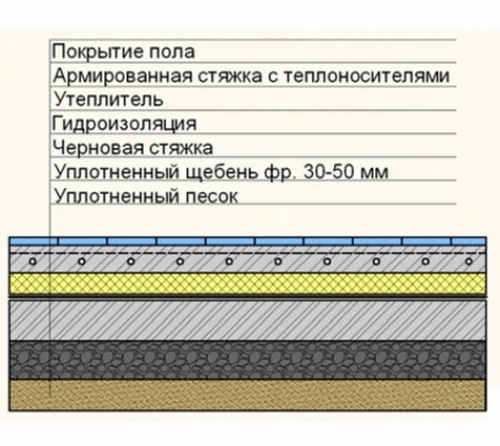
Paul devices are the creation of a multilayer coating, which may look as follows:
- reinforced concrete floor slab;
- waterproofing layer (using roller materials or bitumen mastics);
- gross screed (dry, wet or half -dry, continuous or team);
- the second layer of waterproofing (painting or coating);
- leveling screed (from special mixture mixtures or self-leveling solutions);
- the finish flooring (ceramic tiles, linoleum, bulk floor and everything that relates to moisture -resistant materials for the floor).
If necessary, a warm floor system may be equipped before the cover of the last layer. It is necessary to plan its presence in advance, since the installation requires special preparation.
Tip: When performing repairs yourself, you should not rush, because in this case it is unlikely that you can get a quality and durable floor, which means that in a couple of years you will have to redo everything again. Given that most of the work will be carried out with wet materials, it is necessary to take care of the allocation of time for their natural set of strength. This mainly applies to cement and concrete solutions. Therefore, when planning the time allotted for repairing work, this fact should be taken into account in the first place.
Before proceeding with the direct performance of the screed, you should remove the entire old coating (if any) and carefully clean the reinforced concrete base from dust and dirt. But first you need to decide on the type of future screed.
Varieties of screeds for the floor in the bathroom
Experts distinguish three main types of screeds on the state of the material:
- dry;
- half -dry;
- wet.
Wet screed
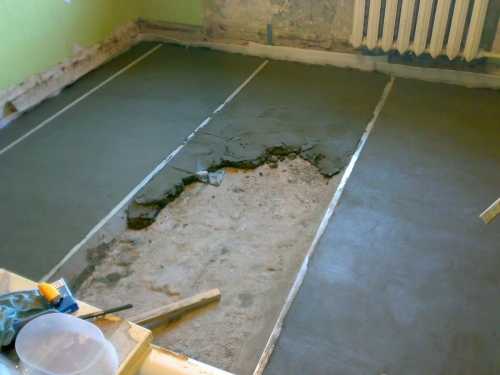
The simplest species is a wet screed, which is performed by a liquid solution, where sand and cement are the main components. The prepared mixture is poured directly on the base and leveled. The disadvantages include a long process of drying the solution.
There are several of its varieties:
- knitted is performed directly on the floor slab and is suitable, as a rule, for dry rooms (bedroom, living room, children's);
- on the waterproofing layer, ideal for bathrooms, kitchens and corridors, the solution in this version is poured on top of the material for waterproofing;
- on the heat -insulating layer it is formed on top of an additional layer, most often used for rooms located on the first floors (fenced off from unheated basements);
- with an additional leveling layer, a laminate board or linoleum is used as a finish coating, since these materials are extremely sensitive to any irregularities.
Half -smoked screed
- It can be performed using a cement-sand mixture or concrete. The main feature of the cement -sand mortar is the presence of various plasticizers in the composition of various plasticizers, which significantly reduces the time of set of strength. The advantage of such a variety is that a smaller amount of water is required to clip the mixture, which means that the flooring will be easier and at the same time quite durable.
- Concrete semi -dry screeds differ from cement in that in addition to sand and cement, they contain light aggregates (expanded clay, vermiculite, and so on). Due to this, such solutions are used for flooring, requiring a large thickness to compensate for irregularities or slopes.
Dry floor screed in the bathroom
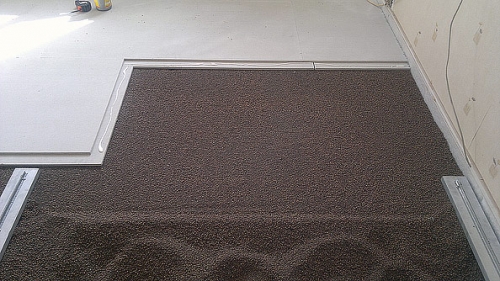
- It belongs to the team of multi -layer structure. The lower layer can be expanded clay or crushed stone, and it is covered with gypsum fiber sheets (material based on gypsum and cellulose fibers, for wet rooms it is best to use moisture -resistant options for the product). The advantage of such a variety is that it does not require large labor and there is practically no dirt during execution, but its main disadvantage can be called inability to retain heavy loads.
- If it is planned to put tiles as a finish coating, it is recommended to perform a semi -dry screed, only it should be borne in mind that the manufacturing process is the most time -consuming.
The screeds also differ by design.
Solid screed
The design of a continuous screed can consist of one layer (laid simultaneously on the entire surface required by thickness), and maybe from several (sequential filling of the solution, with a gradual increase in thickness).
When choosing material for multi -layer floor filling, you should pay attention to the components that are part of the mixtures. So, there are several main types of astringent:
- cement;
- gypsum;
- cement-polymer;
- gypsum-polymer.
Important! If it is decided to fill the layers from the mixtures of various composition, then you must adhere to a number of recommendations:
making the first layer of cement mixture, and the next of the gypsum, you should perform priming between them, since otherwise the gypsum will occur;
it is not allowed to perform the first layer of gypsum mortar, but the following from the cement, since the water included in the composition will soak the gypsum mixture;
it is best to make a screed of homogeneous materials, since, among other things, the use of the primer leads to additional costs of funds.
Cement solutions during drying are subject to the shrinkage process and cracks may appear with too intense drying. To give a mixture of flexibility, it is advisable to add plasticizers and polymer fillers to the composition.
- Now builders are increasingly refusing to perform the screed by a simple cement-sand mixture. Since, among other shortcomings, such a solution also has a tendency to long drying, that is, in order to lay parquet on this surface, you will have to wait from 28 to 60 days. With the advent of modern building mixtures, which includes polymer additives, plasticizers and various fibers, the problem of a long set of strength fades into the background, since a flooded solution freezes in just a couple of days.
- Gypsum mixtures belong to more environmentally friendly and plastic materials, that is, they are cross -resistant products, in addition, they differ in good vapor permeability, wooden floors are very good on this basis, but they are absolutely not suitable for bathrooms or other wet rooms, even if in The composition has all kinds of polymers.
Prefabricated screeds
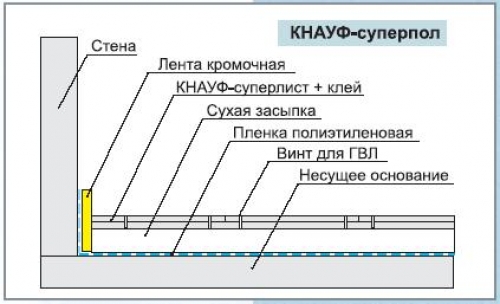
They are a set of various elements of already ready for use. The most popular are the designs consisting of:
- waterproofing (polyethylene film);
- dry backfill;
- substrates (polystyrene foam, mineral wool and so on);
- gypsum-fiber sheets (or from plywood, wood-fibrous or woody boards);
- charging tape.
The most popular company producing prefabricated dry screed is KNAUF.
In addition, there is a classification by the method of adhesion of the solution with the base:
- screed directly on the basis (related);
- on the separation layer;
- on the insulating layer (floating).
When the solution is poured directly on the base (reinforced concrete floor slab), then we can say that a bound type of screed. Such designs can withstand heavy loads, but often suffer from uneven shrinkage (cracks appear on the surface).
In the case when additional waterproofing is required, a special coating on a paper basis (roofing material, peramy and other oiled or bituminous materials) or polyethylene film is located between the solution and the base, that is, it is performed separation screed. The thickness of this design is usually not less than 3 cm.
Floating screeds
- They are made on an insulating layer in the form of a separate design not related to the base. The substrate is the heat -insulating and noise -absorbing materials, for example, mineral wool, cork or wood -fiber slabs, foamed polystyrene and others.
- The thickness of this design should be at least 5 cm, which is a significant drawback of this type of screed, in addition, a low compression strength is noted. Sometimes, for such a constructive circuit, it is necessary to install an additional reinforcing upper layer.
Having dealt with the main varieties and classifications of the floor screed, you can move directly to the stages of its implementation.
Floor screed in the bathroom
Let us consider in detail the process of performing the most popular and reliable screed from the cement-sand mixture, flooded on the established beacons.
The choice of a certain set of tools and materials can differ in each specific cases.
Necessary tools and materials:
- mixture for the selected type of screed;
- primer;
- heat, sound and waterproofing materials (if necessary);
- rule, trowel, spatula, roller;
- guides for lighthouses (wooden or aluminum);
- building level or laser level;
- ruler, pencil;
- perforator, drill.
Pre -preparation of the surface
- The basis for applying the solution should be especially carefully prepared. Since the presence of dust, dirt, oil or bitumen spots will significantly reduce adhesive properties, which means that during operation the completed screed may begin to decay. If the repair is not carried out in a new building, then all available materials should be dismantled to a concrete base. Then close all the cracks, chips with a thick cement mortar or tile glue.
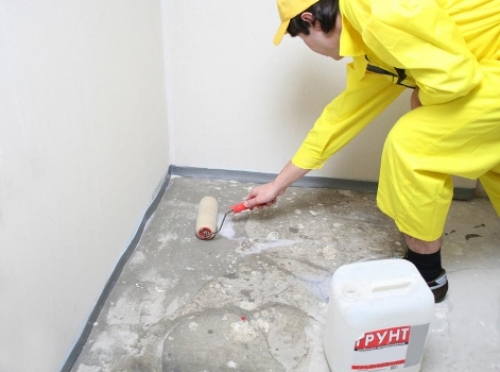
- After that, a primer is spilled onto the prepared surface and leveled with a roller. The primer can be applied in two layers. It is worth waiting for the complete drying of the solution (the exact time should be indicated on the packaging or in the instructions for the product).
- If it is necessary to pour very large irregularities, experts advise to make preliminary backfill on the floor in the bathroom of expanded clay or sand, a layer of at least 10 cm and carefully compact it. Such a measure will help reduce the weight of the subsequent screed and reduce the pressure on the floor slab.
- Next, the installation of all necessary communications (sewer and water pipes) should be completed. It is worthwhile to be very attentive to wiring the pipes, since in the future, in order to make changes, you will have to break the screed.
Installation of heat and moisture insulation
- Thermal insulation of the floor is necessary only in cases of a cold base. If the repair room is located on the last floors, then this stage can be skipped. The installation of heat -insulating materials can also be missed in cases if it is planned to arrange a warm floor system, which is placed on top of the screed. As a heater, there is a layer of expanded clay, polystyrene stoves and other hard materials.
- The most important is the installation of waterproofing, since the bathroom is a room with high humidity, then the execution of such a layer is a mandatory procedure. As moisture -proof materials, a dense film is used (thickness from 200 microns), roller materials, mastic, special paints, varnishes, etc.
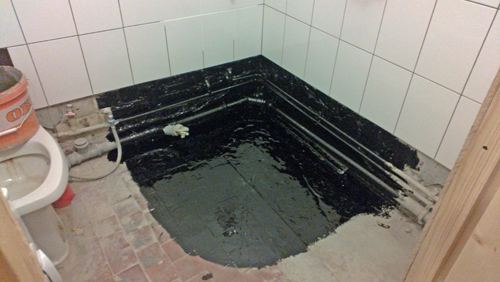
- The most reliable protection includes isolation with the help of melted materials. Such products have increased strength, are not subject to decay, have maximum water -repellent properties and are endowed with a long service life. They are made on the basis of fiberglass, polyester or fiberglass. The following products have gained the most popular:
- aquaizole;
- bicroplast;
- isoplast;
- isoelast;
- crembit;
- mostoplast;
- spoliasol;
- father -in -law;
- technoelast;
- helastopley;
- ecoflex.
- Waterproofing sheets are overlapping at least 15 cm on each other, as well as with a drop on a wall of 10-25 cm. Pipes and thermal insulation are coated with mastic or sealant.
- Rolled insulating materials can be used when installing a shower cabin in the bathroom. In this case, the protective layer should be laid in the places where the structure adjacent to the wall should be laid. It is also recommended to secure the walls and lay the material in the bathing places of the bath.
- Experts do not recommend applying the paint method on a concrete base, since its service life does not exceed 3-6 years. It is better to use coating waterproofing on top of the screed in the bathroom, the most famous manufacturers: unis, knauf, ceresitis, Ivil, Perfect, Glims and others. For preparation, it is necessary to dilute a dry mixture with water according to the instructions, stir and apply to the floor with a roller or brush.
- After all the necessary materials were laid, and the protective funds are applied, you need to wait 24-48 hours until the layers are completely dry.
The device of the screed
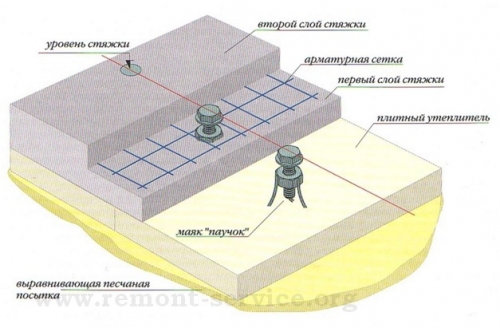
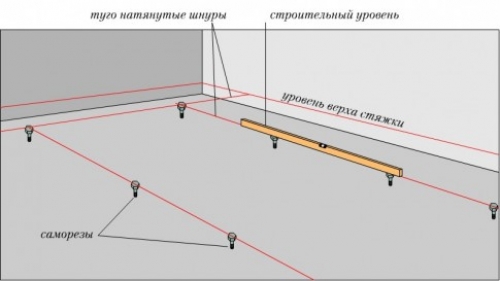
- Before filling the solution, you should determine the maximum height of the screed. Having outlined the highest point, you can put markings on the wall. This is done using a laser level that marks a certain line (for example, at an altitude of 55 cm). From this line in several places, points are noted by half a meter (to the height corresponding to the calculations made) and a flat strip is drawn along them. This will be a mark of the future screed. At the same level, lighthouses are laid with it and are aligned in a single plane.
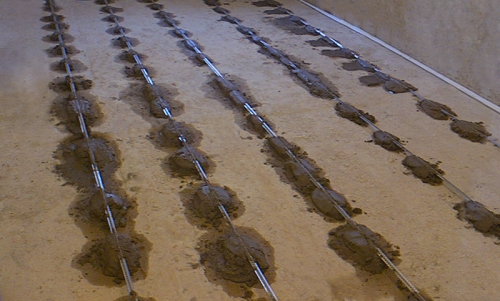
- The lighthouse is an aluminum T-shaped profile or wooden block along which the screed will be leveled. If it is planned that the lighthouse is left in the solution, then the guides are processed in a special way: metal products are coated with anti -corrosion compounds, and wooden bars are impregnated with water -repellent agents.
- You can install a profile on a solution, which is applied in several places along the length of the lighthouse with petals (tubercles). The first guide is installed at a distance of 20-25 cm from the wall, subsequent with a step of 30-40 cm, which, as a rule, corresponds to the length of the rule. While the cement mixture, holding the beacons, has not grabbed completely, their plane is easy to correct.
- After the solution holding the beach system is finally hardened, proceed to the screed. The dry mixture is diluted according to the instructions (the powder is poured into the water at room temperature and is thoroughly stirred with a construction mixer or drill with a special nozzle). After the first stirring, the solution should be left for 5-10 minutes and mixed again, and then, move directly to the pouring.
- Recently, ready -made mixtures for gross equalization, such manufacturers as the Volma, Hercules, Mask and a number of others, as well as products for the device for the device from KNAUF or Osmovit, have been increasingly used to perform screeds. These are ready -made dry powders that are simply diluted with water in the necessary proportion.

- If there are desires to use a solution prepared independently from cement and sand, then the proportions of 1 part of the binder and 3 parts of the aggregate should be withstanded, while a better solution will turn out when added to plasticizers or tile glue.
- The cement-sand mixture is poured in the lanes, that is, between the established lighthouses. If it is planned to remove the guides, then the fill is carried out through one site, and after they dry out, the beacons are removed and the space between them is removed. The first is filled in the area in the far corner from the door.
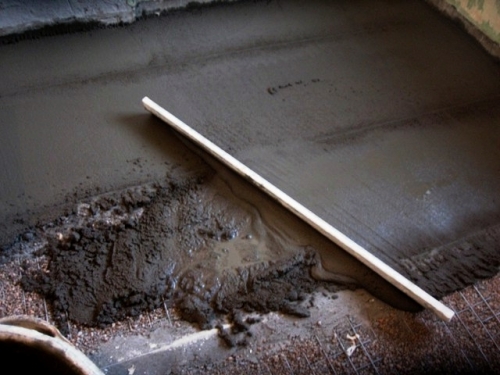
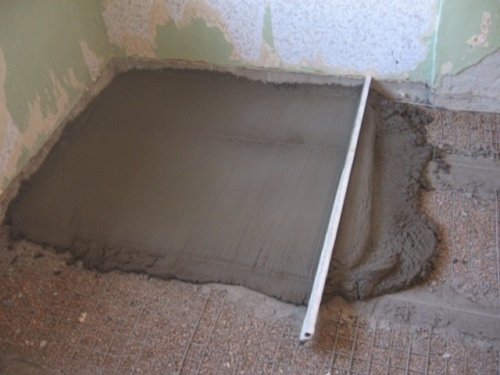
- The solution must be poured above the light level by 0.5-1 cm, and then using the rule to be smoothed to one level with the guides, collecting an extra mixture. The rule should rest the edges on the guide and, moving the instrument on itself along the lighthouse, with a slight fluctuation of the right and left, the layer under it is leveled. If the mixture is not enough and the failures remain, then the solution is poured and smoothed again. When one span is poured, its edge is slightly moistened (for better adhesion) and the second section is poured and so on, until the entire space is filled. In several places, it is advisable to pierce the screed with wire to release excess air, which in the future can ruin all the work done.
- The whole process of filling must be performed at a time, that is, it is borne in mind that products on a cement basis have a life time of not more than 30-60 minutes (when polymer substances are added to 3 hours). After the mixture has grasped or slightly hardened, it can no longer be diluted with water and it will not be possible to smooth out qualitatively.
- You can step on a flooded solution only after 7-14 hours, and in cases where a cement-sand product was used without additional components in the composition, you should wait at least a day. When the screed dries, it is important to maintain a certain temperature regime, which is indicated in the instructions for the mixture used. Usually it is a temperature within 20-25 degrees and air humidity is 70-80 %, as well as the absence of drafts and heating devices.
- The flooded floor is maintained for 28-30 days, you can further moisturize the surface several times during this time so that the drying process passes more evenly. The protruding parts of waterproofing or insulation are cut off at the screed level.
Floor screed in the bathroom video
Final work
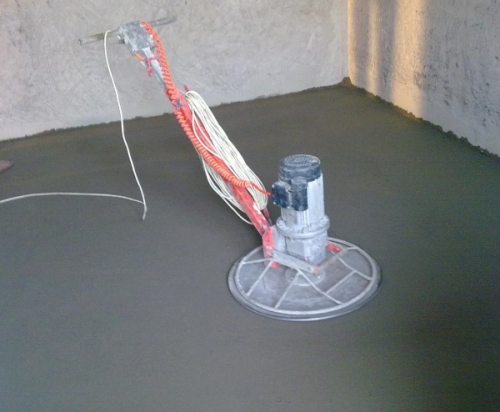
- When the flooded floor is completely dry, it is grinded. Such a procedure will help level the surface and prepare it for subsequent work (flooring flooring).
- You should not persist in grinding, it is enough to equalize only in places with noticeable defects. If it is assumed that linoleum will flow over the screed, then it is advisable to grind through the entire surface.
After all the work carried out, you can think about the flooring of the finish flooring. Which most often act:
- self -leveling mixture (bulk floor);
- moisture -resistant linoleum or laminate;
- cork coating;
- wooden boards;
- ceramic tile.
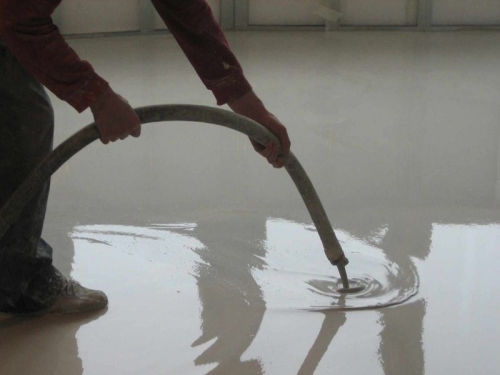
For a bulk floor, a liquid cement-sand mortar is prepared, or ready-made mixtures for a bulk floor or a surface with a 3D effect are purchased, which are on sale a lot and they differ among themselves mainly the company's company. In addition, the bulk floor can be an excellent basis for the flooring of linoleum or laminate.
- An alternative option is considered a cork flooring, which is characterized by high environmental friendliness, excellent hypoallergenicity and increased aesthetic qualities. This coating is not subject to decay and reproduction of bacteria and fungi in it, it is pleasant to the touch and is ideal for the bath, since it is impossible to slip on it, even with its abundant wetting. True, only an array of corks can be used in wet rooms, because a thin coating or made of processed material absorbs water very strongly, which makes it quickly.
- The owners of the wooden floor may also face the same problems if the wood is not pre -treated with special moisture repellents and antiseptics, it will not last long.
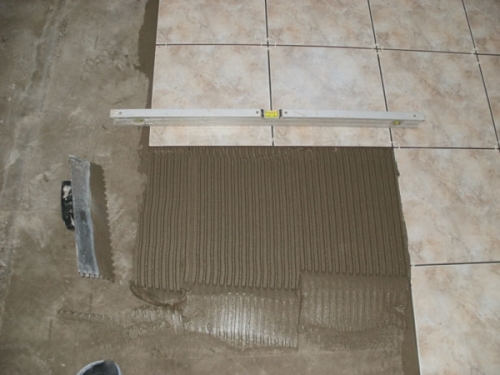
- Still unchanged flooring for the bath remains ceramic tiles. It has a lot of advantages, including increased strength, and a huge selection of color and design solutions. The disadvantages include the complexity of its installation.
In general, there are a great many floor coverings for the bathroom and, if you correctly carry out all the work on the device of the screed, then the floor in the bathroom will last for many years and will not lose its presentable look, strength and reliability during operation.

