External slopes are an important detail of the window structure. They are mounted not only ...
|
|
After the decision has been made on the choice of finishing materials for painting, it remains ... |
The wealth of the imagination of developers does not know the barriers. Soiling and architectural ... |
External slopes on the windows with your own hands: features and rules of manufacture. Stages of conducting work on the manufacture of external slopes on the windows with your own hands. Necessary tools for making external slopes on the windows with your own hands
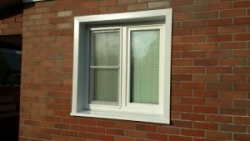
External slopes are an important detail of the window structure. They are mounted not only when installing new windows, but also when replacing the old ones. Often in city houses you can see a new plastic window framed by mounting foam. This common mistake based on the desire to save, leads to the fact that after one season, foam is destroyed under the influence of the sun. In the article, we consider several technologies for installing external slopes with your own hands.
Content:
- The appointment of external slopes on the windows
- Varieties of materials for slopes on the windows
- Metal external slopes on the windows with your own hands
- External slopes on the windows of plastic with your own hands
- Features of plastering slopes on the windows with your own hands
The appointment of external slopes on the windows
There are several main reasons:
- protection of the edges of the window frame and mounting foam, which fills all the free space between the frame and glass. This guarantees a long operational period.
- protection against drafts. A properly installed slope will prevent blowing and moisture from getting inward. High-quality hydraulic and thermal insulation will provide equally well plastic, metal or stone slopes, most importantly. Observe the technological process;
- decorative. No matter how beautiful the profile in the double -glazed window was, without slopes, the window will look unfinished. Therefore, external framing is no less important than internal.
Varieties of materials for slopes on the windows
- Plastic slopes. This is one of the most popular materials. It is very practical, as it is easily washed. In addition, it looks beautiful, as it is made of one material, which is the window. If desired, any lamination is applied to it. Technical characteristics are also excellent, at a low price, it is completely moisture -resistant, and is not much susceptible to environmental influences. And the light weight and ease of work made it the most popular among non -professionals who prefer to do housework on their own.
- Metal slopes. This is a very durable and durable material, but in order to correctly install them, you will need to additionally resort to sound and thermal insulation materials. For work, you need scissors for metal and special bolts.
- Usage natural stone For the manufacture of slopes with your own hands. Owners of cottages trimmed with natural stone prefer to finish slopes in the same style. This is durable, moisture -resistant material. But working with him, it is worth considering his wrong forms and a different thickness. True, there are already polished stones on sale, but their price is much higher.
- Plaster. This is a wonderful noise insulation material that is beautifully aligned with a window slope from any material. But it is not as durable as the above materials will require restoration work once every few years. But if you use a reinforcing mesh and high -quality materials, as well as observe all stages of application and drying, then it lasts more than one decade.
Metal external slopes on the windows with your own hands
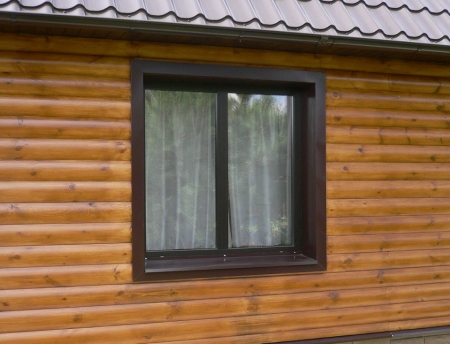
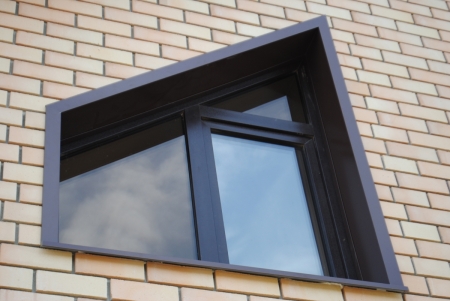
Due to the high strength of metal slopes, they are selected for decoration of window openings in multi -storey city houses and in private low -rise construction. It guarantees reliable window protection due to high resistance to mechanical damage. In addition, he does not change his characteristics, both at high and at very low temperature.
Here is a list of necessary tools and materials, for the manufacture of external slopes with your own hands:
- roulette is needed for measuring work;
- self -tapping screws for metal. They are fastened with slopes, so the color of their hats must be selected according to the color of the material;
- screwdriver for fixing fasteners;
- a long bat for a screwdriver. It is useful for twisting screws in hard -to -reach places;
- scissors for metal. We need to fit the material in size:
- sealant and mounting foam with pistols for filling seams and joints;
- construction knife, pencil and angle for measurements and marks.
Important! It is more convenient to work on an even table, so you should take care of the working surface in advance. If the windows are located quite high from the ground, then you will need a staircase or construction forests.
Stages of work on the installation of metal slopes
- First, the protective film is removed from the slopes and convinced of the lack of marriage. As a rule, they are sold standard size and in configuration they have not only the upper and side strips, but the lower tint. For the connection, special profiles are used.
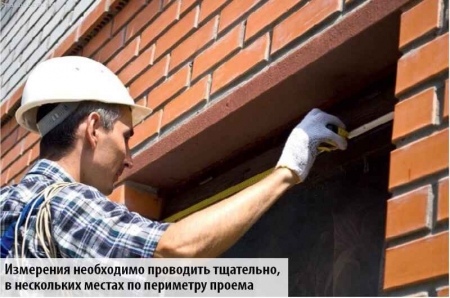
- Now once again measure the window opening. If work is carried out in an old house, then often the window is installed with a slight curvature. All this will have to be considered when fitting. To avoid errors, all slopes and tide can be first just attached to the opening, so. Having made a preliminary fit.
- The lower part on which the drain cornice is placed, as a rule, a little wider. Therefore, work begins with him. Putting it on the table, with the help of a roulette measure the length and cut off the excess. If the width is slightly larger, then in the future the so -called ears are cut at the edges.
- Cutting off the excess from the tide, they leave a supply of 5-10 cm on the sides. In the future, it is bent up. Having put the tide to the window opening, they check again, whether everything is suitable, and after that they attach it to self -tapping screws. If free space forms between the opening and the tide, it is filled with mounting foam.
- The upper and side slopes are attached using a starting bar. First, try on and check the length of the upper horizontal bar. If everything is suitable, it is attached close to the window profile. Not forgetting to leave small overflows, which bend down. Next, take the slope and tightly insert it into the profile along the entire length. Fixation is performed using self -tapping screws with hats of the desired color.
Tip: each element of the slope is always packed in a protective film. But you should not shoot it at once from the entire product, since during installation you can accidentally damage it. And any scratch will further lead to metal corrosion. Therefore, the film is removed only from the places where fixation will be carried out.
- Then the starting profile for the left and right slopes is attached, attaching them to the ears from the ebb and upper slope. Lateous tints are attached to them with the help of a spike-paz castle.
- Even with thorough fitting, the cracks between the elements will remain, they are filled with sealant.
External slopes on the windows of plastic with your own hands
Manufacturers offer different models and types of plastic slopes. They are chosen depending on what material the length of the house is used. For example, if it is siding, then the side and upper horizontal strips have special grooves into which the edge of the siding is inserted, instead of the finish profile and thereby, it fixes the tide. For brick houses, whole models are selected.
Consider the features of the use of plastic on the windows of the house without a ventilation facade with your own hands.
The following tools will be required to work:
- roulette;
- pencil;
- bulgarian;
- screwdriver;
- self -tapping screws;
- level.
Stages of work on the manufacture of plastic external slopes
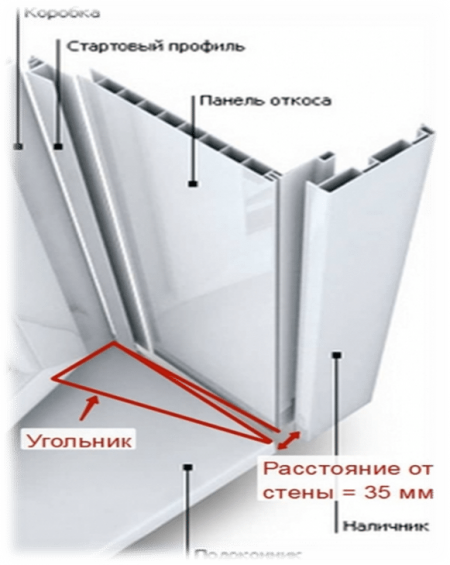
- As in the case of metal slopes, the tint is primarily mounted. Not forgetting to leave the ears bent to the top on the sides. It is important to correctly calculate its size. Despite the fact that the slopes themselves will be plastic, the tolls are made of metal.
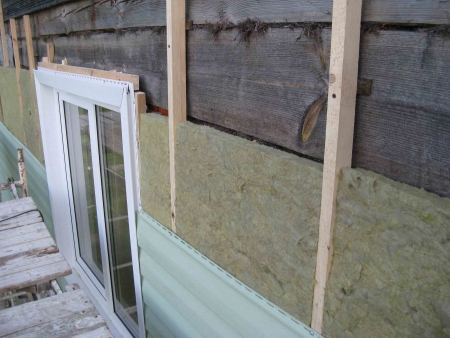
- Further along the perimeter of the window, starting strips are mounted close to the window profile. If the house is wooden, then with the help of self-tapping screws, if brick or from foam block, then on a dowel-gvo. Each bar is measured in level.
- Then, planks are inserted into the start profile, which have bends on the front side. With their help, the slopes are attached to the wall with a step of 15-20 cm. First, the upper horizontal bar is fixed, and then the side.
- As a finish step to the slopes, using a spike-paz system, plastic platbands are attached.
- All joints are qualitatively covered with a transparent sealant.
Tip: If the windows in the house with siding are framed with plastic slopes, then whole slopes from the Mr.-shaped form are selected. Where the angle will serve as a slope and platbands (in the groove of which the edge of the siding will be started), and the straight side is recessed into the mounting foam close to the window profile.
Features of plastering slopes on the windows with your own hands
The plaster of external slopes is the most time -consuming and prolonged process. In addition, it is possible only on windows, which have free access from the outside (first floor, balcony window, etc.). But the result is a beautiful option for finishing, which will be completely in harmony with the appearance of the facade. This method guarantees high-quality moisture and wind protection, since it has no joints. And serves as additional thermal insulation.
For work, you will need:
- putty knife;
- master OK;
- rule;
- external angles with a painting grid;
- reinforcing mesh;
- primer;
- grater and interchangeable skins for aligning the surface;
- plaster composition designed for external work;
- decorative plaster or paint.
The stages of work on plastering external window openings
- The technology of work on the manufacture of external slopes on the windows with your own hands involves the original surface preparation. It can have irregularities, but it is important to remove all the dirt or the remnants of old compositions. At the end of the work, the surface is exhausted, treated with a primer to improve adhesion and left until completely dry.
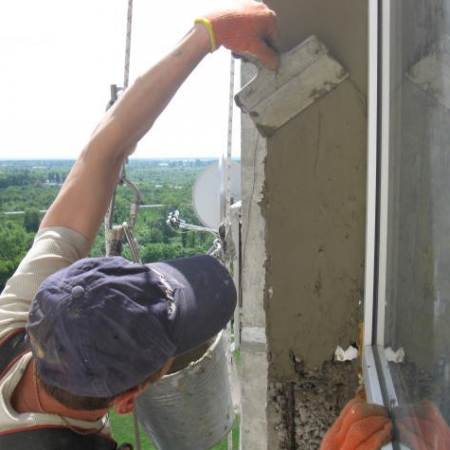
- The mixture is prepared in small portions, but so that it is enough for one window. It is sold in dry form in bags and knead before use on its own. For this, cold water is poured into the bucket and, adding the composition without ceasing, stir with a construction mixer. It is not always possible to measure the necessary proportions, so when preparing the solution, you need to achieve a sufficiently thick consistency so that when turning the trowel down, the plaster does not fall from it.
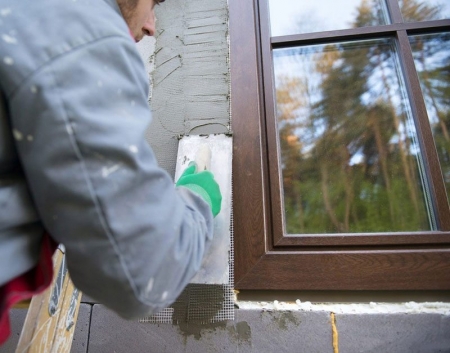
- At first, corners from the profile with a painting grid are attached to the composition, this will align the angles more simple. To the upper horizontal side, the reinforcing mesh is also fixed on the composition and the putty layer begins to apply. It is convenient to align it with a wide spatula.
- Side slopes are also putty in the same way. After 12-24 hours, the composition will grab. He will be skinned, removing all the irregularities and primed.
- The result is a flat coating, but porous and hygroscopic. A thin layer of finish putty is applied to it, literally 1-2 mm, only to close the pores and mask the gray color of the cement mortar.
- Before applying the finish, slopes are recommended to be treated with any antiseptic fluid that prevents mold.
External metal slopes with your own hands video



Production and installation
Production and installation of window grilles in Sergiev Posad 8 (903) 715-91-15.
Sergiev Posad lattices on windows, balconies, loggias.
http://www.posadstal.tt34.ru Metal grilles in Sergiev Posad 8 (903) 715-91-15 Sergiev Posad are window grilles.
LLC STALMaster - making grilles in Sergiev Posad.
Lattice doors to Sergiev Posad.
Installation of the lattice doors in Sergiev Posad 8 (903) 715-91-15.
Sergiev Posad doors lattice with the castles "Gardian" http://www.posadstal.tt34.ru window grilles in Sergiev Posad.